Head Attached 3D Objects
- Available on all platforms
You can attach 3D Objects to your head so that they track to a point on your head. This is great for adding accessories such as glasses, headwear and other 3D models.
Import your 3D Object
You can import your 3D object by dragging your file into the Scene Hierarchy panel. Lens Studio shows the importer settings for the file, then adds the object to your scene.
Create the Head Binding
A 3D object is attached to the face using a Head Binding object. To create a Head Binding, in the Scene Hierarchy panel select + > Face > Head Binding.
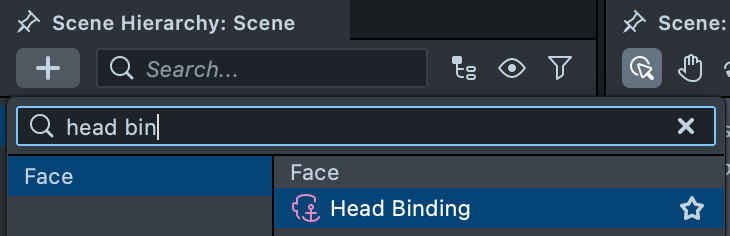
Then drag your 3D objects onto the new Head Binding object to attach them to the user's face.
Modifying the Head Binding
In the Inspector panel of the Head Binding object, you can set which Face Index to attach the object to. The Face Index field starts with 0 for the first face the Lens sees, 1 for the second face and so forth.
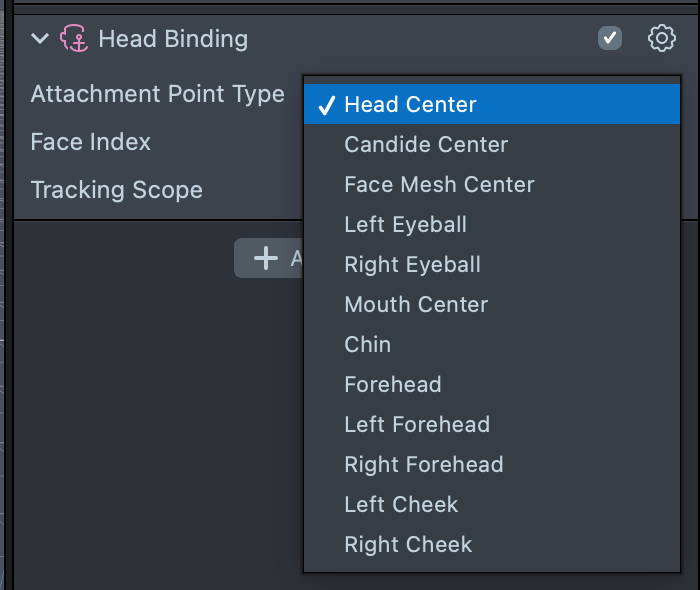
You can change which part of the face the Head Binding is attached to with Attachment Point Type. See Head Binding Settings below for more information.
The options in 5.25:
Positioning your 3D Objects
You can position your 3D objects around your head as you would with other 3D objects.
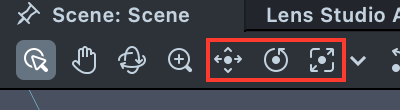
Use the Move, Rotate and Scale tools at the top of the Scene panel to change the transform of your 3D objects relative to the Head Binding.
Face Occluder
The Head Binding object comes with a Face Occluder as a child. This Face Occluder object contains a 3D model of a face that is used to hide parts of your 3D model as your head turns. In other words, it represents your user’s head in the scene.
For example, if you add a 3D model of sunglasses, part of the glasses' arms is hidden behind your head when you turn it.
In most cases, you don't need to change the default Face Occluder. You can create your own by adding a custom mesh and assigning it a new Occluder material.
Head Binding Settings
With the Head Binding object selected, you'll see the following settings in the Inspector panel:
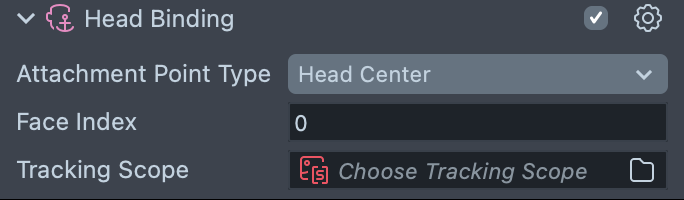
- Face Index: the index of the face the Head Binding tracks. Change this value to control which face it tracks. The first detected face is 0, the second face is 1, and so forth.
- Attachment Point Type: the point on the face that the Head Binding is centered on. Options are:
- Head Center
- Candide Center
- Face Mesh Center
- Left Eyeball
- Right Eyeball
- Mouth Center
- Chin
- Forehead
- Left Forehead
- Right Forehead
- Left Cheek
- Right Cheek
- Tracking Scope: the source the Head Binding tracks faces in, such as a person or a texture other than the camera. See Tracking Scope.