Face Landmarks
- Available on all platforms
Face Landmarks are 93 points that are tracked with the user's face. Like Object tracking, the positions of the points are in screen space.
Face Landmarks are great if you want to track specific parts of the face since you have 93 points to attach to. You can also build interactions based on the distance between two landmarks.
The guide below walks through getting the position of points and then attaching an object to specific points.
To learn more, take a look at the Face Landmarks example, which pins objects to a point and creates effects based on the distance between points.
Face Landmarks Points
Each point of the face landmark is referred to by a specific number. Take a look at the map below to find the point that you are looking for.
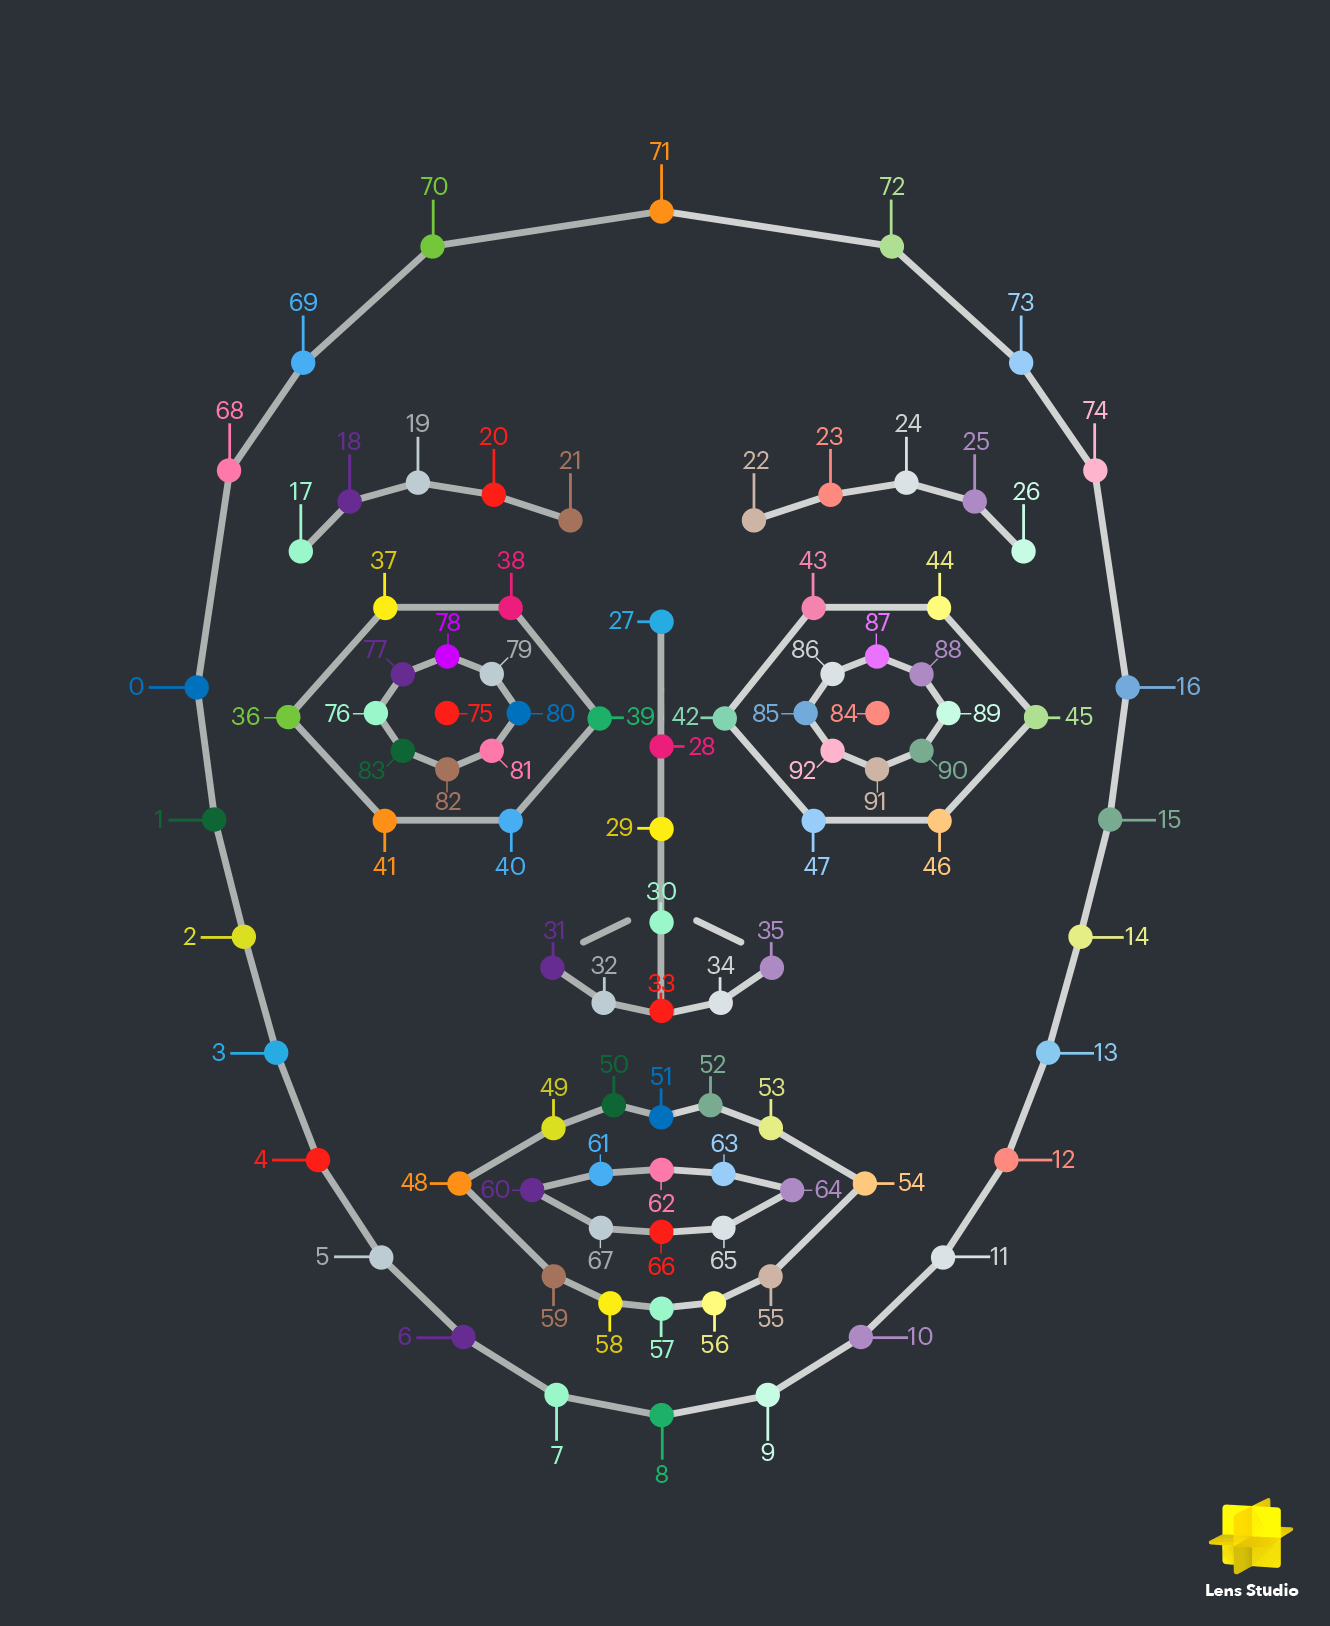
These points can be accessed through the Head Binding component.
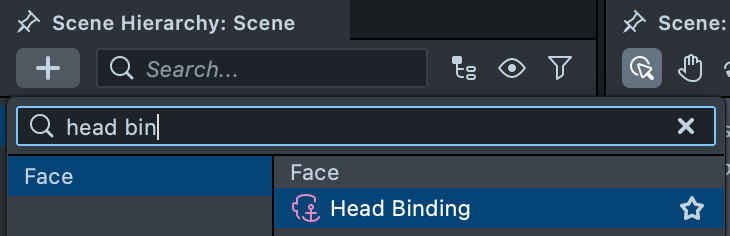
To add a Head Binding, in the Scene Hierarchy panel select + > Face > Head Binding.
Next, create a script and attach it to a scene object.
To learn more about scripting, check out the Scripting overview page
Then get a reference to the Head Binding in the script. Add an input to the script, then set the
Head Binding input in the Inspector panel of the object the script is attached to:
//@input Component.Head headBinding
In the same script, you can then read the landmark. The head binding's onLandmarksUpdate event fires each time the tracked landmarks change and passes the screen positions of all the points, so a landmark's position is its number used as an index:
const landmarkId = 30;

script.headBinding.onLandmarksUpdate.add(function (landmarks) {
  print(landmarks[landmarkId]);
});
This script prints the position of landmark landmarkId every time the landmarks update.
Take a look at the API page for more information.
Using Face Landmark Position
You can use this position the same way you would use any other screen position. For example, you can use it to attach a screen image to that face landmark's position.
The code below attaches a screen object to a landmark on your face. Copy it into a script and add the script to any object.
// -----JS CODE-----
//@input int faceLandmarkIndex = 30 {"min": 0, "max": 92}
//@input Component.Head headBinding
//@input Component.ScreenTransform screenImage
var screenImage = script.screenImage;

function onLandmarksUpdate(landmarks) {
  var landmarkPosition = landmarks[script.faceLandmarkIndex];
  if (!landmarkPosition) {
    return;
  }
  var parentPos = screenImage.screenPointToParentPoint(landmarkPosition);
  screenImage.anchors.setCenter(parentPos);
}

script.headBinding.onLandmarksUpdate.add(onLandmarksUpdate);
Then, in the Inspector panel, set Face Landmark Index to the landmark you want, and set the Head Binding and Screen Image inputs. The screen image then tracks that part of the face.
These points are tracked in screen space, but because they come from a Head Binding, you can also get the depth and rotation from the Head Binding component. To learn more about this you can take a look at the Face Landmarks example.