Face Mesh
- Available on all platforms
The Face Mesh asset provides a 3D mesh that mimics the user's facial expression in real time. You can use it anywhere you can use a mesh. For example, you can use the Head Binding component and the Face Mesh resource to add a 3D face mask on the user. Take a look at the Face Mesh Template for examples on how to use Face Mesh.
Adding a Face Mesh
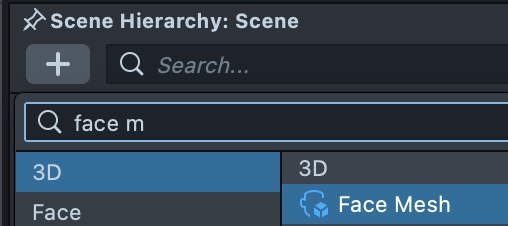
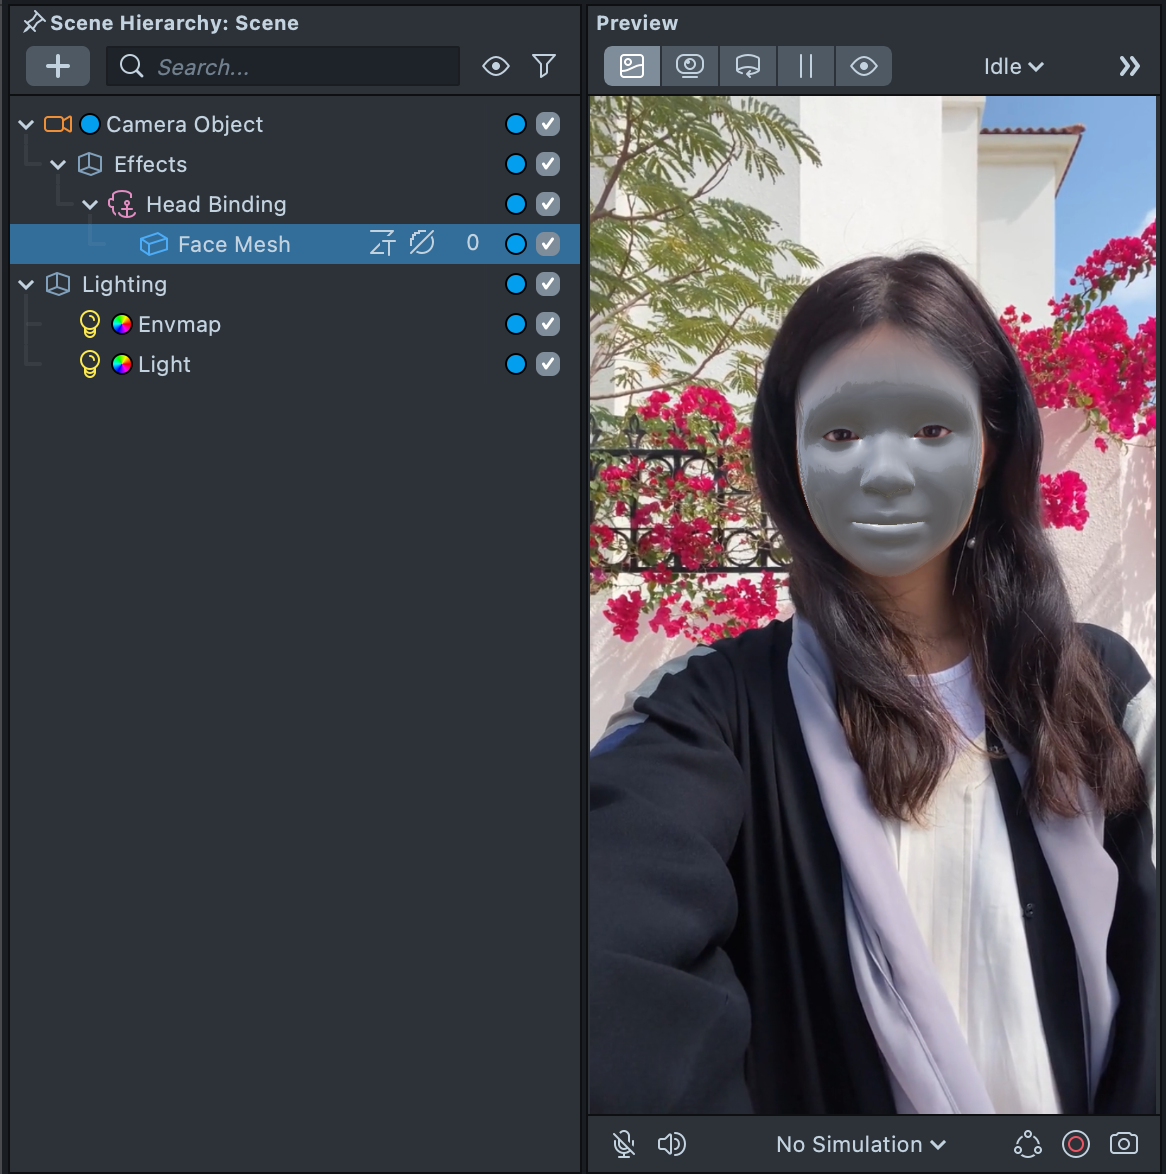
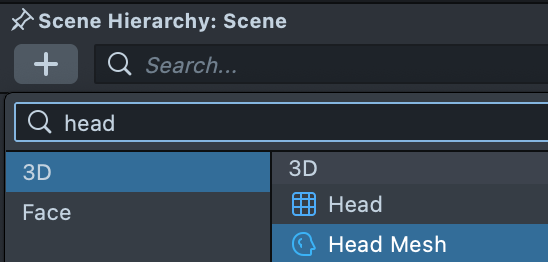
To add a Face Mesh to the user's head, select + > Face Mesh in the Scene Hierarchy panel. Lens Studio adds it under a new Head Binding.
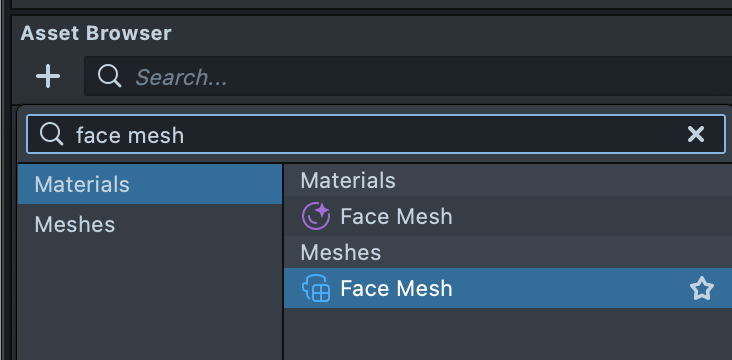
Alternatively, add the asset alone: in the Asset Browser panel, select +, then Face Mesh under Meshes. (The Face Mesh under Materials is a material, not the mesh.)
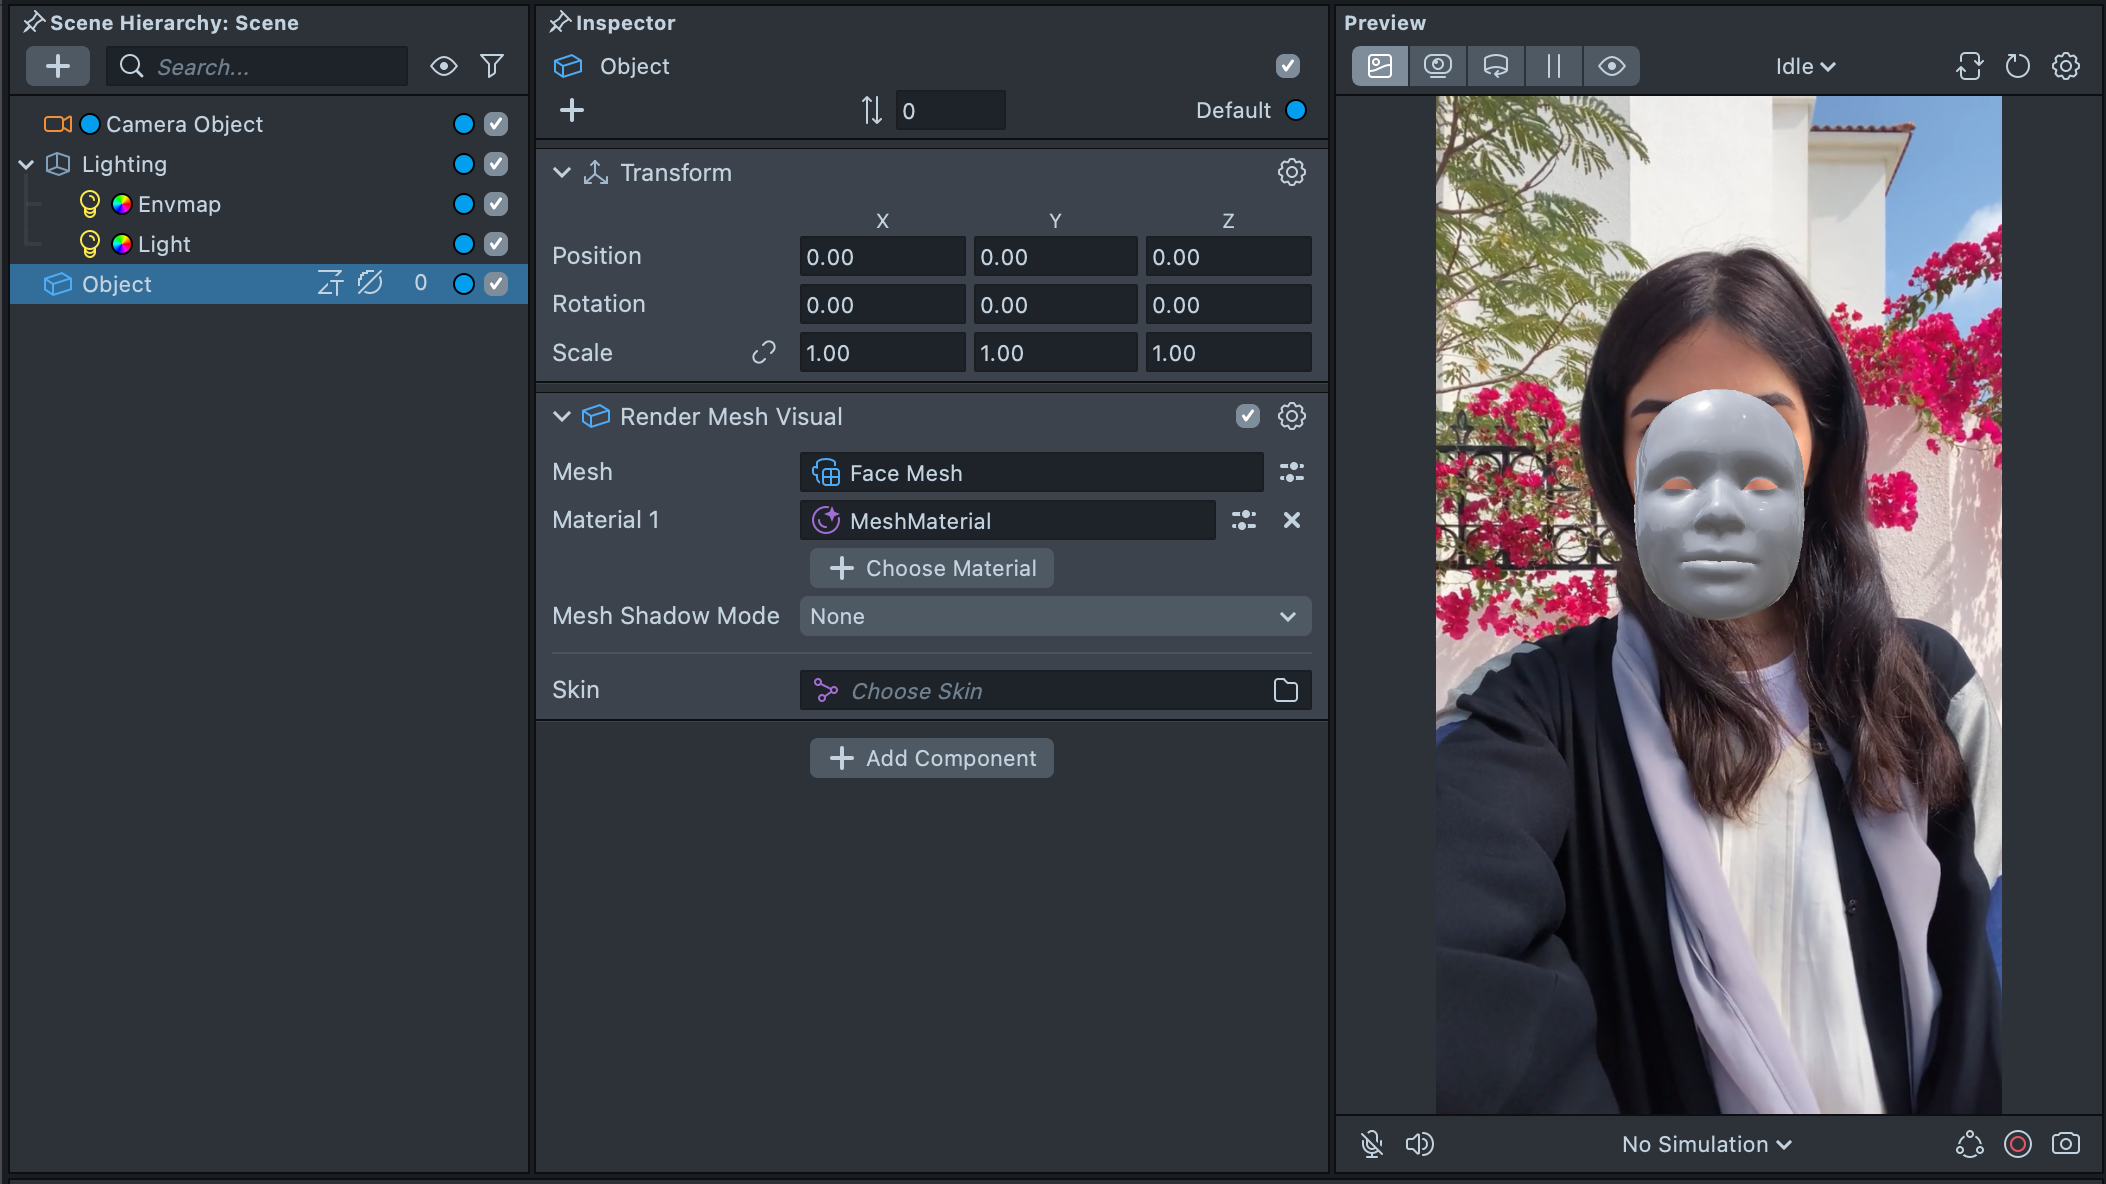
You can then use this asset in the Mesh field of a Render Mesh Visual to display it in your Lens.
Face Mesh Customization
To change the Face Mesh's settings, select the Face Mesh asset in the Asset Browser panel and adjust them in the Inspector panel.
Face Index sets which face in the camera drives the Face Mesh. The first face detected has index 0, the
second 1, and so forth.
You can also choose which parts of the Face Mesh render with the Face Geometry, Eye Geometry, Eye Corner Geometry, Mouth Geometry, Skull Geometry and Ear Geometry checkboxes. By default only Face Geometry and Eye Corner Geometry are on.
Tracking Scope limits which faces or source the Face Mesh tracks. See Tracking Scope.
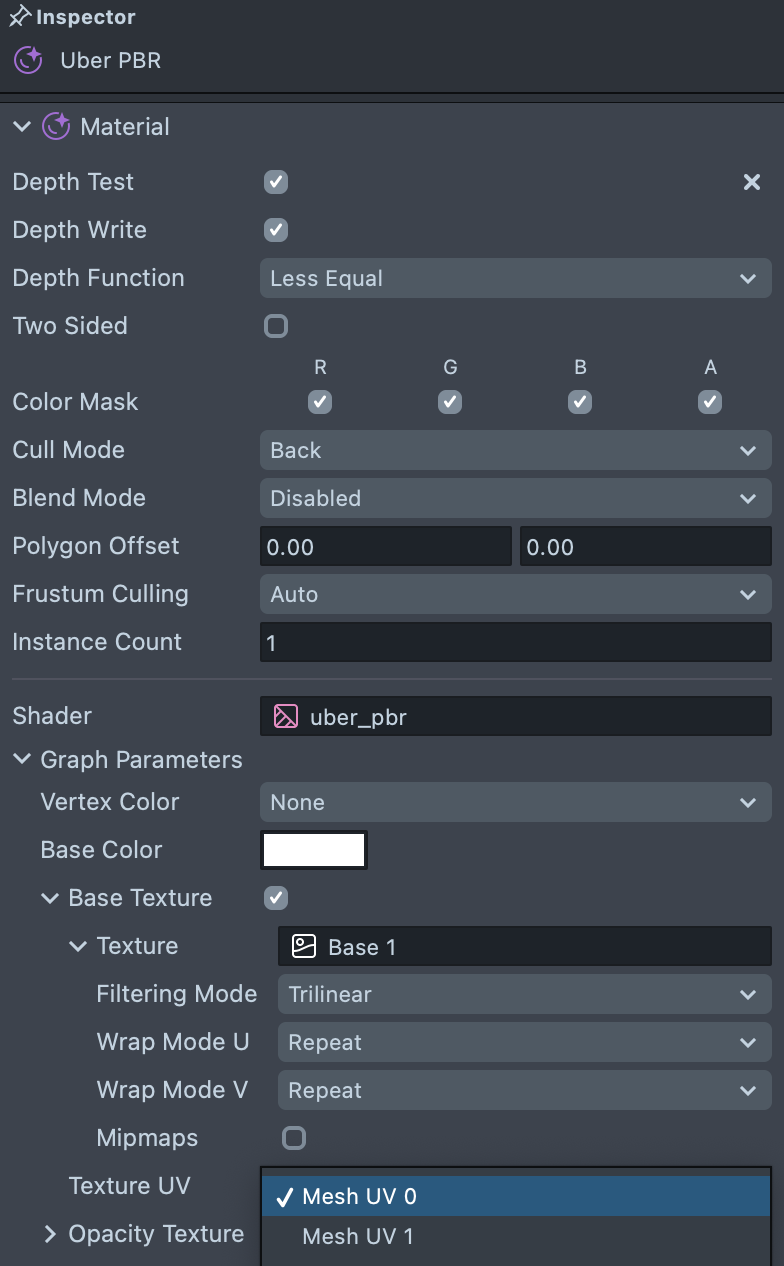
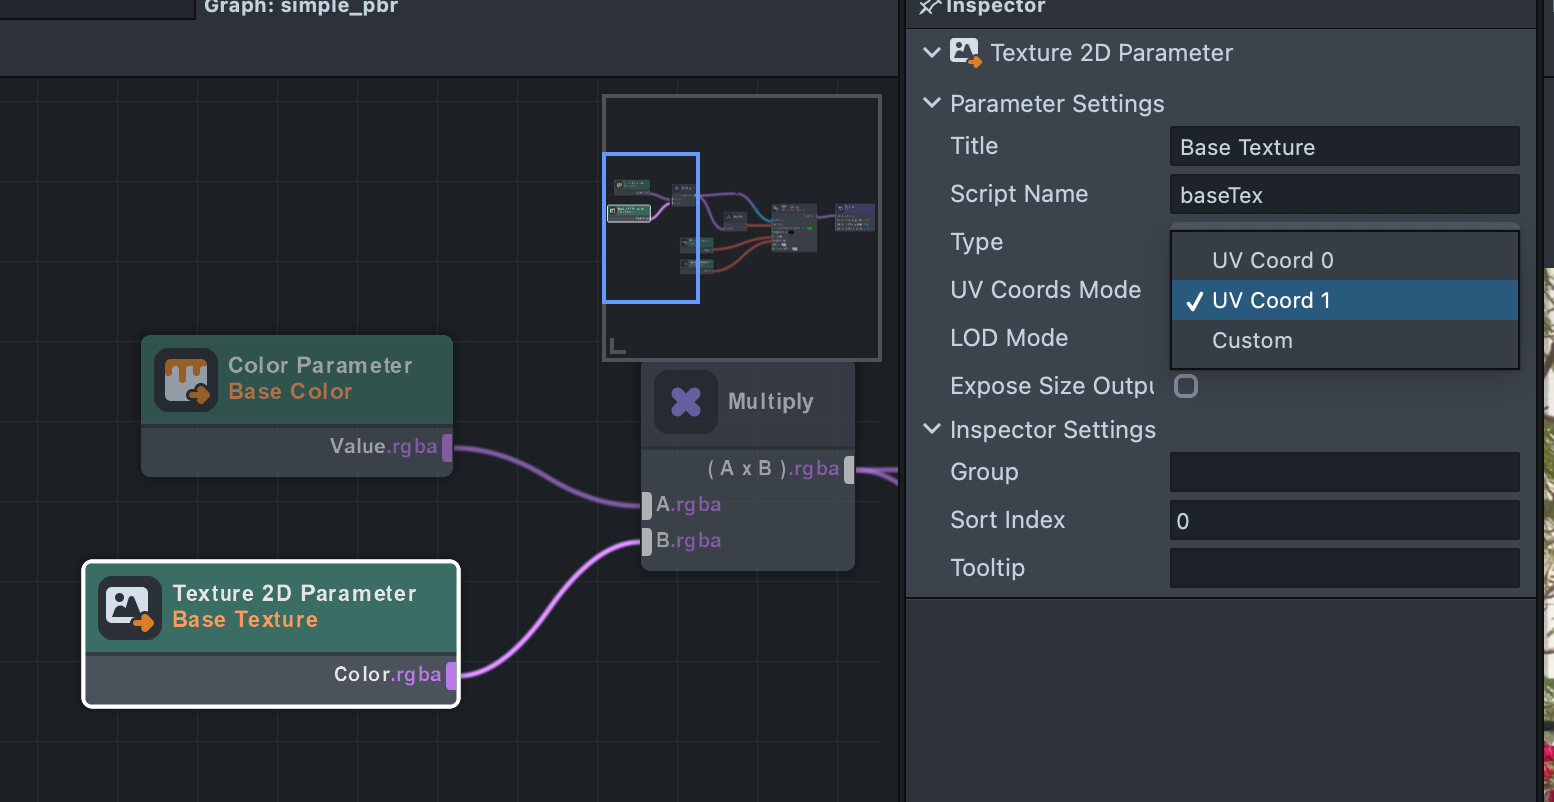
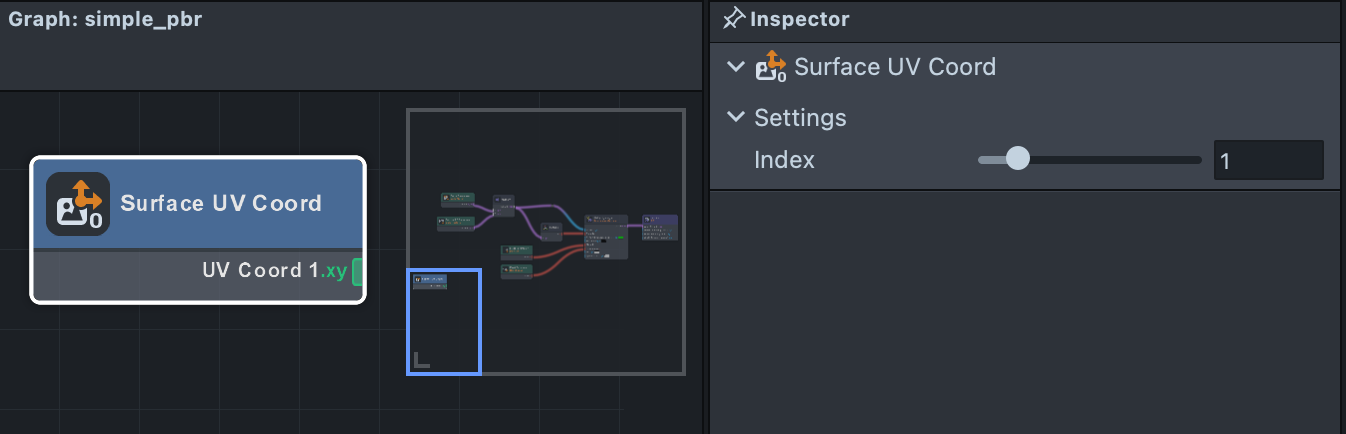
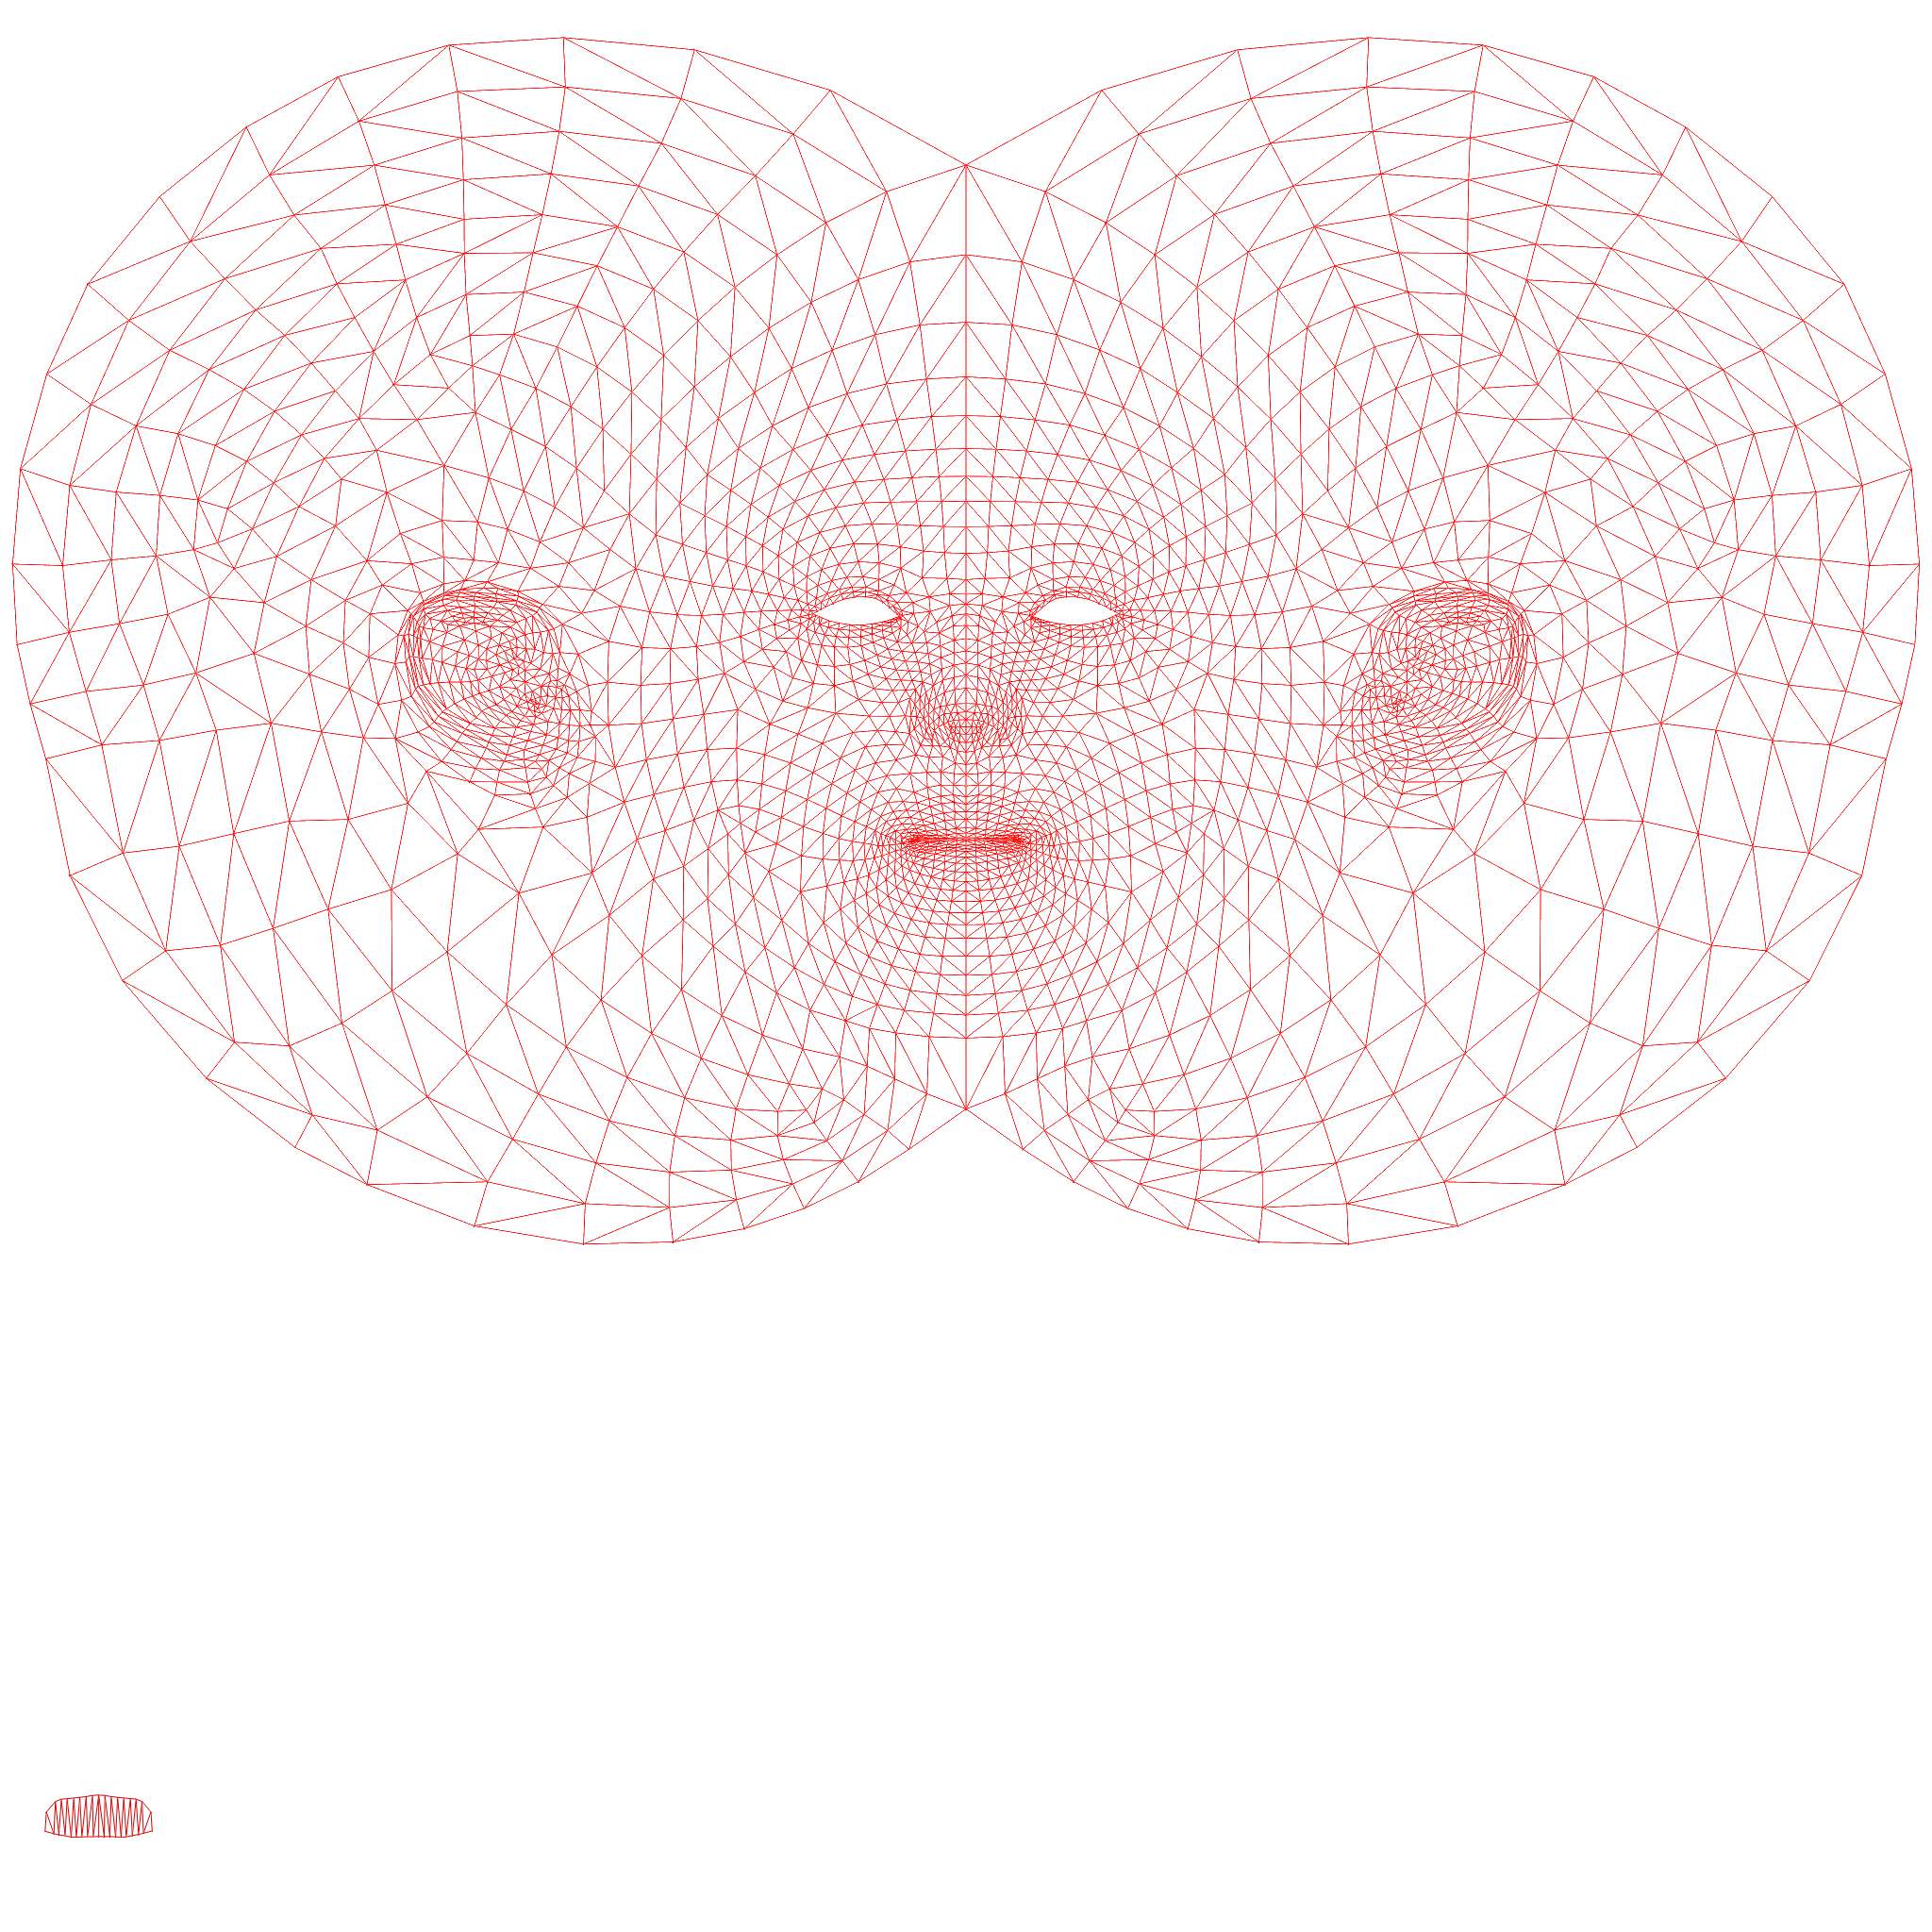
When using the Skull or Ear options, make sure to use the UV1 option for the textures in your material, because UV0 maps the Face Mesh without the skull.
Some ways of doing this:
-
Use the built-in Uber PBR material (Asset Browser > + > Uber PBR), whose Texture UV setting picks the UV set a texture uses (Mesh UV 1 for the skull and ears).
-
You can modify a graph material to use a different Surface UV Coord node.
-
You can modify a graph material's texture parameter to use a different UV Coords Mode.
You can also add Face Mesh with the Skull option directly by adding Head Mesh:
External Face Mesh
In addition to the built-in face mesh, you can provide your own mesh for the user's face to map to, through the Face Mesh's External Mesh setting.
With an external mesh, you can:
- Transition between the built-in face mesh and the custom face mesh
- Add additional Blend Shapes to modify the shape of the face mesh.
For your mesh to map correctly to the user's face, use the same UV map as the built-in Face Mesh. You can download the UV maps and the 3D model below.
To add your own custom mesh, first import your mesh into Lens Studio by dragging your file into the Asset Browser panel. Then select the Face Mesh asset in the Asset Browser panel, and in the Inspector panel, select the External Mesh field. In the pop-up, choose your imported mesh.
The settings below External Mesh control how it maps:
- External Scale: scales the custom mesh.
- Expression Multiplier: how much the user's expression affects the mesh.
- External Mesh Map UV: the UV set (Texcoord0 to Texcoord3) used to map the mesh to the Face Mesh.
Look for Face Reprojection in the Asset Library to see examples of this. See the Face Morph to learn more about those examples.
You can generate these morphs with the GenAI Suite's Head Generator. Learn more in the Head Generator guide.
Hiding Parts of the Face Mesh
In some cases you may want to hide parts of the Face Mesh. You can do this with an opacity texture on a PBR material used for the Face Mesh, as you would on other meshes.
To create a PBR material, in the Asset Browser panel, press + > Uber PBR.
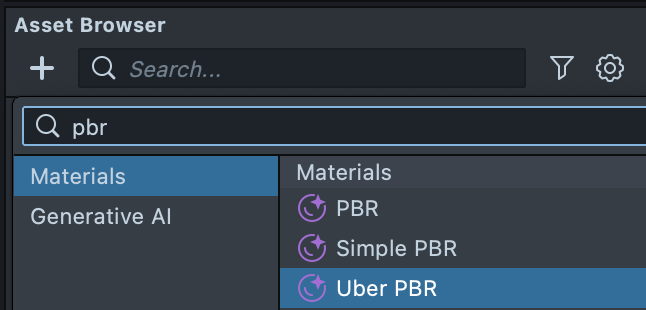
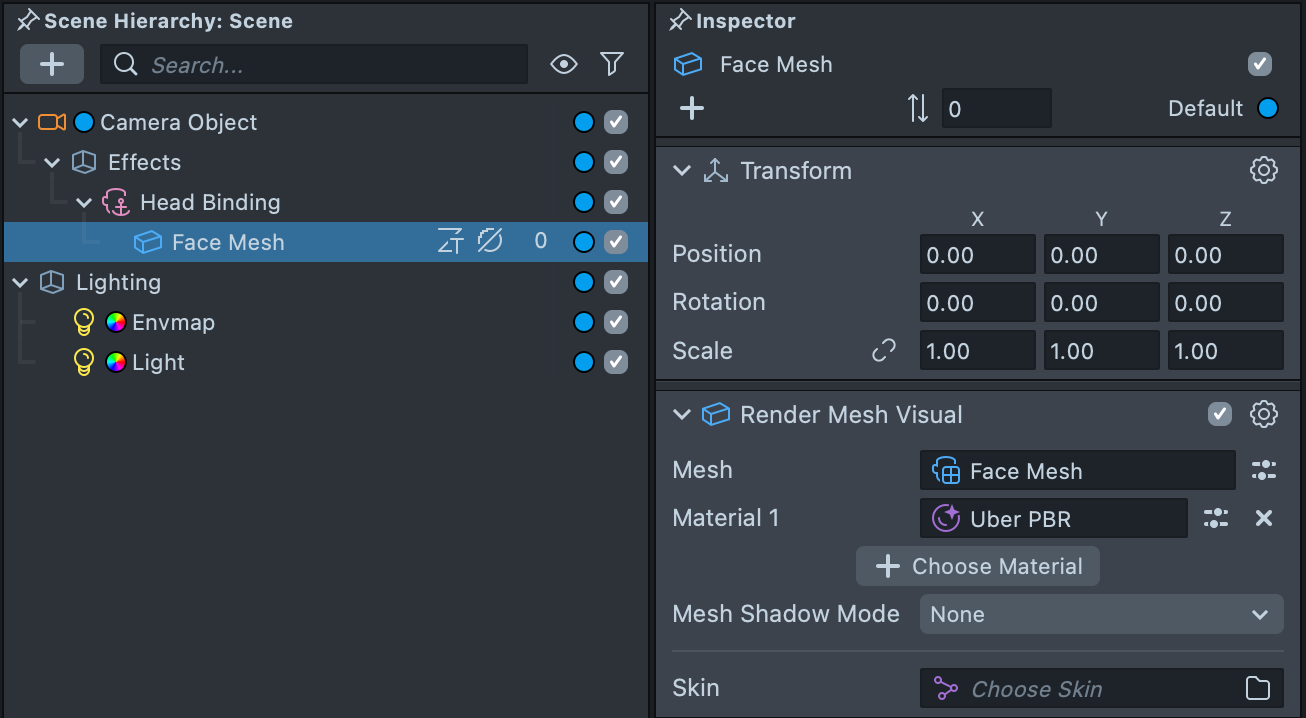
Then select your Face Mesh object in the Scene Hierarchy panel, and in the Inspector panel, set the Render Mesh Visual component's material to the new material.
Then, in the Asset Browser panel, select the PBR material and set its Blend Mode to Normal so the material can have transparency. Next, check Opacity Texture to show its Texture field.
You can set this Texture field to your own texture. The texture should correspond to the Face Mesh UV, which you can find in the next section.
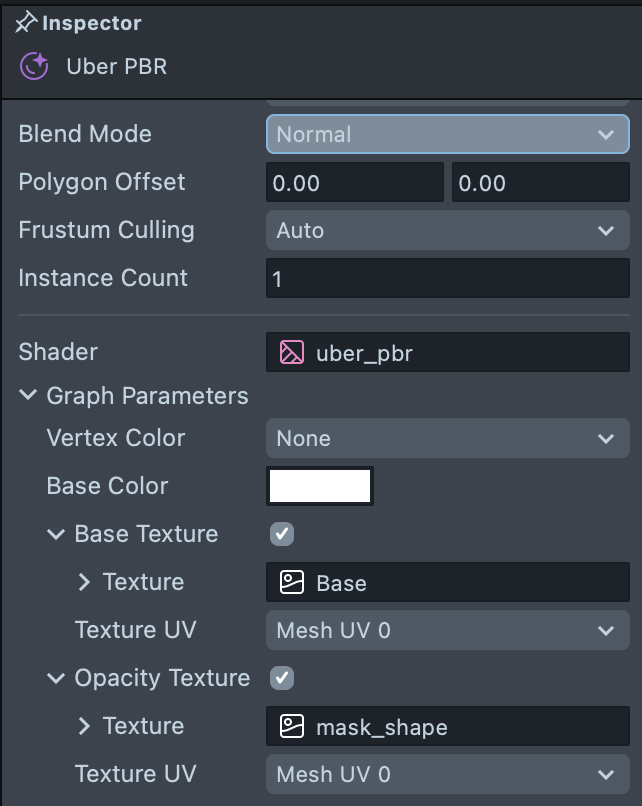
For example, if we use this mask:

The final Face Mesh will look like:
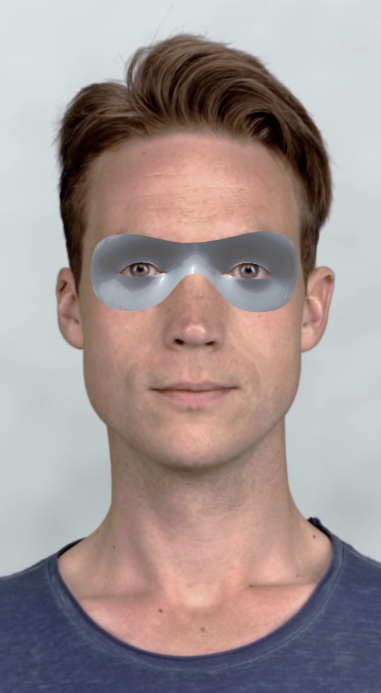
Download example Face Mesh Opacity Textures
Download the Face Mesh UV
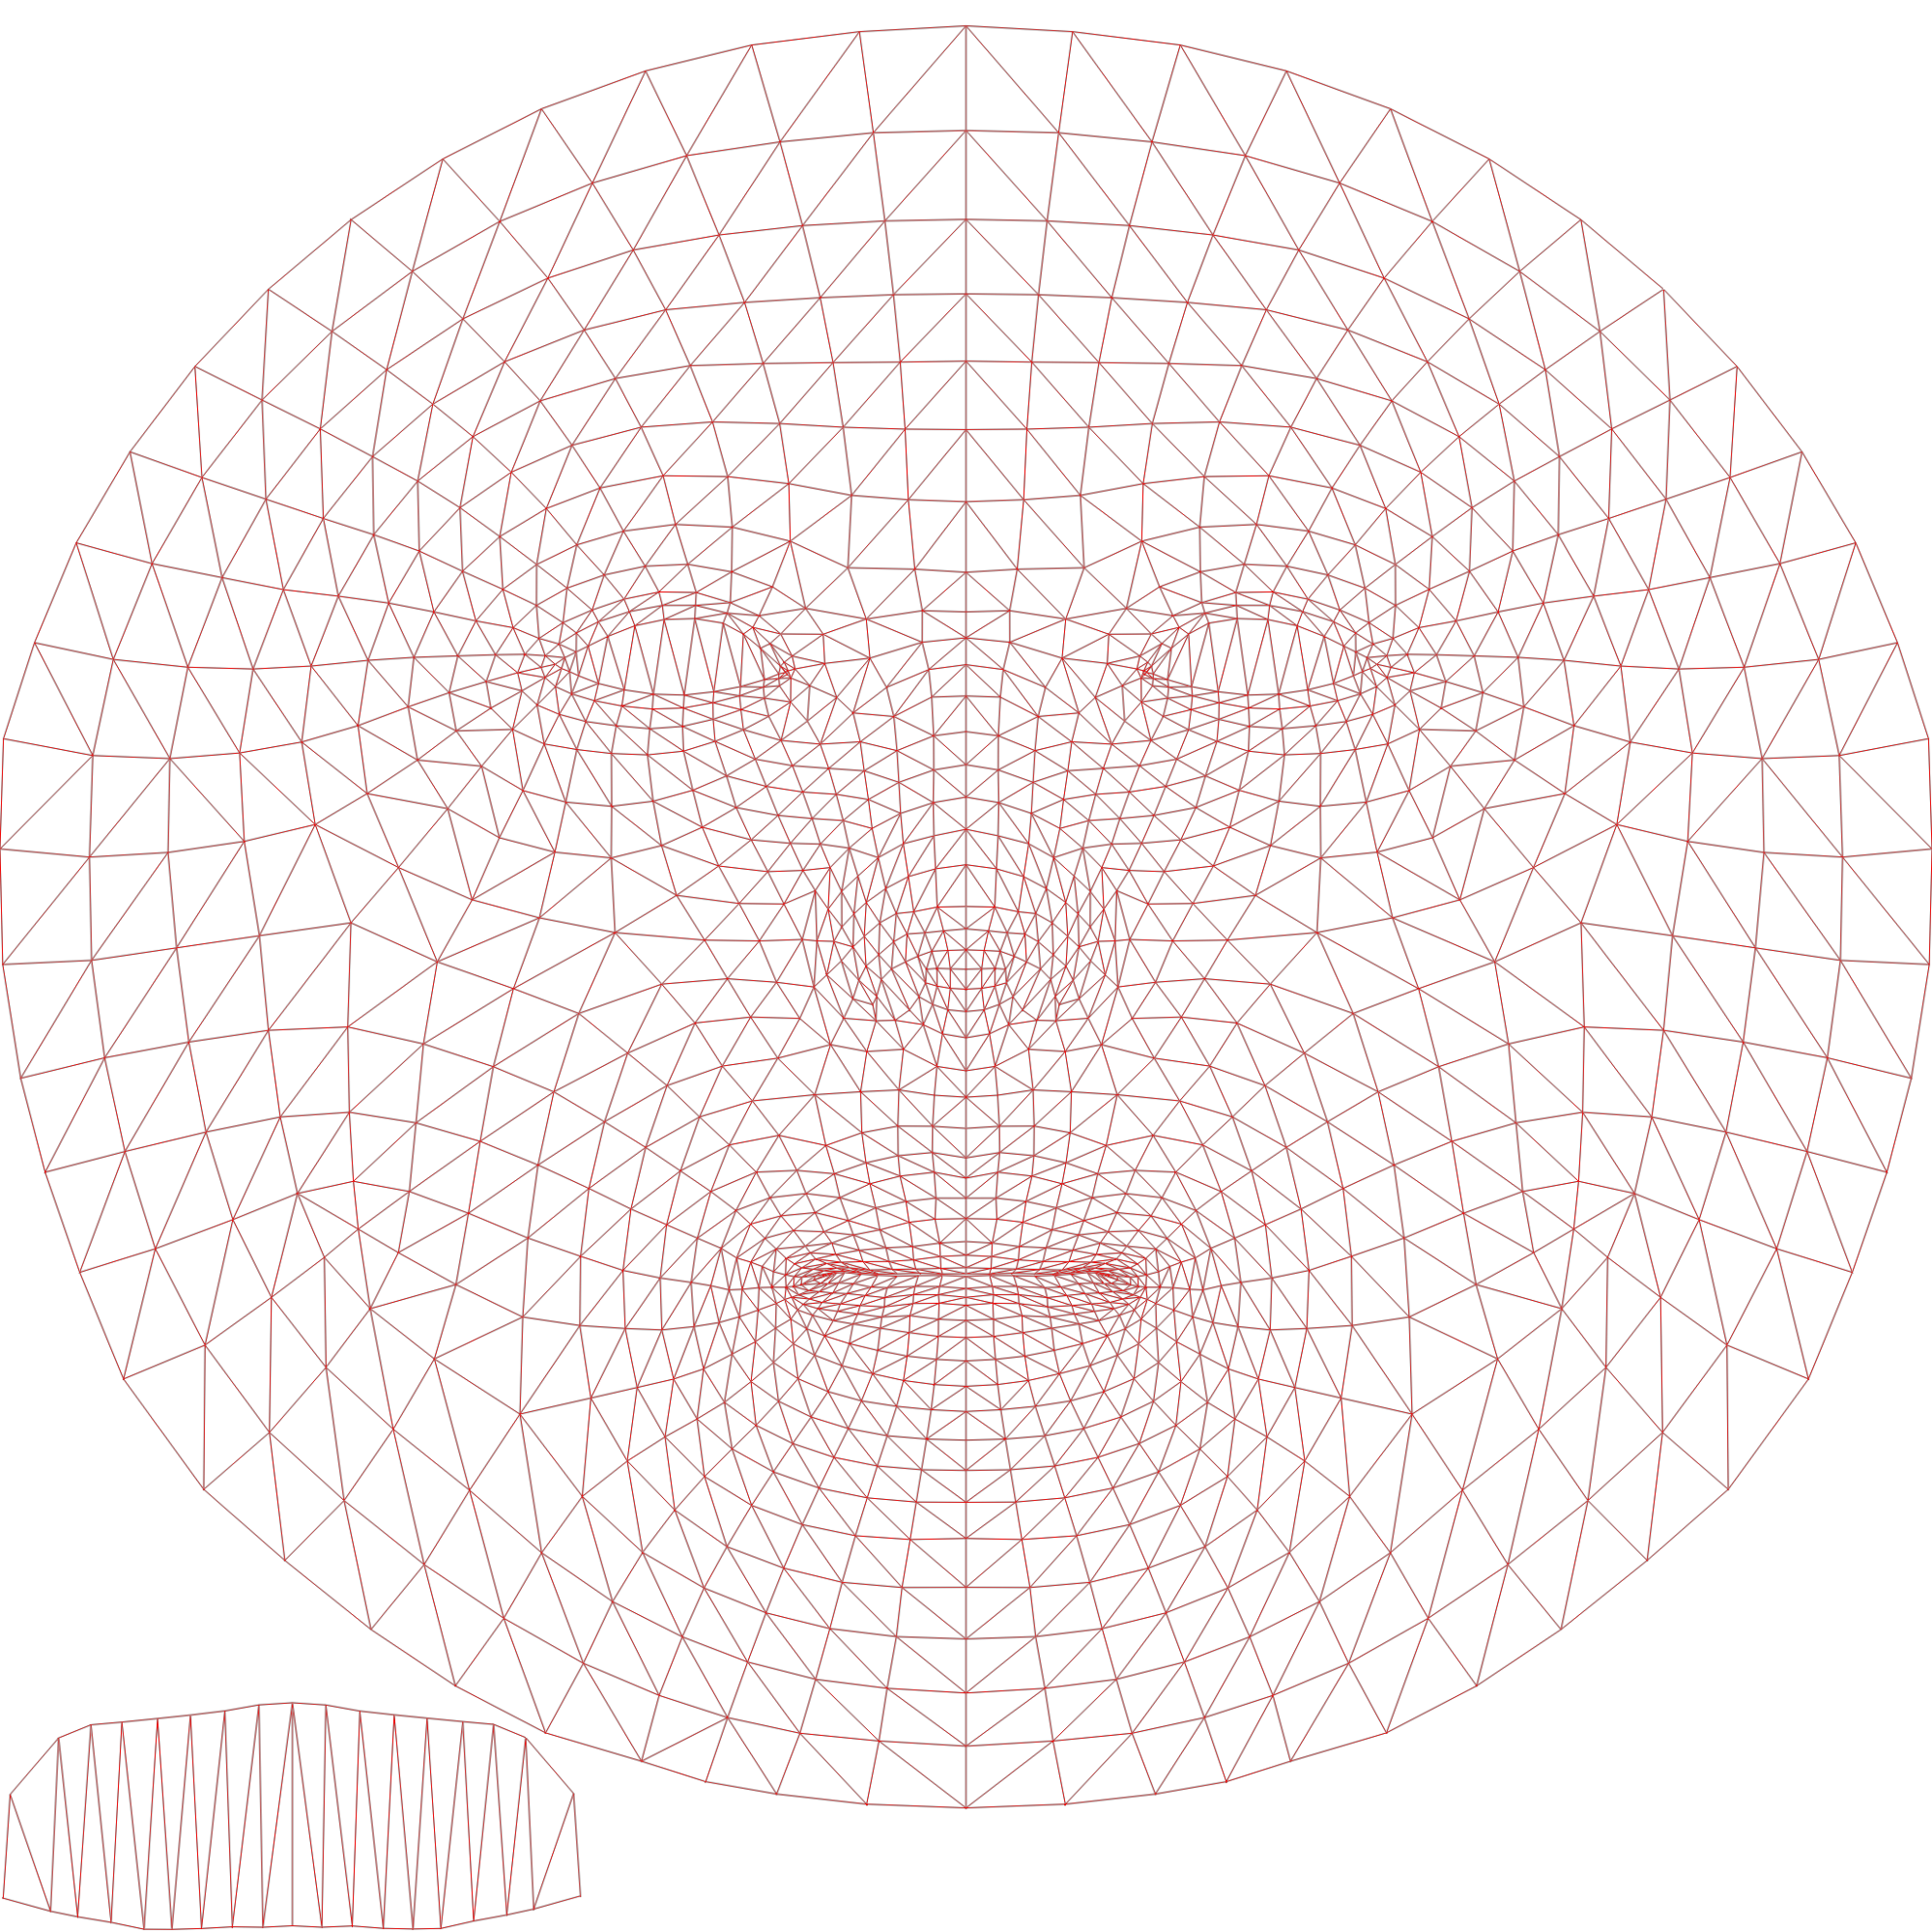
The Face Mesh UV file provides a reference on how 2D textures are applied to the Face Mesh. These textures can be used to modify how your Face Mesh appears. For example, you can use it to create an opacity mask texture to hide parts of the Face Mesh from appearing in your Lens as in the previous section, or create a normal map texture to add additional details to the Face Mesh. Take a look at the Materials guide for more information on how different textures can be used to create a material in Lens Studio.
Download Face Mesh UV Reference
When Skull Geometry or Ear Geometry is on, use the UV1 set, because they add polygons.
Download the Face Mesh 3D model
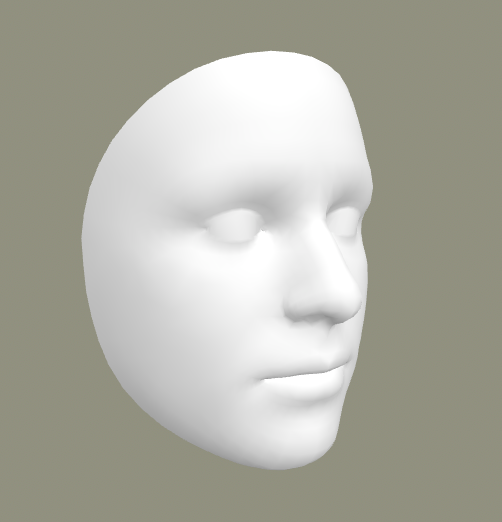
You can also download a 3D model of the Face Mesh to view your content in other 3D software. For example, you can use it as a reference to paint on in software such as Substance Painter. Take a look at the Substance Painter texturing guide for more information on how to create textures to use on a material in Lens Studio.
Download Face Mesh with Skull 3D Model
Download Face Mesh with Skull 3D Model and Ears
You can't replace the Face Mesh in Lens Studio with a face mesh 3D model made outside Lens Studio. To change its shape, use an external mesh, as above.