Get Started
Set up Snap Cloud for a SPECS Lens: install the Supabase Client package, log in, create a project, import its credentials, and sign the user in from a script.
- Snapchat: not supported
- SPECS: fully supported
- Camera Kit Web: not supported
- Camera Kit Mobile: not supported
- SnapchatNot supported
- SPECSFully supported
- Camera Kit WebNot supported
- Camera Kit MobileNot supported
This guide sets up a SPECS Lens to use a Snap Cloud backend: you install the package, log in, create a Snap Cloud project, bring its credentials into Lens Studio, and write a script that signs the user in. The other Snap Cloud pages start from the result. Next, the Databases guide adds a table and reads and writes it.
For the full reference, see the Snap Cloud documentation site.
Snap Cloud is in alpha.
Before you start
- Lens Studio 5.25 or later. The Supabase Client package 4.0.0 needs it.
- A Snapchat account with a verified email, to log in to Snap Cloud from Lens Studio. The users of your Lens sign in with their SPECS Account.
- A Lens Studio project whose Target Platform is SPECS. The Supabase panel works only in SPECS projects.
Install the Supabase Client package
The Supabase Client package (SupabaseClient 4.0.0) is the one package Snap Cloud needs. It contains:
- The
supabase-jsclient library configured for Lens Studio, imported fromSupabaseClient.lspkg/supabase-snapcloud. Your scripts call your Snap Cloud backend through it. - The Supabase plugin, which adds the Supabase panel where you log in and manage your projects. You don't install the plugin separately.
- The
SnapCloudRequirementscomponent, which holds a project for several scripts (see Share one project across scripts), and a demo prefab.
To install it:
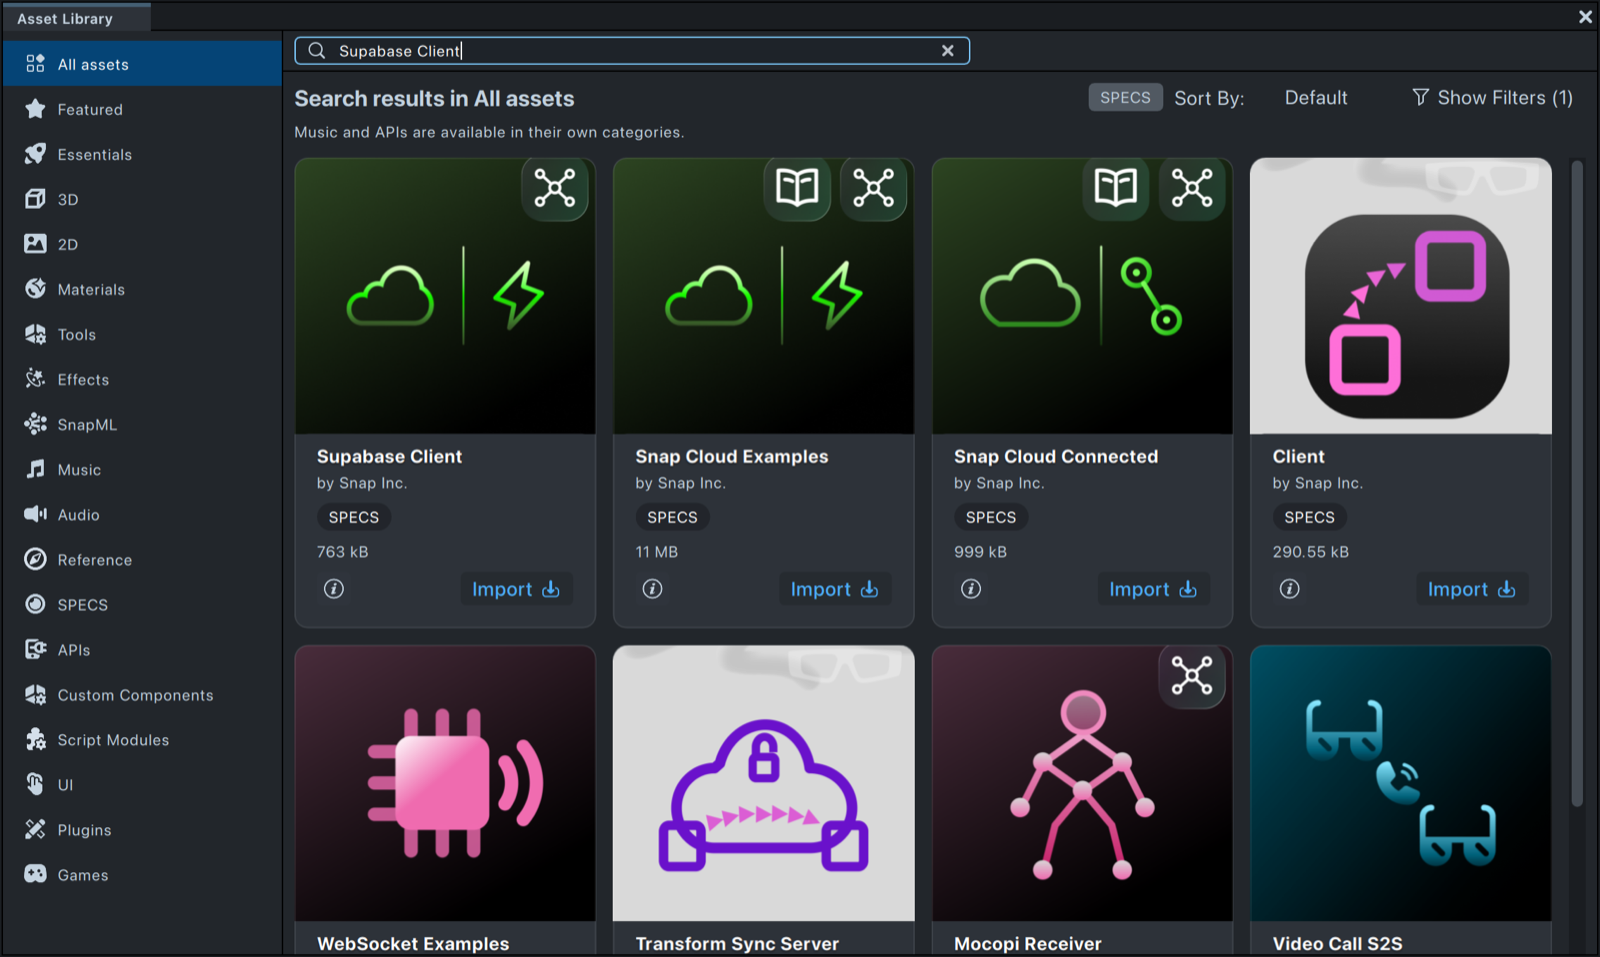
- Open the Asset Library.
- Search for Supabase Client.
- Select Import on the Supabase Client card.
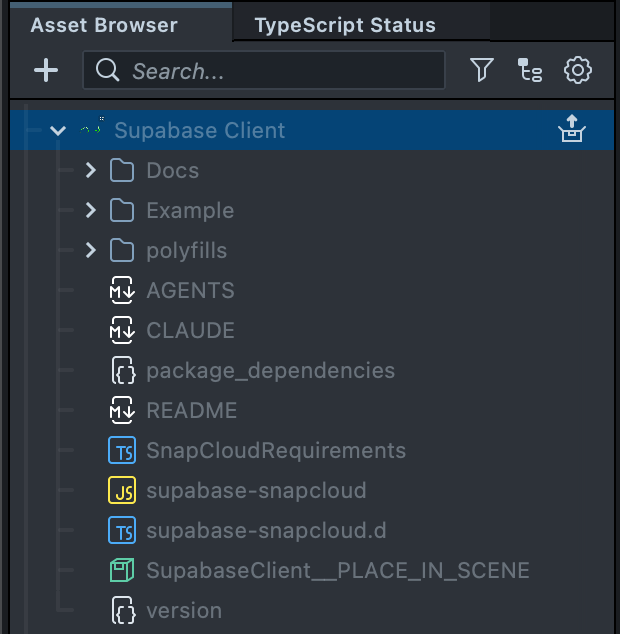
The package appears under Packages in the Asset Browser as Supabase Client.
Open the Supabase panel and log in
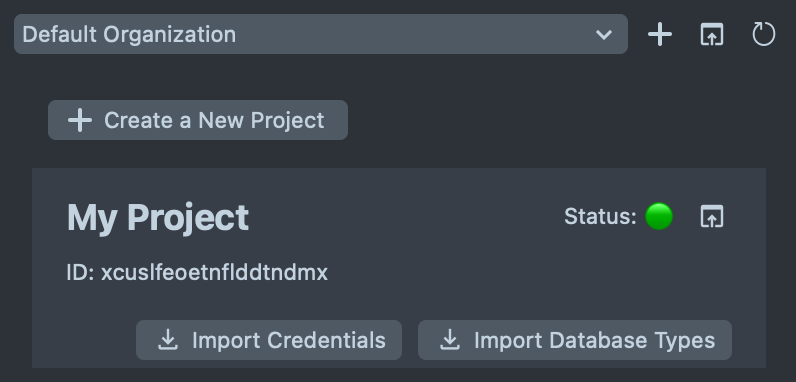
The Supabase panel lists your organizations and projects and lets you create projects, import their credentials, and open the Snap Cloud dashboard.
-
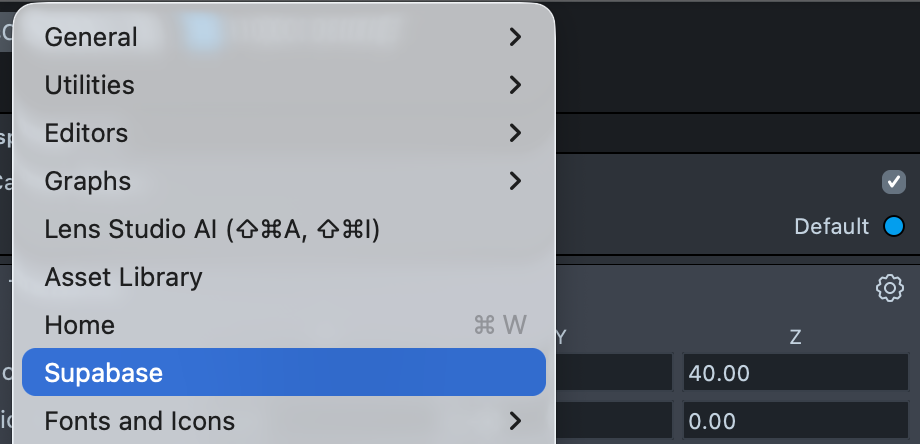
Choose Window > Supabase.
-
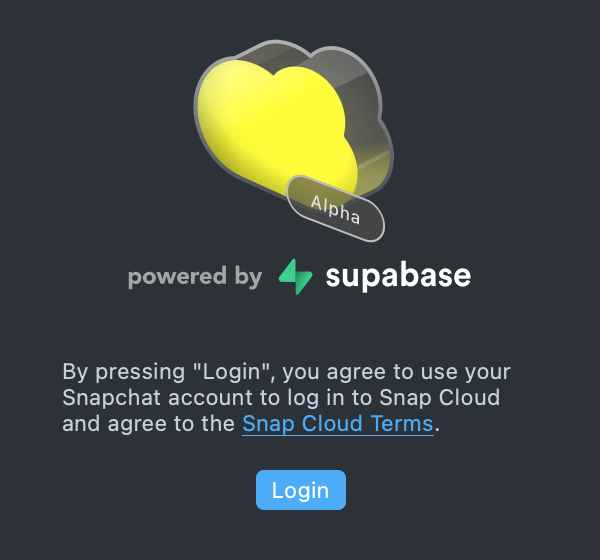
In the Supabase panel, select Login.
-
Sign in with your Snapchat account. When the sign-in finishes, the panel shows your organizations.
Make sure your Snapchat account has finished email verification before you log in. Without a verified email, the panel asks you to add an email to your Snapchat account and log in again.
If the panel shows "Snap Cloud is available on SPECS projects only. Switch Target Platform to SPECS to continue.", see Troubleshooting.
Create a Snap Cloud project
The first time you log in and have no organization, the panel creates one for you, Default Organization. If you belong to more than one organization, choose it in the drop-down at the top of the panel. Create New Organization (the + button beside it) adds another.
- Under your organization, select Create a New Project.
- Enter a Project Name of at least 3 characters.
- Enter a Database password of at least 8 characters, with letters, numbers, and symbols.
- Select Create.
A new project can take a minute to initialize. It then appears in the panel with its ID and status.
Import the project credentials
Your scripts reach a project through a SupabaseProject asset, which holds the project's URL and public token.
-
On the project's card in the Supabase panel, select Import Credentials.
The panel creates an asset named
SupabaseProject <project name>in the Asset Browser. -
Optional: select Import Database Types to write your tables' TypeScript types to
DatabaseTypes.ts.
The asset carries the public token only. Keep service-role keys out of your Lens: they belong in edge functions and other server code.
Open the Snap Cloud dashboard
You create tables, storage buckets, edge functions, and policies in the Snap Cloud dashboard at cloud.snap.com.
- To open the dashboard, select Open Dashboard in Browser at the top of the Supabase panel.
- To open one project, select Open Project in Browser on its card.
Create the client and sign in
Every Snap Cloud call goes through a client created from your SupabaseProject asset, and most calls need a signed-in user. Users sign in with their SPECS Account; anonymous sign-in is turned off.
-
Create a TypeScript script named
SnapCloudStarter.tswith the code below (or the JavaScript version). -
Add the script to a scene object.
-
In the Inspector, drag the
SupabaseProjectasset from the Asset Browser into the script's Supabase Project field.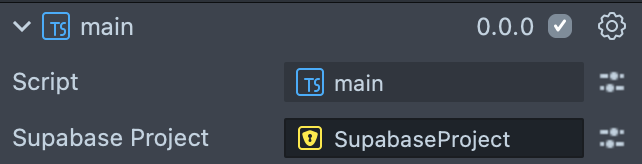
-
Run the Lens in Preview, or send it to SPECS. The Logger reports a successful sign-in and prints the user's ID.
The script works in four parts:
import { createClient, SupabaseClient } from 'SupabaseClient.lspkg/supabase-snapcloud'imports the client library.@input supabaseProject: SupabaseProjectreceives the asset from Import Credentials. SupabaseProject exposes itsurlandpublicToken.createClient(this.supabaseProject.url, this.supabaseProject.publicToken, options)creates the client. SetheartbeatIntervalMsto2500in itsrealtimeoptions before creating it: it works around a known realtime connectivity issue in the alpha, and without it realtime connections time out.this.client.auth.signInWithIdToken({ provider: 'snapchat', token: '' })signs in the user who is running the Lens. The provider name stays'snapchat'and the token stays empty: the Lens supplies the user's identity. The client also has asignInWithSnapchat()helper that makes the same call.
When sign-in succeeds the script calls onSignedIn(). The other Snap Cloud pages add their methods to this script and call them from there. The script binds OnDestroyEvent to close realtime channels with removeAllChannels() when the script is destroyed.
- TypeScript
- JavaScript
import {
  createClient,
  SupabaseClient,
} from 'SupabaseClient.lspkg/supabase-snapcloud';

@component
export class SnapCloudStarter extends BaseScriptComponent {
  @input
  @hint('SupabaseProject asset created by Import Credentials')
  supabaseProject: SupabaseProject;

  private client: SupabaseClient;
  private uid: string;

  onAwake() {
    this.createEvent('OnStartEvent').bind(() => {
      this.initSupabase();
    });
    this.createEvent('OnDestroyEvent').bind(() => {
      this.cleanup();
    });
  }

  async initSupabase() {
    print('Initializing Supabase client...');
    print('Project URL: ' + this.supabaseProject.url);

    const options = {
      realtime: {
        // Known alpha limitation: set the heartbeat to 2500 ms
        heartbeatIntervalMs: 2500,
      },
    };

    this.client = createClient(
      this.supabaseProject.url,
      this.supabaseProject.publicToken,
      options
    );

    if (!this.client) {
      print('Failed to create Supabase client');
      return;
    }

    print('Supabase client created successfully');
    await this.signInUser();

    if (this.uid) {
      await this.onSignedIn();
    }
  }

  async signInUser() {
    print('Attempting to sign in...');

    const { data, error } = await this.client.auth.signInWithIdToken({
      provider: 'snapchat',
      token: '',
    });

    if (error) {
      print('Sign in FAILED: ' + JSON.stringify(error));
      return;
    }

    if (data && data.user) {
      const { user, session } = data;
      this.uid = JSON.stringify(user.id).replace(/^"(.*)"$/, '$1');

      print('Sign in SUCCESS!');
      print('User ID: ' + this.uid);
      print('User Email: ' + (user.email || 'N/A'));

      if (session) {
        print('Session Active: YES');
        print(
          'Access Token (first 20 chars): ' +
            session.access_token.substring(0, 20) +
            '...'
        );
        print('Token Type: ' + session.token_type);
        print(
          'Expires At: ' + new Date(session.expires_at * 1000).toISOString()
        );
      } else {
        print('Session: No session data');
      }

      print('Authentication verified and ready!');
    } else {
      print('Sign in completed but no user data returned');
    }
  }

  // Runs once the user is signed in. The other Snap Cloud pages call their methods here.
  async onSignedIn() {}

  // Waits the given number of milliseconds.
  private delay(ms: number): Promise<void> {
    return new Promise((resolve) => {
      const delayedEvent = this.createEvent('DelayedCallbackEvent');
      delayedEvent.bind(() => {
        resolve();
      });
      delayedEvent.reset(ms / 1000);
    });
  }

  cleanup() {
    if (this.client) {
      this.client.removeAllChannels();
    }
  }
}
// Import the Supabase client
const createClient =
  require('SupabaseClient.lspkg/supabase-snapcloud').createClient;

//@input Asset.SupabaseProject supabaseProject {"hint":"SupabaseProject asset created by Import Credentials"}

var SnapCloudStarter = function () {
  this.client = null;
  this.uid = null;

  this.onAwake = function () {
    script.createEvent('OnStartEvent').bind(() => {
      this.initSupabase();
    });
    script.createEvent('OnDestroyEvent').bind(() => {
      this.cleanup();
    });
  };

  this.initSupabase = async function () {
    print('Initializing Supabase client...');
    print('Project URL: ' + script.supabaseProject.url);

    const options = {
      realtime: {
        // Known alpha limitation: set the heartbeat to 2500 ms
        heartbeatIntervalMs: 2500,
      },
    };

    this.client = createClient(
      script.supabaseProject.url,
      script.supabaseProject.publicToken,
      options
    );

    if (!this.client) {
      print('Failed to create Supabase client');
      return;
    }

    print('Supabase client created successfully');
    await this.signInUser();

    if (this.uid) {
      await this.onSignedIn();
    }
  };

  this.signInUser = async function () {
    print('Attempting to sign in...');

    const { data, error } = await this.client.auth.signInWithIdToken({
      provider: 'snapchat',
      token: '',
    });

    if (error) {
      print('Sign in FAILED: ' + JSON.stringify(error));
      return;
    }

    if (data && data.user) {
      const user = data.user;
      const session = data.session;
      this.uid = JSON.stringify(user.id).replace(/^"(.*)"$/, '$1');

      print('Sign in SUCCESS!');
      print('User ID: ' + this.uid);
      print('User Email: ' + (user.email || 'N/A'));

      if (session) {
        print('Session Active: YES');
        print(
          'Access Token (first 20 chars): ' +
            session.access_token.substring(0, 20) +
            '...'
        );
        print('Token Type: ' + session.token_type);
        print(
          'Expires At: ' + new Date(session.expires_at * 1000).toISOString()
        );
      } else {
        print('Session: No session data');
      }

      print('Authentication verified and ready!');
    } else {
      print('Sign in completed but no user data returned');
    }
  };

  // Runs once the user is signed in. The other Snap Cloud pages call their methods here.
  this.onSignedIn = async function () {};

  // Waits the given number of milliseconds.
  this.delay = function (ms) {
    return new Promise((resolve) => {
      const delayedEvent = script.createEvent('DelayedCallbackEvent');
      delayedEvent.bind(() => {
        resolve();
      });
      delayedEvent.reset(ms / 1000);
    });
  };

  this.cleanup = function () {
    if (this.client) {
      this.client.removeAllChannels();
    }
  };
};

// Create the instance and start it
var instance = new SnapCloudStarter();
instance.onAwake();
Share one project across scripts
When several scripts use the same Snap Cloud project, assign the SupabaseProject asset once on a SnapCloudRequirements component instead of on every script. The Snap Cloud Examples package works this way: every example reads the project from one [SnapCloudRequirements] object.
SnapCloudRequirements holds the project and builds URLs and headers from it: getSupabaseProject(), isConfigured(), getSupabaseUrl(), getSupabasePublicToken(), getSupabaseHeaders(), getRestApiUrl(), getStorageApiUrl() and getFunctionsApiUrl(). It doesn't create a client or sign anyone in, so each script still calls createClient and signs in. isConfigured() checks that a project is assigned, not that the backend answers.
- Add the
SnapCloudRequirementsscript from theSupabaseClientpackage to a scene object. - Drag the
SupabaseProjectasset into its Supabase Project field. - In each script, replace the
supabaseProjectinput with a reference to the component, and read the project from it:
import { SnapCloudRequirements } from 'SupabaseClient.lspkg/SnapCloudRequirements';

// In the component:
@input
snapCloudRequirements: SnapCloudRequirements;

// Before createClient:
const project = this.snapCloudRequirements.getSupabaseProject();
this.client = createClient(project.url, project.publicToken, options);
Troubleshooting
"Snap Cloud is available on SPECS projects only"
The Supabase panel shows this message instead of your projects:
Snap Cloud is available on SPECS projects only. Switch Target Platform to SPECS to continue.
Cause: the project's Target Platform isn't SPECS.
Fix: switch the project's Target Platform to SPECS, then reopen Window > Supabase.
Sign-in returns AuthRetryableFetchError
Cause: on device startup, the sign-in token may not be available yet.
Fix: wait about 1 second and try again. To retry automatically, replace signInUser() in the SnapCloudStarter script with this method, which tries up to four times. It uses the script's delay helper.
// Retry sign-in when the token isn't ready yet
async signInUser(attempt: number = 0): Promise<boolean> {
  const { data, error } = await this.client.auth.signInWithIdToken({
    provider: 'snapchat',
    token: '',
  });

  if (!error && data?.user?.id) {
    this.uid = JSON.stringify(data.user.id).replace(/^"(.*)"$/, '$1');
    print('Authenticated: ' + this.uid);
    return true;
  }

  // Retry up to 3 times for transient errors
  if (attempt < 3) {
    await this.delay(1000);
    return this.signInUser(attempt + 1);
  }

  print('Authentication failed after retries');
  return false;
}
Realtime connections time out
Cause: the client was created without the heartbeat setting.
Fix: pass { realtime: { heartbeatIntervalMs: 2500 } } as the third argument to createClient, as SnapCloudStarter does.
Related
- Databases: create a table and read and write it from this script.
- Examples: the Snap Cloud Examples package, with working Lenses for every Snap Cloud feature.
- Storage, Edge Functions and Realtime: the other Snap Cloud services.
- Limits: the project, storage, and realtime limits to plan for.
- Snap Cloud documentation site: the full Snap Cloud reference.