External Body Mesh
- Snapchat: fully supported
- SPECS: partially supported
- Camera Kit Web: fully supported
- Camera Kit Mobile: fully supported
- SnapchatFully supported
- SPECSPartially supported
- Camera Kit WebFully supported
- Camera Kit MobileFully supported
External Body Mesh is an extension of the body mesh feature that allows you to fit meshes, such as clothes, onto the tracked user body. External meshes deform and move without any rigging and also automatically conform to tracked bodies. Adding an external mesh is a convenient approach to fit any mesh approximating a human body to the base mesh.
To add the entire body mesh setup, tracked to the body, select + in the Scene Hierarchy panel, then select Full Body Mesh. See Body Mesh.
Adding an External Mesh
To create or alter a 3D model to use as an external mesh, see External Body Mesh Creation. Once you've prepared a 3D model, import it into Lens Studio to use as an external mesh.
To use an external mesh:
-
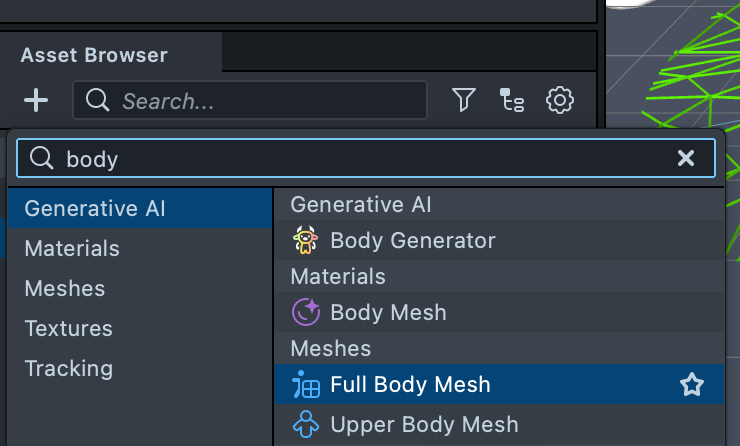
Select a Full Body Mesh asset in the Asset Browser panel. If you haven't created one yet, select + in the Asset Browser panel, then select Full Body Mesh under Meshes.
-
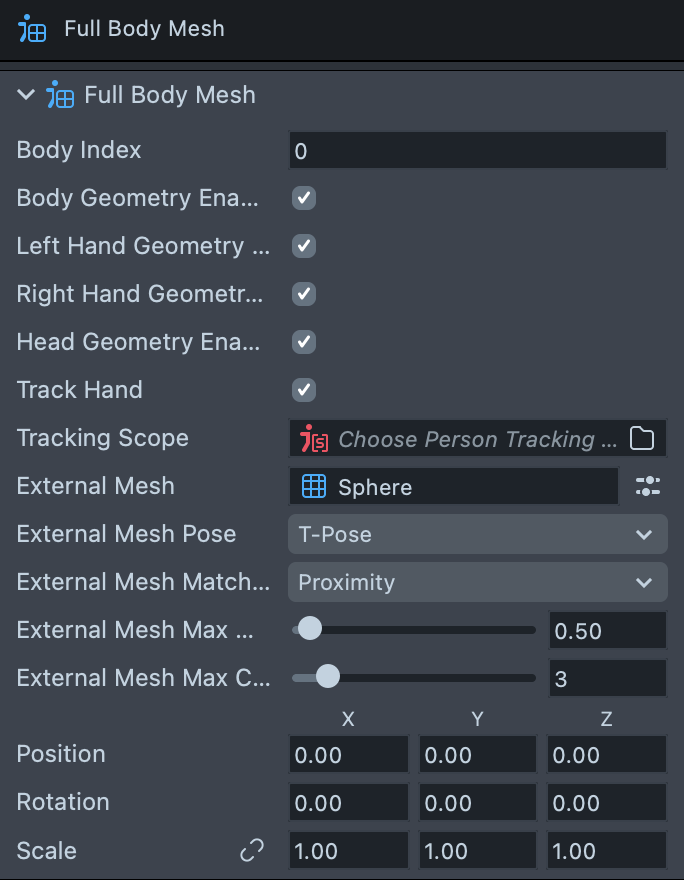
In the Inspector panel, drag the imported mesh you want to deform with the body onto the External Mesh field, or select the field and choose the mesh.
Fields
- Body Index: the tracked body whose pose and size this body mesh deforms to match.
- Body Geometry Enabled, Left Hand Geometry Enabled, Right Hand Geometry Enabled and Head Geometry Enabled: turn the submeshes for the body, the left hand, the right hand and the head on or off.
Try disabling the hands for garments with long sleeves to prevent hands from affecting the external mesh.
- External Mesh: the mesh the Body Mesh deforms to.
- External Mesh Pose: the pose used to align the external mesh to the reference mesh, T-Pose or A-Pose. It should match the rest pose of your external mesh.
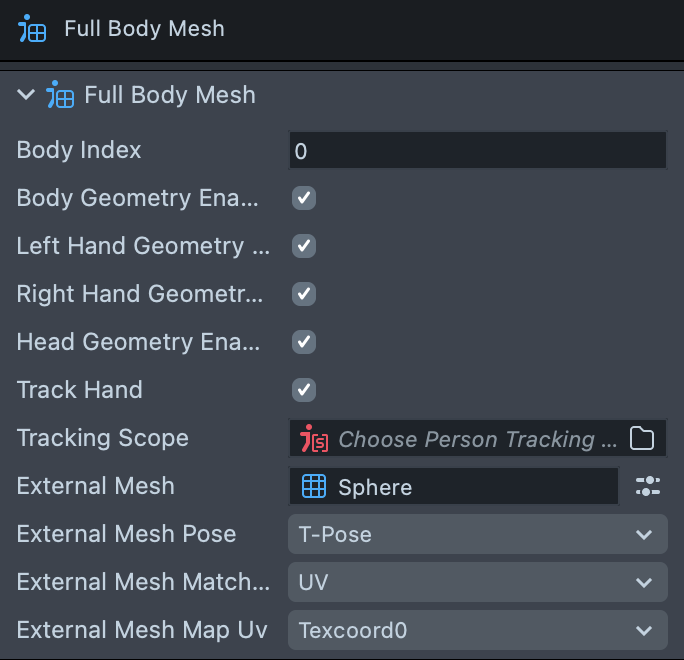
- External Mesh Matching Mode: the algorithm that calculates how the external mesh's vertices deform relative to the reference Body Mesh, Proximity or UV.
Proximity matches your external mesh to the base mesh based on the distance between the vertices of each. It adds these settings:
- External Mesh Max Distance: the maximum distance under which a body mesh vertex can match an external mesh vertex.
- External Mesh Max Count: the maximum number of vertices on the base mesh that can match an external mesh vertex.
When using proximity matching on looser garments, try higher values of External Mesh Max Distance. For looser garments you can also try higher values of External Mesh Max Count, so your external mesh deforms more smoothly along the base body mesh.
- Position, Rotation and Scale: offset, rotate and scale the external mesh to align it with the base mesh before matching.
Make sure to export your model with a transform such that the position and rotation are uniformly 0 and the scale is uniformly 1. Alternatively, you can adjust Position, Rotation and Scale here.
UV uses a UV channel to map your external mesh onto the body mesh. Pick the channel in External Mesh Map UV (Texcoord0 to Texcoord3). This setup is similar to the UV setup for an External Face Mesh, except you create UVs for the entire body, not just the face.
Usage
Once you've imported and configured your external mesh, Lens Studio processes it and it appears in the Scene panel. If your external mesh needs a material, select the Body Mesh object that uses the Full Body Mesh asset in the Scene Hierarchy panel, and set the material on its Render Mesh Visual.
The Render Mesh Visual now has a blend shape called ExternalMesh under Blend Shapes. Use it to morph between the base mesh and your external mesh.
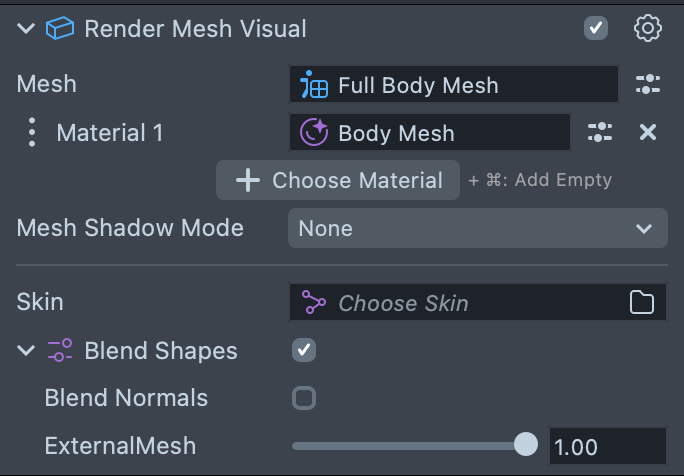
If the model seems to be missing some details, turn on Blend Normals under Blend Shapes on the Render Mesh Visual. It's off by default.
It’s possible to set up multiple body meshes with multiple external meshes and have them run at the same time. For example, you could have separate meshes for pants and a shirt. Duplicate the Full Body Mesh asset and set up the object tracking for it the same as you did for the first one. See Adding a second Body Mesh.
Next Steps
Take a look at the Clothing Try-On for examples on how to use this functionality.