Body Mesh
- Snapchat: fully supported
- SPECS: partially supported
- Camera Kit Web: fully supported
- Camera Kit Mobile: fully supported
- SnapchatFully supported
- SPECSPartially supported
- Camera Kit WebFully supported
- Camera Kit MobileFully supported
The Body Mesh feature creates a custom mesh that mimics the user’s body as a 3D mesh in real time.
When building for SPECS, Body Mesh fits the bodies of people in front of you, not your own.
Getting Started with Body Mesh
To add a Body Mesh to your Lens Studio project, select + in the Scene Hierarchy panel, then select
Full Body Mesh. Type body mesh in the menu search to find it under 3D.
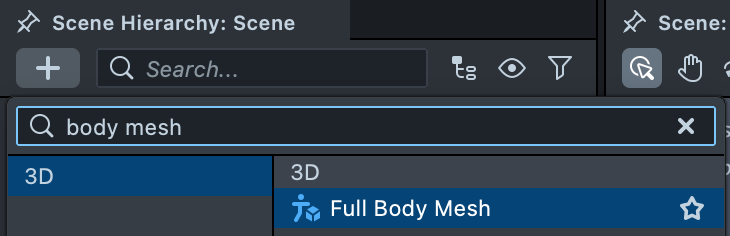
Lens Studio adds a 3D Body Tracking scene object with a Body Mesh child. In the Asset Browser panel you'll find a new 3D Body Tracking asset (the Body Tracking asset), a Full Body Mesh asset, and a default Body Mesh material.
The Body Tracking asset handles the tracking data of the body and is used by Object Tracking 3D components in the scene. The same asset can be used for multiple bodies, and can also be used for skeletal tracking. The Full Body Mesh asset is the mesh that will deform according to the tracked body.
Body Mesh Settings
Select the Full Body Mesh asset in the Asset Browser panel to see its settings in the Inspector panel:
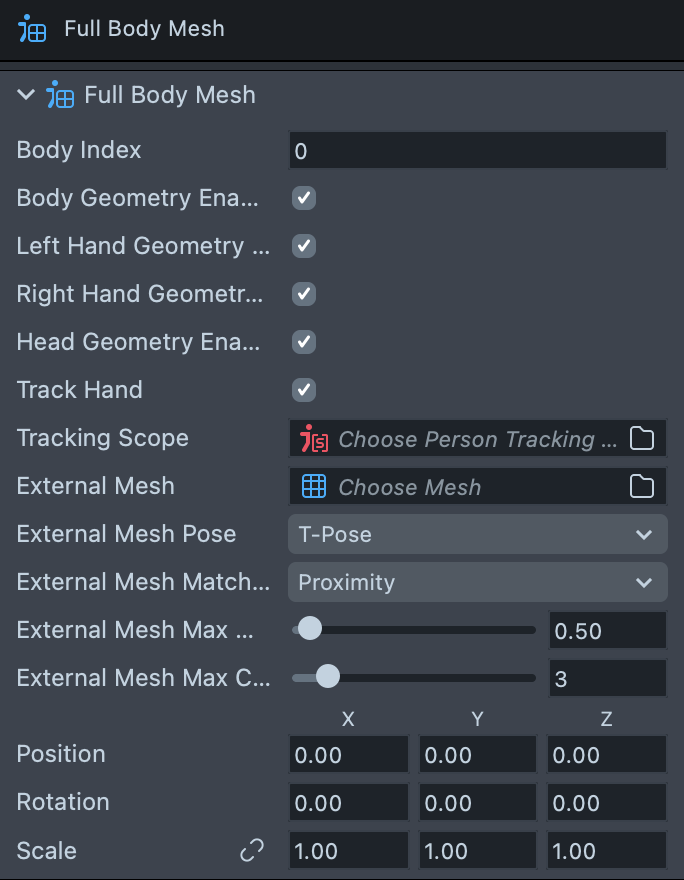
- Body Index decides which tracked body the mesh corresponds to. It should match the Object Index on the Object Tracking 3D component of the scene object that contains the Body Mesh object.
- Body Geometry Enabled, Left Hand Geometry Enabled, Right Hand Geometry Enabled and Head Geometry Enabled decide which parts of the body your body mesh includes.
- Track Hand lets the mesh's hands follow the tracked hands.
- Tracking Scope limits which people the mesh can track. See Tracking Scope.
- External Mesh and the settings below it deform an imported mesh with the body. See External Body Mesh.
You can additionally deform the body mesh based on an imported mesh. Take a look at the External Body Mesh guide to learn more.
Working with Body Meshes
Adding a second Body Mesh
You can add another Body Mesh, the same as or different from the one already in the scene. To add one:
-
In the Scene Hierarchy panel, right-click the 3D Body Tracking object and select Duplicate.
-
Select the duplicate. In the Inspector panel, set Object Index on its Object Tracking 3D component to
1, so it maps to the second person in the scene.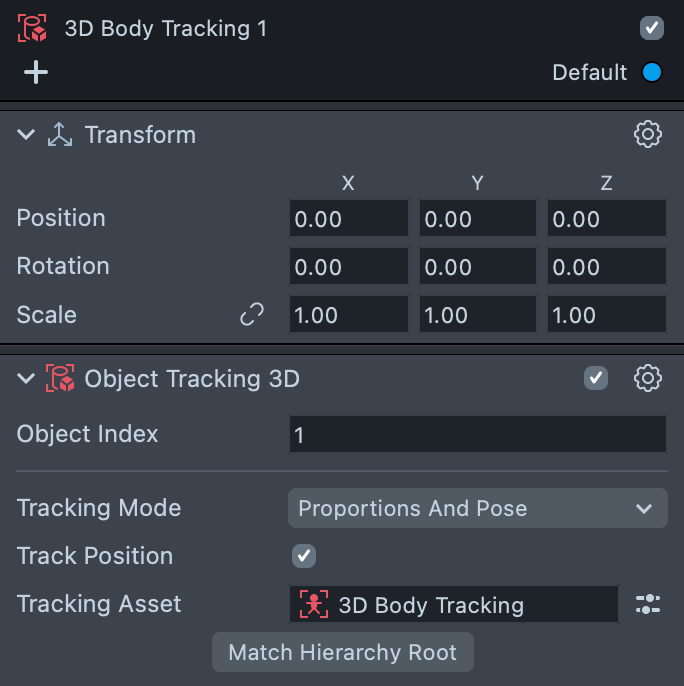
-
The second mesh still has the same shape and pose as the first. To make it track the second person, right-click the Full Body Mesh asset in the Asset Browser panel and select Duplicate.
-
Select the new asset and set its Body Index to
1as well. Then select the Body Mesh object under the duplicated tracking object and set Mesh on its Render Mesh Visual to the new asset.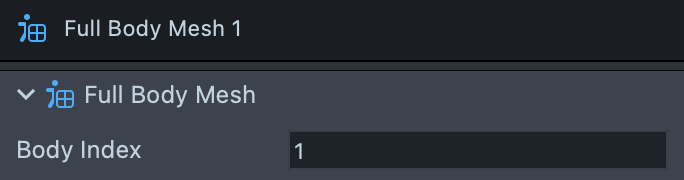
To attach objects onto the body mesh, try using the Pin To Mesh Component
Next Steps
To see examples of using a Body Mesh, check out the Body Mesh example page. To automatically fit other outfits or accessories onto the reference body mesh try creating an External Mesh.
Download the Reference 3D Body Mesh
Click here to download a zip that contains a 3D model of the Body Mesh object along with a UV map. You can use these to create modified body meshes or textures.