Marker Tracking
- Snapchat: fully supported
- SPECS: partially supported
- Camera Kit Web: fully supported
- Camera Kit Mobile: fully supported
- SnapchatFully supported
- SPECSPartially supported
- Camera Kit WebFully supported
- Camera Kit MobileFully supported
Lens Studio's Marker Tracking lets you build a Lens that tracks content to a unique physical image. Marker Tracking is ideal for Lenses that are meant to be used in the presence of a custom image. For example, you can create a Lens that places an animated 3D character on a poster or mural of your own design.
You can also set up a Marker Tracking Lens to detect and track Snapcodes.
When building for SPECS, Marker Tracking tracks image markers. Snapcode tracking isn't available on SPECS 27.
This guide covers how to create a custom tracking marker and include it in a Lens.
Creating a Marker Tracking Lens
This section covers how to create a Marker Tracking Lens in a new project. You can also follow these steps to add Marker Tracking to an existing Lens.
Several assets in the Asset Library can help you create your marker Lens, including Marker Tracking Helper.
Prepare an Image for Tracking
If you're planning to use a custom image as a tracking marker, keep the following guidelines in mind to make sure it tracks smoothly and accurately:
- Make sure your image has a lot of detail and contrast
- Avoid repetitive patterns
- Avoid low resolution images
- Use a
PNGorJPGwith a resolution of 2048 × 2048 or less
Here is an example of a bad marker. Notice the low contrast and high repetition.

Here is an example of a good marker for mobile, but NOT for Spectacles. This image has a lot of detail, contrast, and doesn't contain a repeating pattern. However, because the image is highly detailed, it won't work as well when tracking from far away, or when the camera has a wide FOV, such as Spectacles.
When building for SPECS, avoid a marker like this one. The image has a lot of detail, contrast, and doesn't contain a repeating pattern. However, because it's highly detailed, it won't track well from far away or with a wide field of view camera, such as the cameras on SPECS.
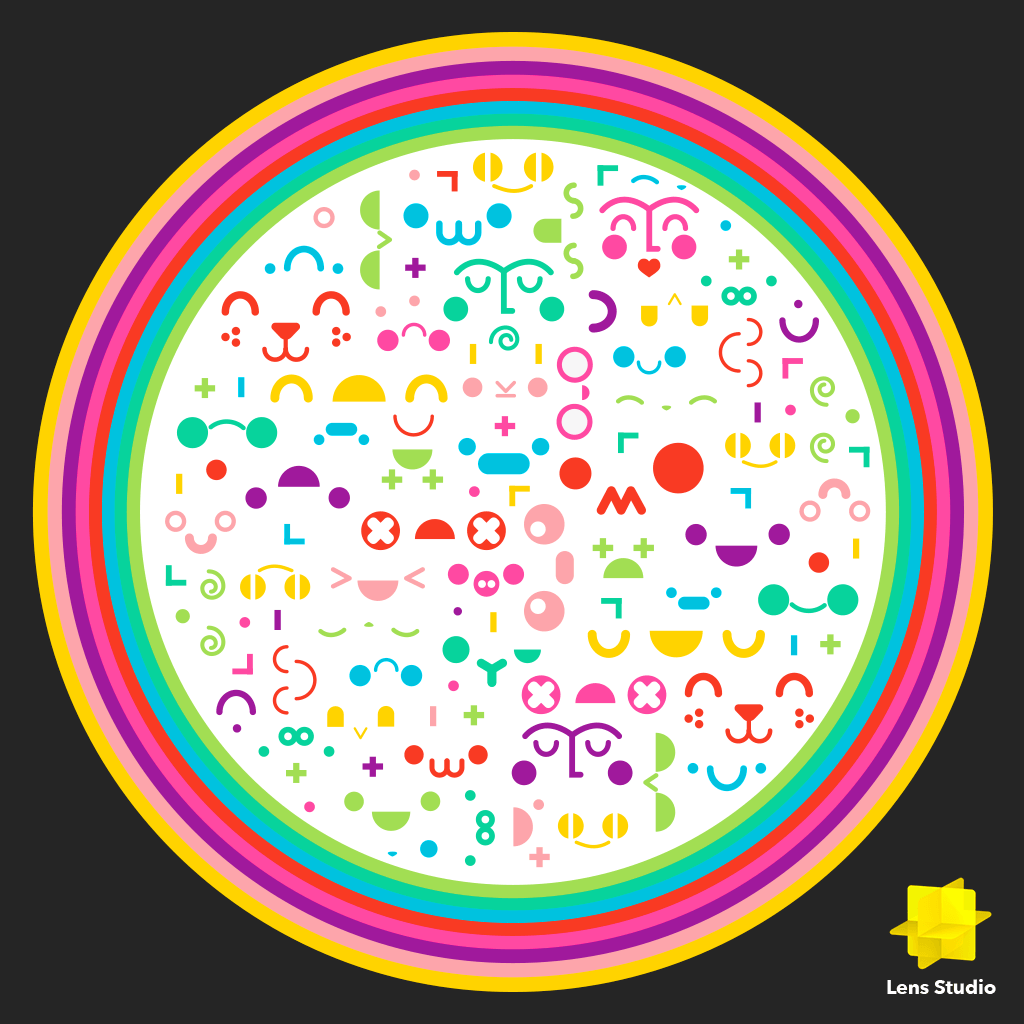
Here is an example of a great marker. This image has a lot of details, contrast, and doesn't contain a repeating pattern. Additionally, there are high contrasting features from both close and far away (for example, the rocket is distinguishable from the planets, and even within the planets, there are distinguishable features).

When building for SPECS, choose a marker like the planets image, with large, high-contrast features that stay distinct from far away. Set the marker's Marker Height to the size of the printed or displayed image, in centimeters, or the tracked content will be misaligned with the target.
You can download these images to see the full size resolution.
Create a New Project
Create a new project by selecting File > New Project from the Lens Studio menu.
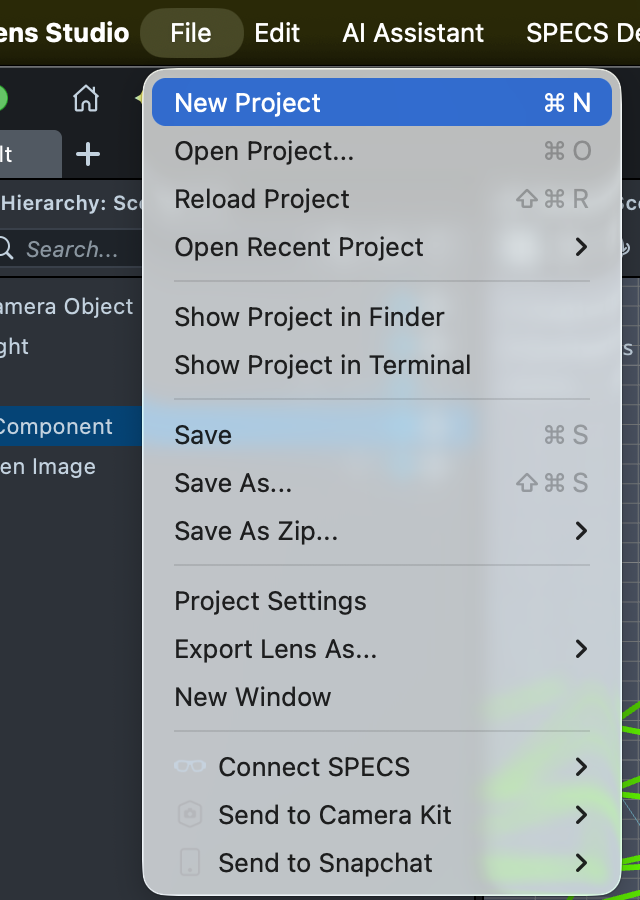
Create a Marker Tracking Object
Marker Tracking requires a Marker Tracking object in your scene.
Your Lens can use Image Tracking, Snapcode Tracking, or both.
Adding Image Tracking
To set up your Lens to track a custom image:
-
In the Scene Hierarchy panel, select + > Image Marker. Type
markerin the menu search to find it under Tracking.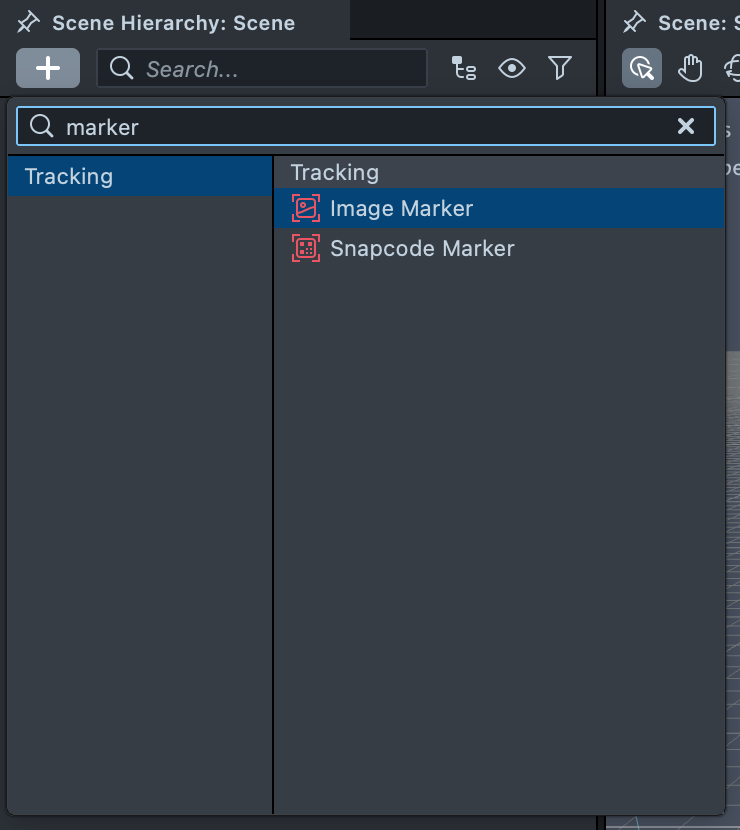
-
In the Select image for the marker dialog, choose a
PNGorJPGfile from your computer and select Open. -
In the Scene Hierarchy panel, you now see an Image Tracking object under your Camera Object.
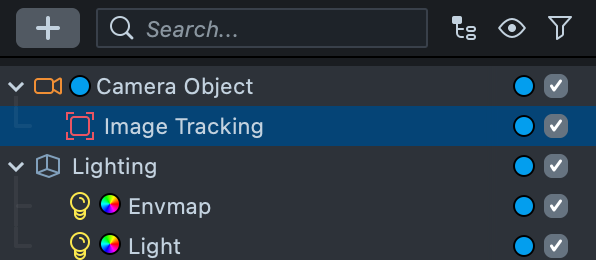
-
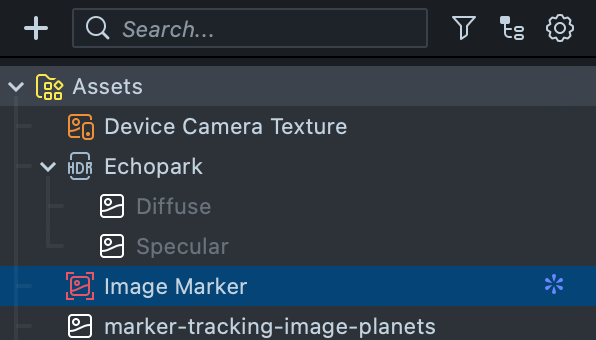
In the Asset Browser panel, you now see an Image Marker asset and the image you imported.
-
Select the Image Marker asset in the Asset Browser panel.
-
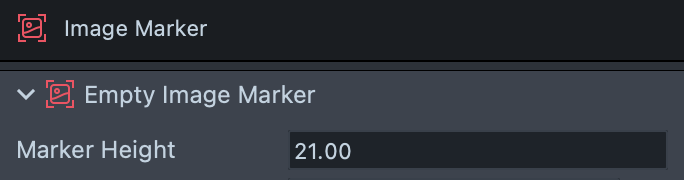
In the Inspector panel, set Marker Height to the vertical size of the physical image, in centimeters (cm). For example, if your Lens tracks content to a printed sticker that's 8 cm tall, set Marker Height to 8. Marker Texture shows the image the marker tracks.
Adding Snapcode Tracking
-
In the Scene Hierarchy panel, select + > Snapcode Marker. Type
markerin the menu search to find it under Tracking.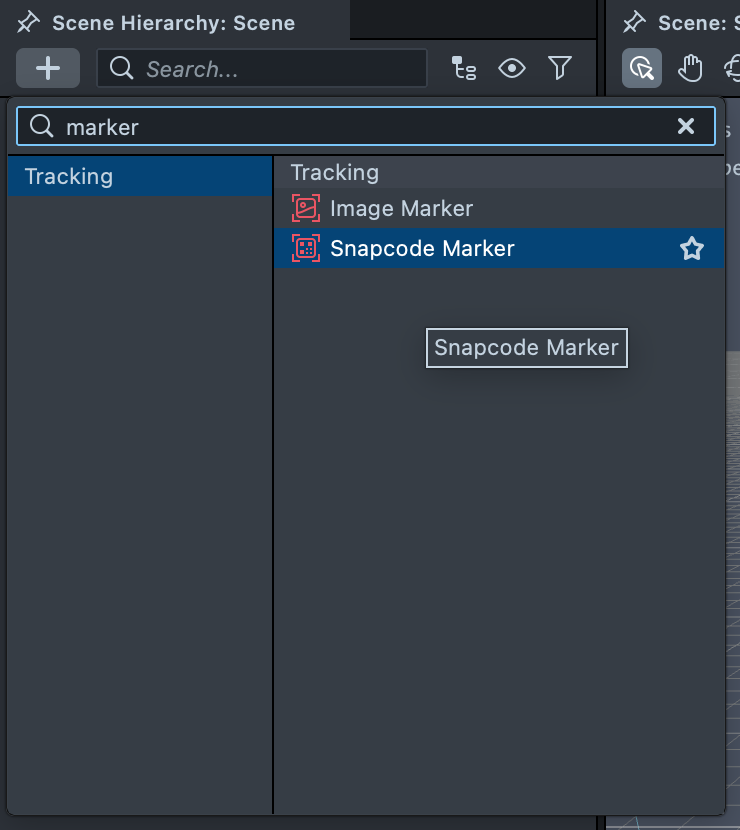
-
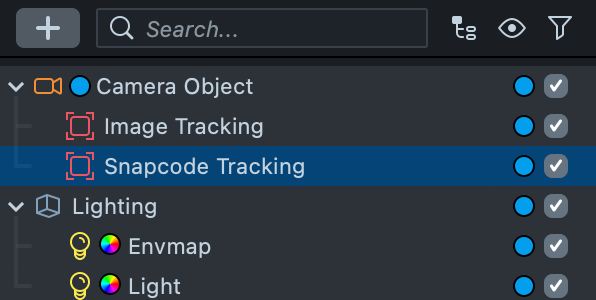
In the Scene Hierarchy panel, you now see a Snapcode Tracking object under your Camera Object.
-
In the Asset Browser panel, you now see a Snapcode Marker asset.
-
Select the Snapcode Marker asset in the Asset Browser panel.
-
In the Inspector panel, set Marker Height to the vertical size of the physical Snapcode, in centimeters (cm). For example, if your Lens tracks content to a printed sticker that's 8 cm tall, set Marker Height to 8.
Marker Tracking objects, such as Image Tracking, must be children of your scene's main camera to track properly. The + menu items put them under Camera Object for you.
You can include up to 10 marker images in a Lens, as well as Snapcode Tracking objects. Only one image and one Snapcode are tracked at a time, but a single image and a single Snapcode can be tracked at the same time.
You can include up to 10 marker images in a Lens. Only one image is tracked at a time.
Orienting the Marker Tracking Object
By default, the Marker Tracking object is created in a vertical orientation. Objects are tracked to the marker image itself, so a marker oriented horizontally in Lens Studio still tracks the same image when it's vertical in real life. Orienting your marker in Lens Studio only helps your development process.
Placing Content
Any content you want to track to your marker should already be imported to your scene and set up as a scene object. Make it a child of the Marker Tracking object you created in the previous section.
To set up your content:
-
In the Scene Hierarchy panel, select the scene object you want to track to the marker.
-
Drag the scene object onto the Marker Tracking object you created, such as Image Tracking, so that it becomes its child.
-
In the Scene panel, align the scene object's position with the position of the marker.
-
Scale the scene object as you see fit. The Marker Height you set on the marker asset is the marker's size in centimeters in physical space, so use the marker's size as a guide for scaling your content.
To learn more about importing 2D and 3D content to your scene, see Importing and Updating Resources.
Previewing The Lens
To preview your Marker Tracking Lens in the Preview panel, play a video of your marker:
-
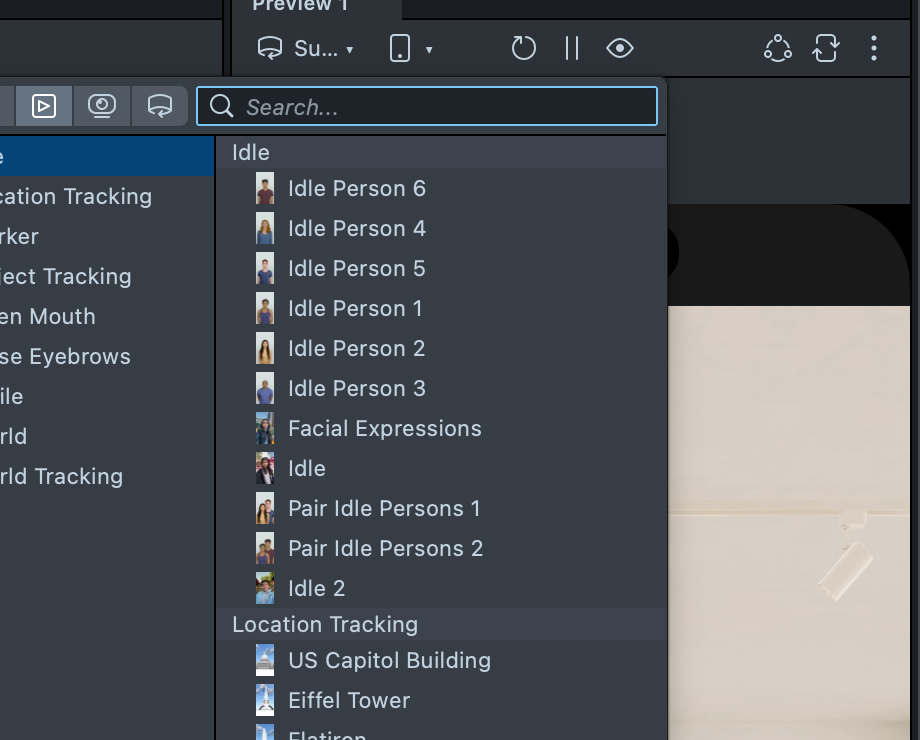
At the top of the Preview panel, select the preview input dropdown, then select the video tab.
-
Choose a sample video from the Marker category, or select Import From Files to use a video of your own marker.
-
If you imported a video, find the video file and open it. The Preview panel selects and plays it.
-
Your content should be aligned to the marker whenever the marker is on screen.
When building for SPECS, the Preview panel's input dropdown offers Interactive Previews (simulated rooms) and your computer's camera, but no video import.
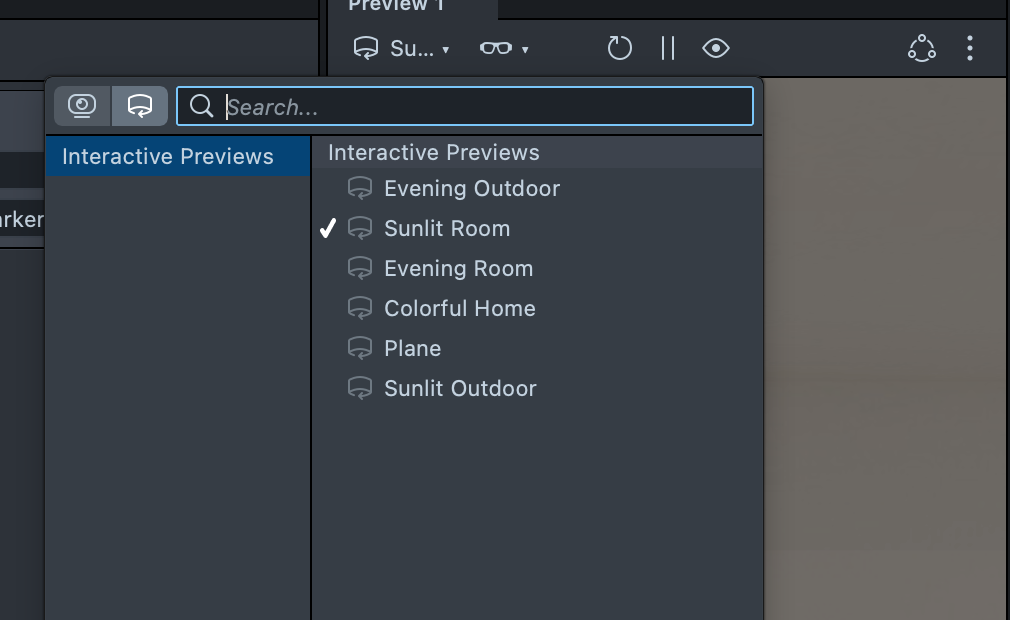
To test marker tracking, print or display your marker at the Marker Height you set, then send the Lens to SPECS and look at the marker. You can also hold a printed marker up to your computer's camera in the Preview panel.
Additional Information
Marker Resources
Marker Tracking requires a marker asset. The marker asset defines the target image the Lens tracks and its expected physical size.
Marker assets come in two types: Image Marker and Snapcode Marker. A marker asset is created automatically when you add an Image Marker or Snapcode Marker object to your scene, but you can also create one yourself in the Asset Browser panel.
When building for SPECS, use an Image Marker. It's created automatically when you add an Image Marker object to your scene, but you can also create one yourself in the Asset Browser panel.
Creating an Image Marker Resource
If you want your Lens to track a specific image, create an Image Marker.
To create an Image Marker:
-
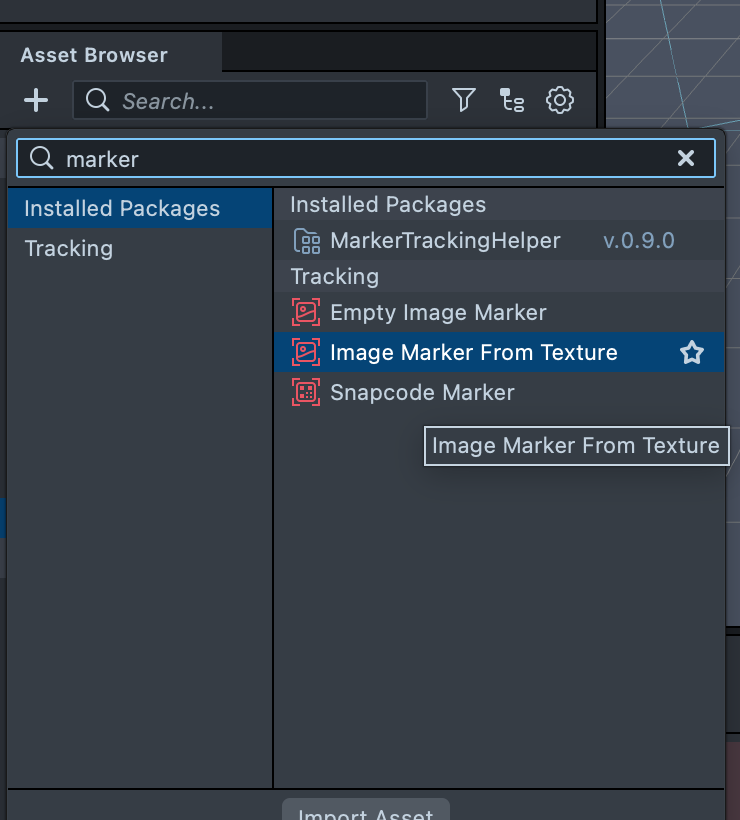
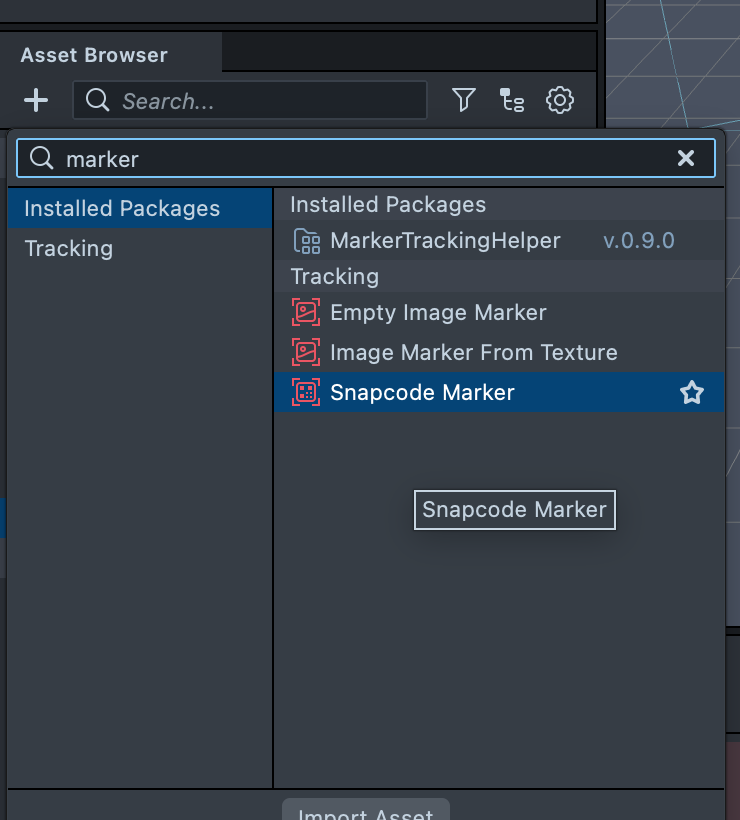
In the Asset Browser panel, select + > Image Marker From Texture, and choose your image. To pick the texture later, select + > Empty Image Marker instead.
-
If you created an Empty Image Marker, import your texture into Lens Studio, select the Image Marker asset, and in the Inspector panel set Marker Texture to that texture.
-
In the Inspector panel, set Marker Height to the vertical size of the physical image, in centimeters (cm). For example, if your Lens tracks content to a printed sticker that's 8 cm tall, set Marker Height to 8. The marker's transform is then scale accurate: 1 unit in the
Transformcomponent is 1 cm.
Creating a Snapcode Marker Resource
If you want your Lens to track Snapcodes, create a Snapcode Marker.
To create a Snapcode Marker:
-
In the Asset Browser panel, select + > Snapcode Marker.
-
Select the new Snapcode Marker asset in the Asset Browser panel.
-
In the Inspector panel, set Marker Height to the vertical size of the physical Snapcode, in centimeters (cm). For example, if your Lens tracks content to a printed Snapcode that's 8 cm tall, set Marker Height to 8.