Instant World Hit Test
- Snapchat: fully supported
- SPECS: not supported
- Camera Kit Web: not supported
- Camera Kit Mobile: fully supported
- SnapchatFully supported
- SPECSNot supported
- Camera Kit WebNot supported
- Camera Kit MobileFully supported
Overview
The Instant World Hit Test asset enables users to start interacting with world-facing Lenses instantly. Currently there needs to be a UI prompt for the user to look around for a few seconds before generating the World Mesh and causes a decrease in user engagement.
With this asset library Custom Component, the Lens Creator can start hit testing right on the depth texture and ask for callbacks when a World Mesh hit test is found that is more accurate. This will increase user engagement for the use cases of AR object placement and projectile shooting.
Notice that the user can shoot candy canes instantly with this Lens. The blue candy canes were shot using a hit result from the depth texture since the World Mesh haven't generated in that area yet. Notice that the World Mesh does eventually generate in that area, and the candy canes were upgraded from blue to red to indicate that they have their position and orientation upgraded from a depth texture hit result to a World Mesh hit result.
Capabilities
Instant World Hit Test enables hit testing right from the beginning of Lens session. It uses both depth texture and World Mesh for hit testing results. Adding this asset to a Lens Studio project will give instant World Mesh hit testing ability to Lens Creators. It uses the deviceTracking.hitTestWorldMesh(screenPosition) method, which is deprecated since Lens Scripting Version 378; in your own scripts, use WorldRaycast.hitTestWorldMesh(screenPos, camera) instead.
If that method returns no results, it will then sample the corresponding pixel in the depth texture for a depth value which is projected to a coordinate in world space. This is generally sufficiently accurate (±10% of the true depth) to be used for object placement, which is one of the primary use cases of the hitTestWorldMesh method. Additionally, this asset also offers a optional callback on a depth texture hit testing that will check for and return when possible a World Mesh hit test of similar start and end positions.
Installation
The Instant World Hit Test custom component can be found in Lens Studio Asset Library
In the Asset Library, type in Instant World Hit Test in the Search field of Asset Library, navigate to the Instant World Hit Test asset and click Install.
Adding To The Scene
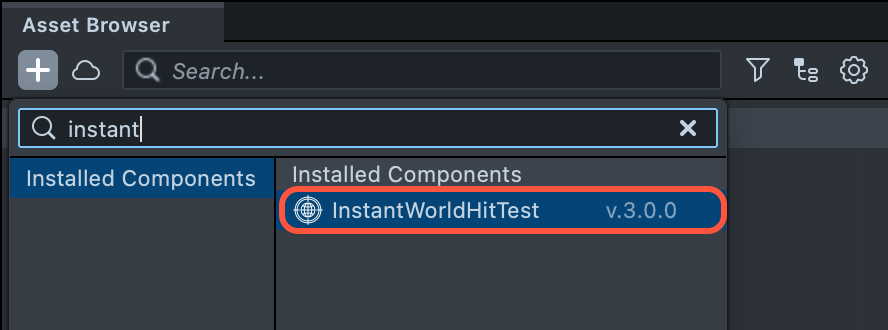
In the Asset Browser, click + button, scroll to the right to Custom Components tab, and select the InstantWorldHitTest custom component.
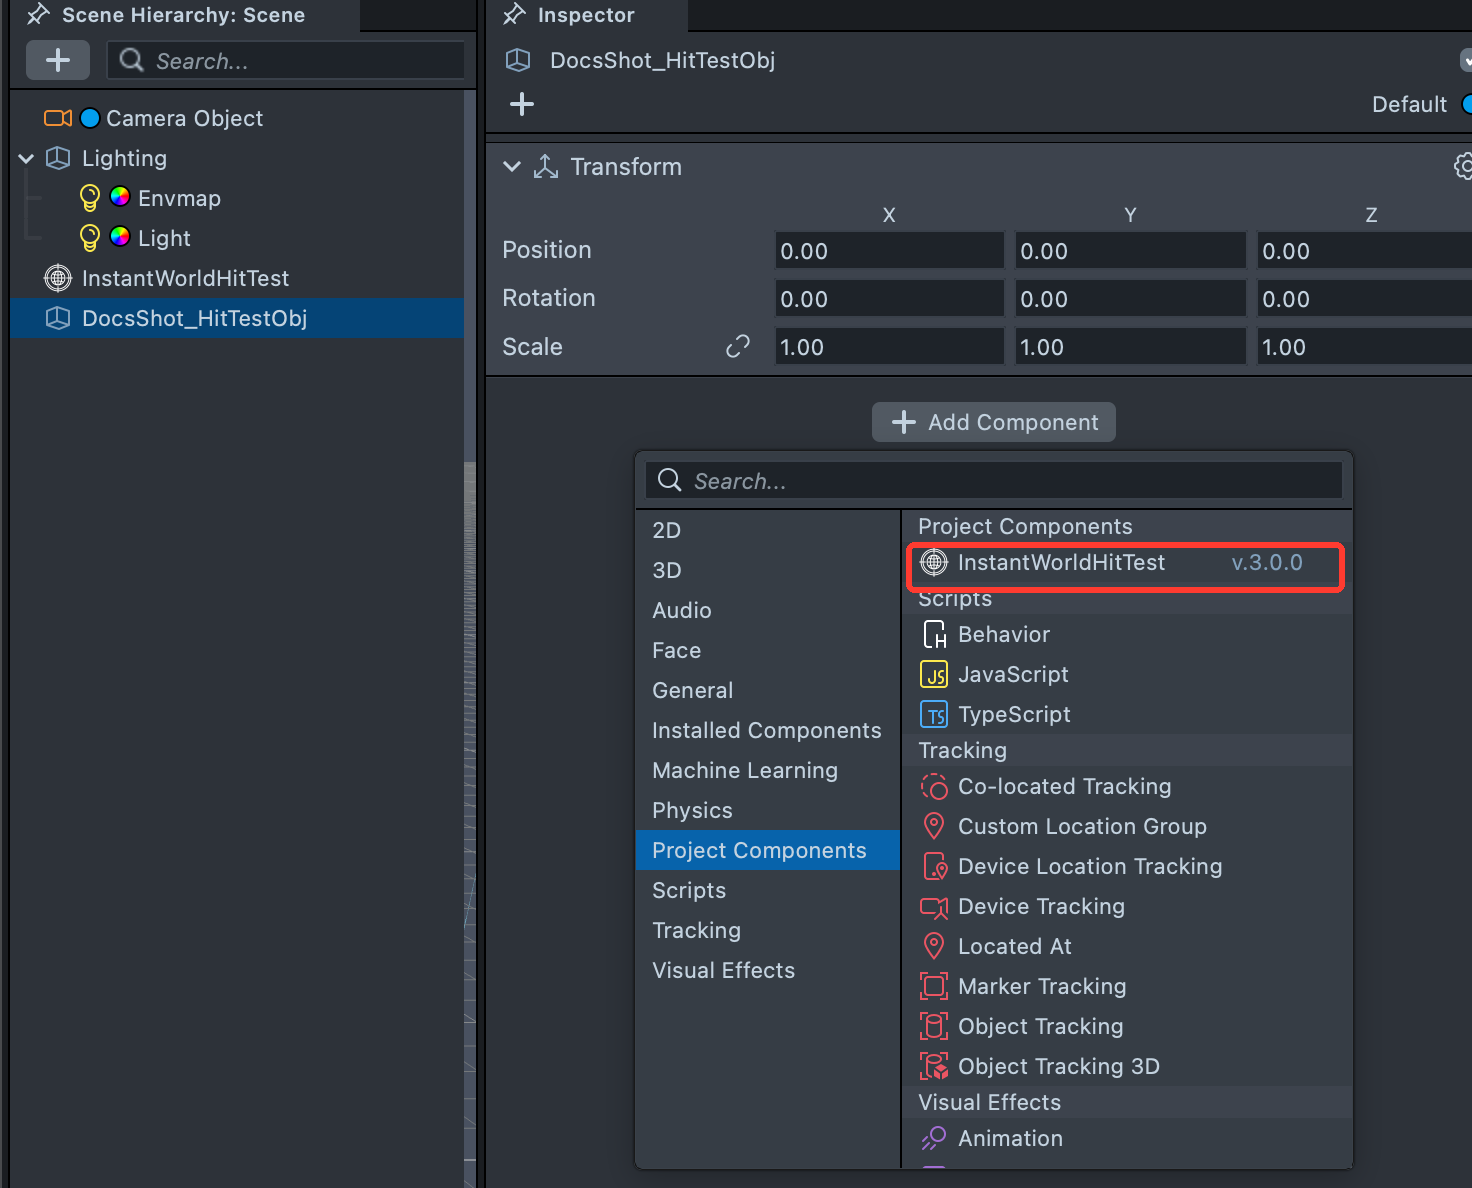
In the Scene Hierarchy, create a Scene Object. Select it, and click Add Component button in the Inspector Panel. Scroll to the right to either the Custom Components - Local Library or Custom Components - Asset Library tabs to find the InstantWorldHitTest component.
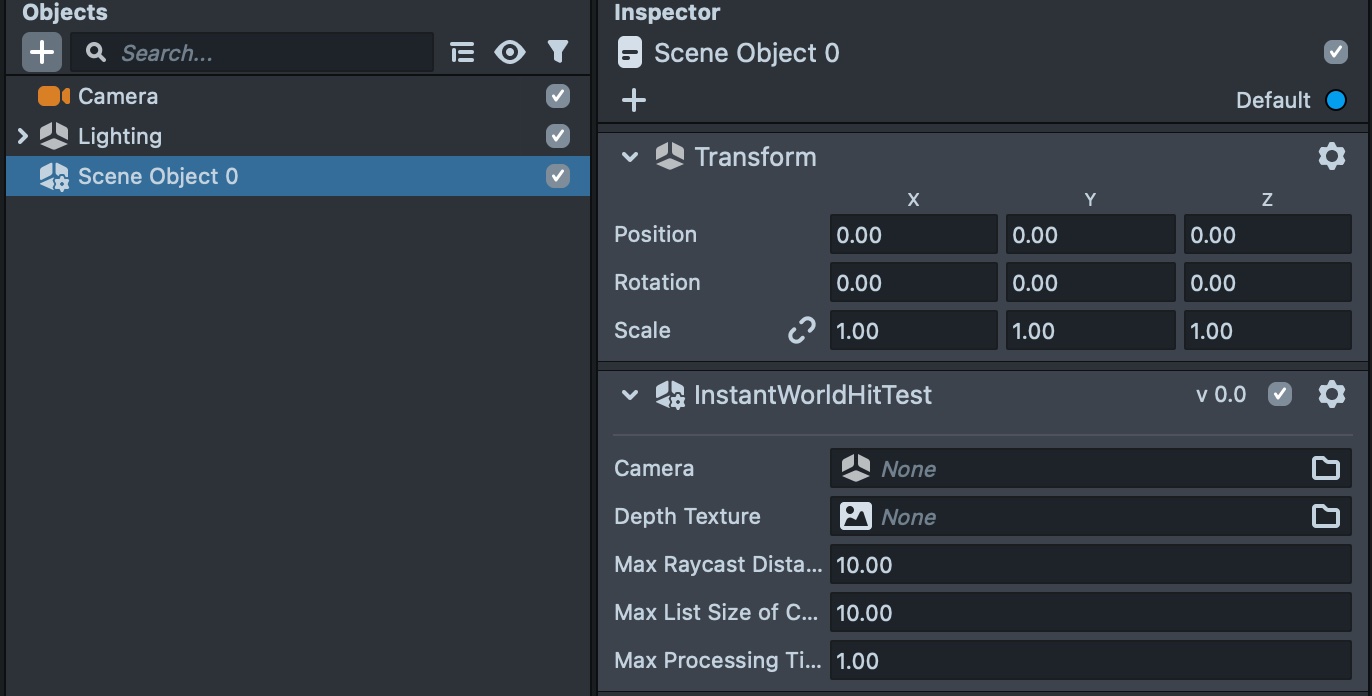
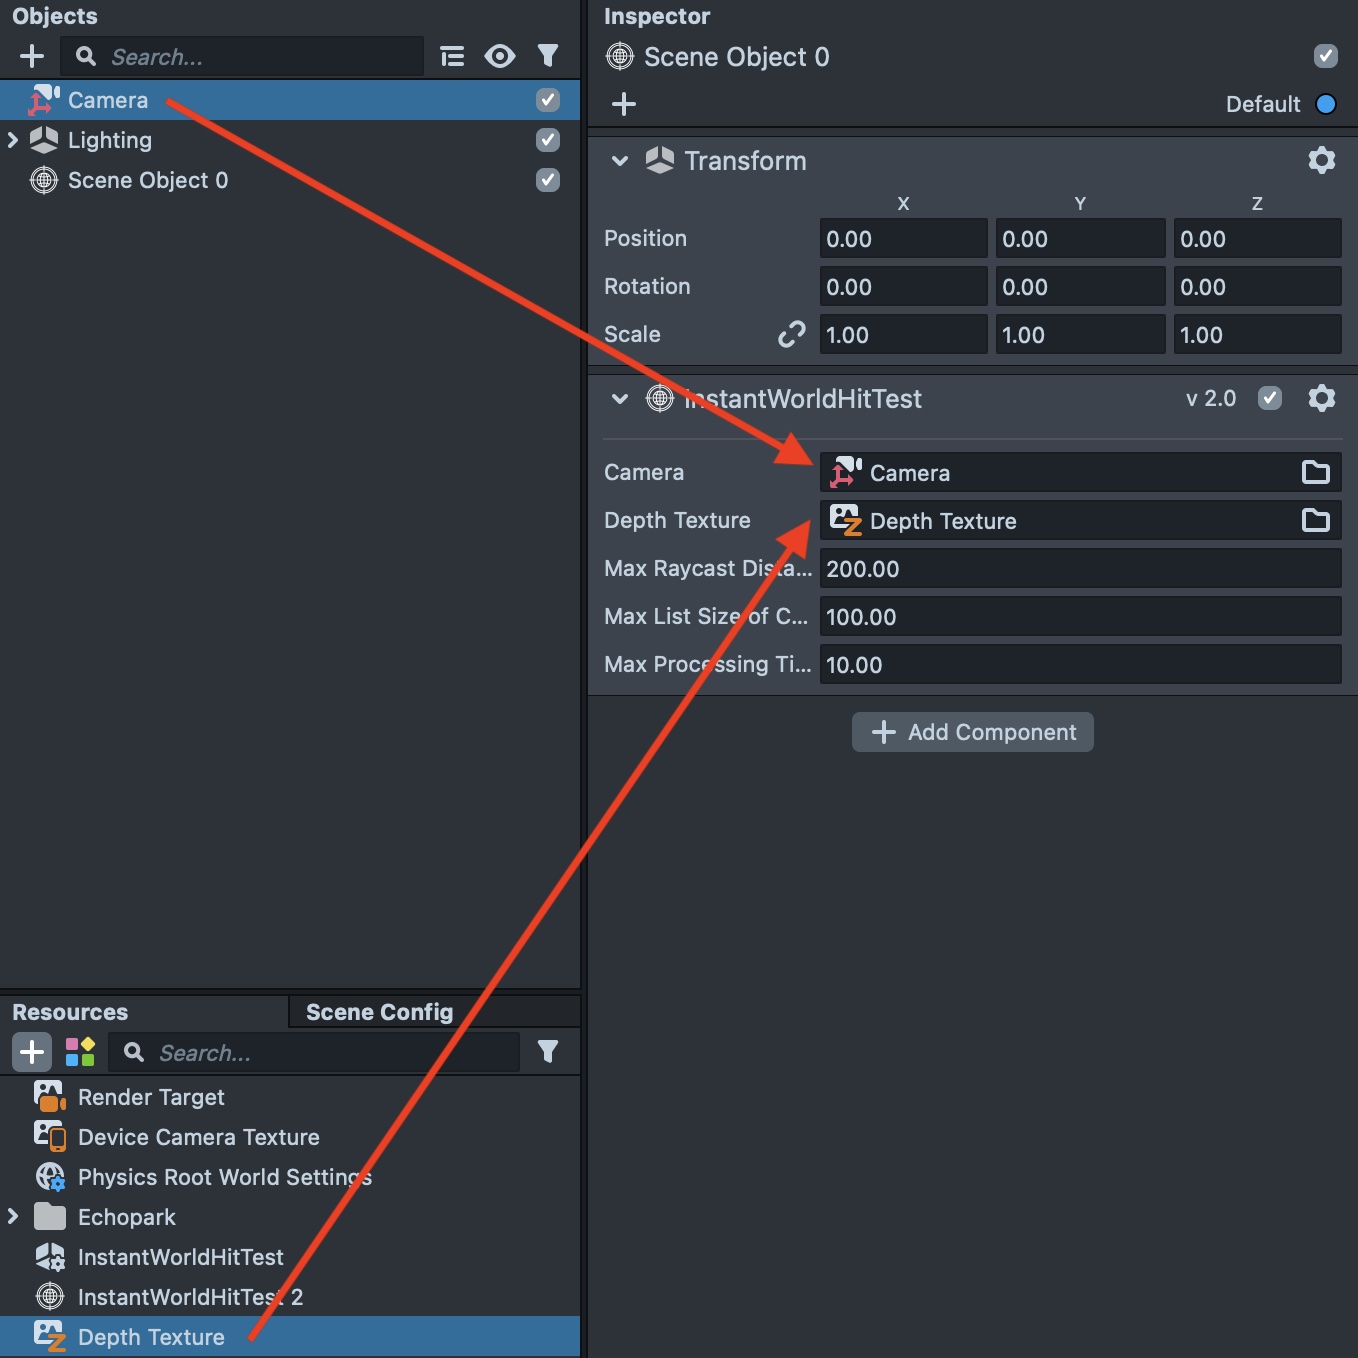
Add the InstantWorldHitTest component to your Scene Object. Notice there is reference needed for the camera in the scene and for a Depth Texture resource.
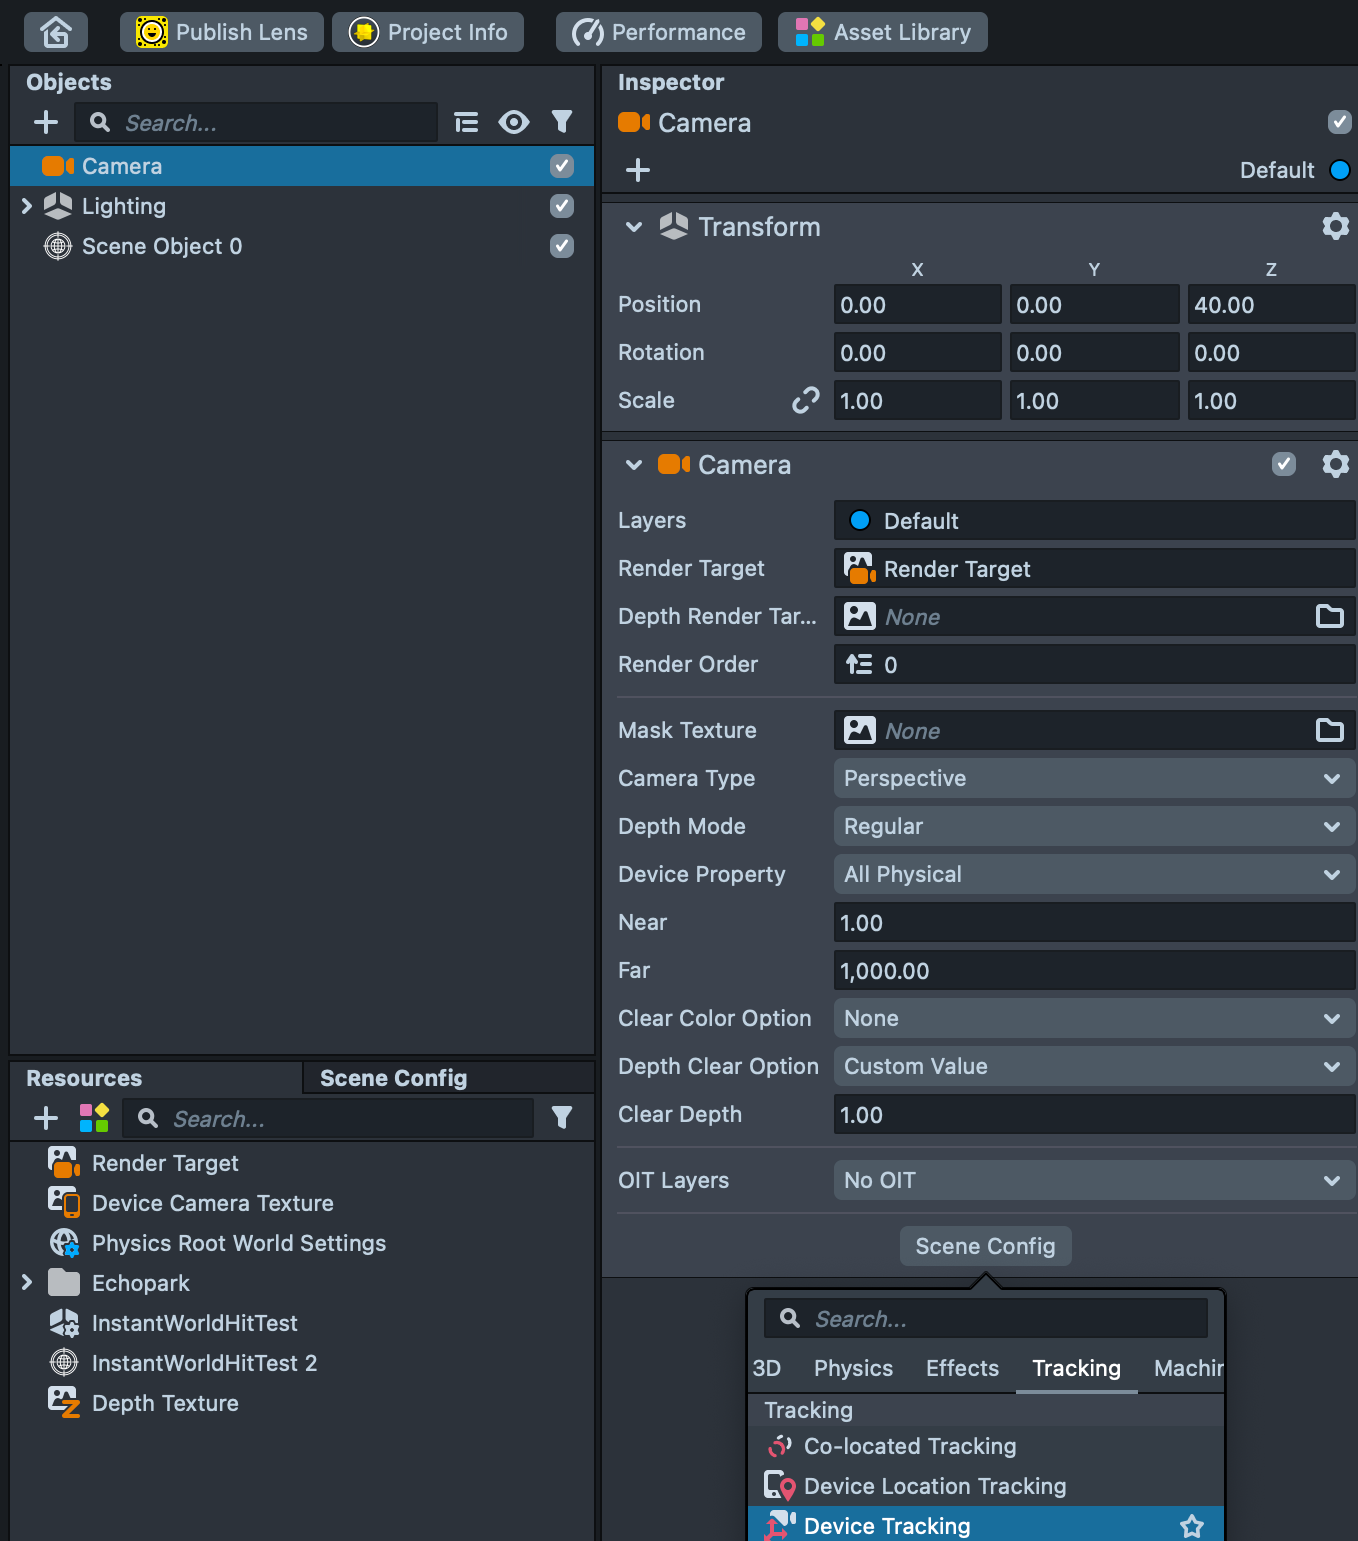
The Camera Scene Object will need a Device Tracking component attached to it for this all to work.
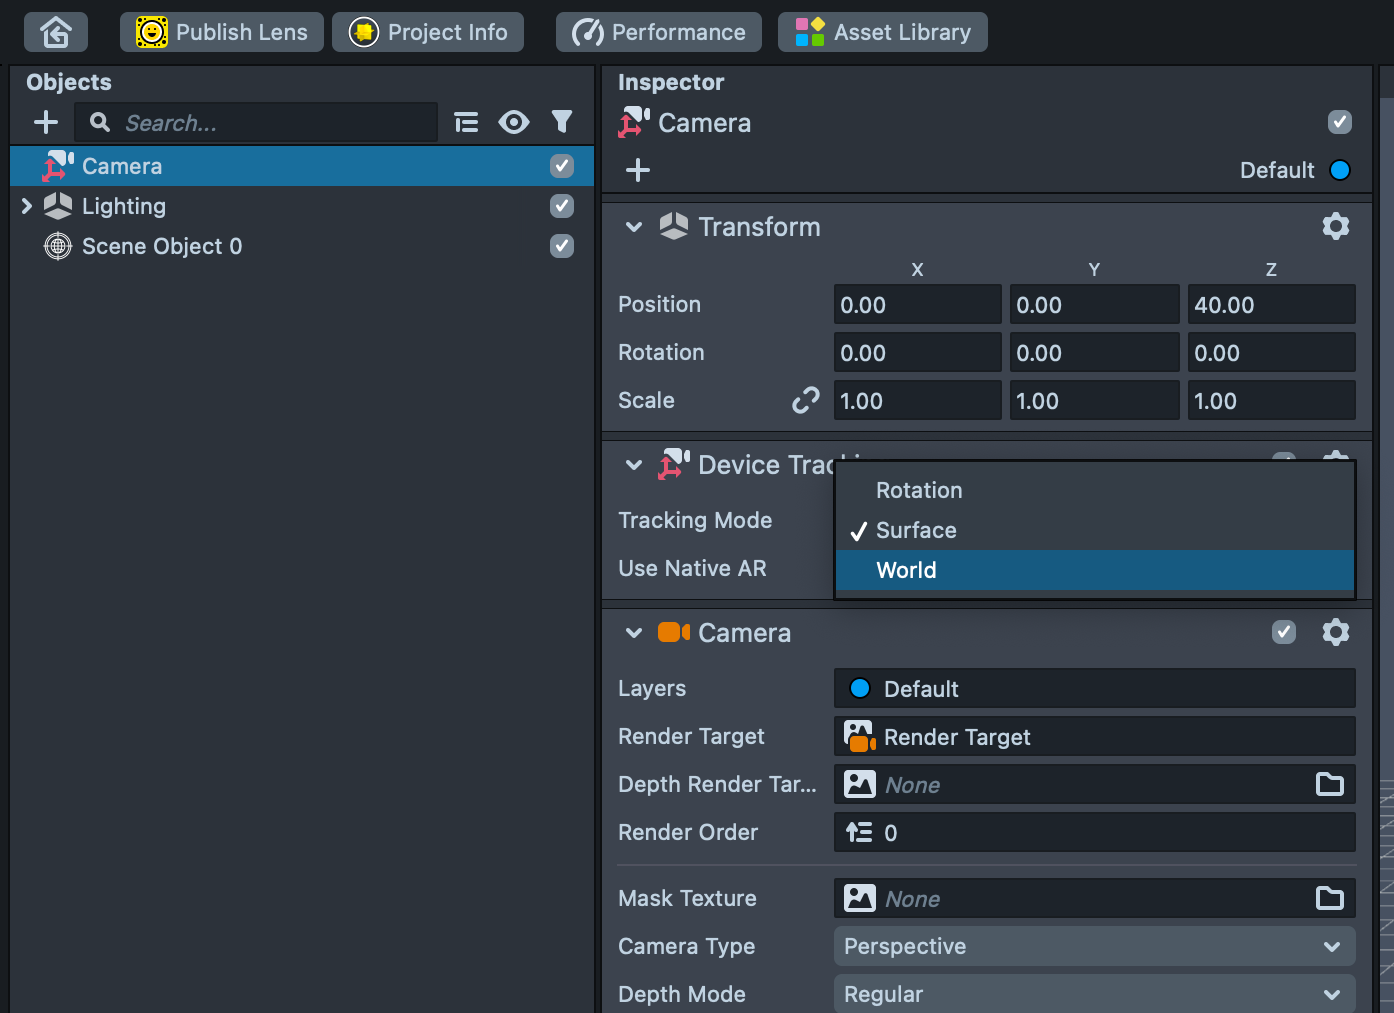
Select the Camera Scene Object and add a Device Tracking component, and set it to World Tracking Mode.
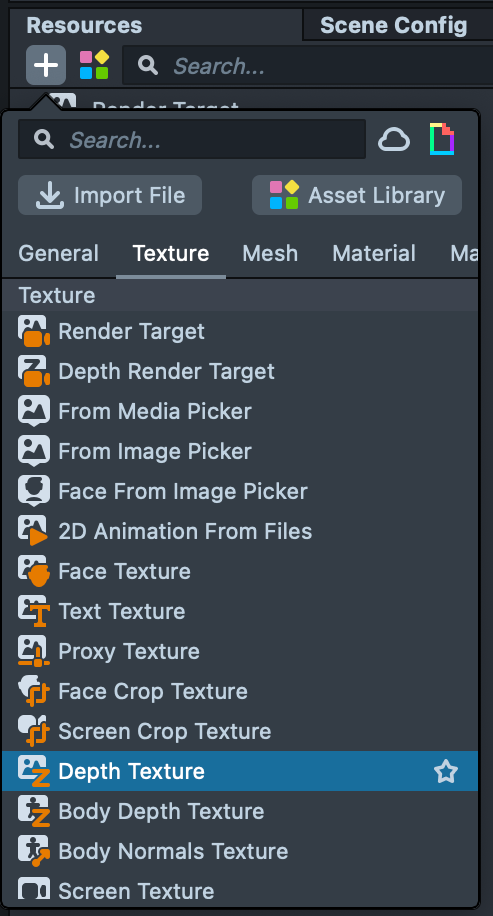
Next, add a Depth Texture Resources in the Asset Browser.
Now, we can assign the two references of the InstantWorldHitTest component by dragging the Camera Scene Object onto the Camera reference and the Depth Texture Resources onto the Depth Texture reference. You can leave the other properties of the InstantWorldHitTest component at their default settings. They are customizable but that is usually for edge cases.
All that is left, is to connect up a World Mesh resource to the Lens. You can accomplish all the necessary steps at once, if you create a World Mesh Scene Object, which is under the Mesh tab of the Scene Hierarchy. Manually, you would have to create a World Mesh Resource, then create a Scene Object, then a Render Mesh Visual Component, and then connect the World Mesh Resource to the Render Mesh Visual Component.
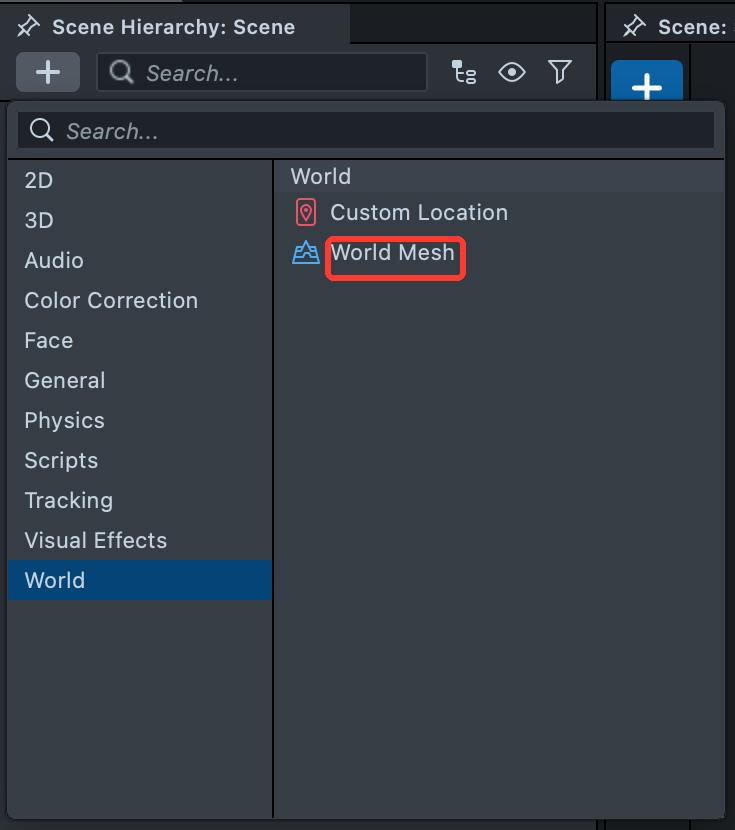
The Render Mesh Visual will have the World Mesh Default material assigned to it, which makes the World Mesh appear on screen. This is good for debugging, and may suit your final Lens' needs. If not, please ensure you replace the material. You can create a basic invisible material by creating an Unlit Material Resource, setting its blend mode to normal, and setting its base color's opacity to zero.
Building a Simple Lens Projects
Let's build a basic sample project to show off the Instant World Hit Test feature in a Lens. First, create a Script Resource.
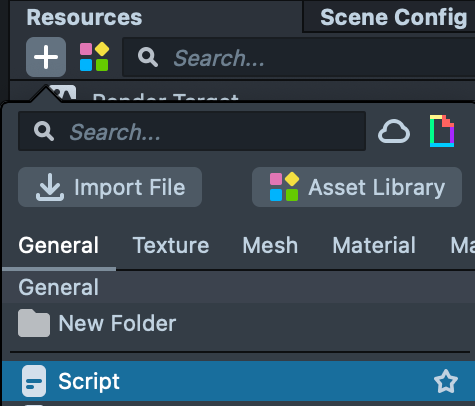
Let's call it LensLogic as it is going to run the logic of our Lens. Now write this code in the Script Editor Panel and save it to that Script Resource. It will create some basic Lens logic that listens for a tap event from the user. It then instantiates a prefab and calls hitTest method on the instantWorldHitTest component with a callback method provided by the prefab logic script, which we will write in a bit.
// @input Component.ScriptComponent instantWorldHitTest
// @input Asset.ObjectPrefab prefab

script.createEvent('TapEvent').bind((eventData) => {
  var tapPosition = eventData.getTapPosition();
  var instance = script.prefab.instantiate(script.getSceneObject());
  var prefabLogic = instance.getComponent('Component.ScriptComponent');
  var hitResult = script.instantWorldHitTest.hitTest(
    tapPosition,
    prefabLogic.onFoundBetterHitTestResult
  );
  prefabLogic.setInstance(hitResult);
});
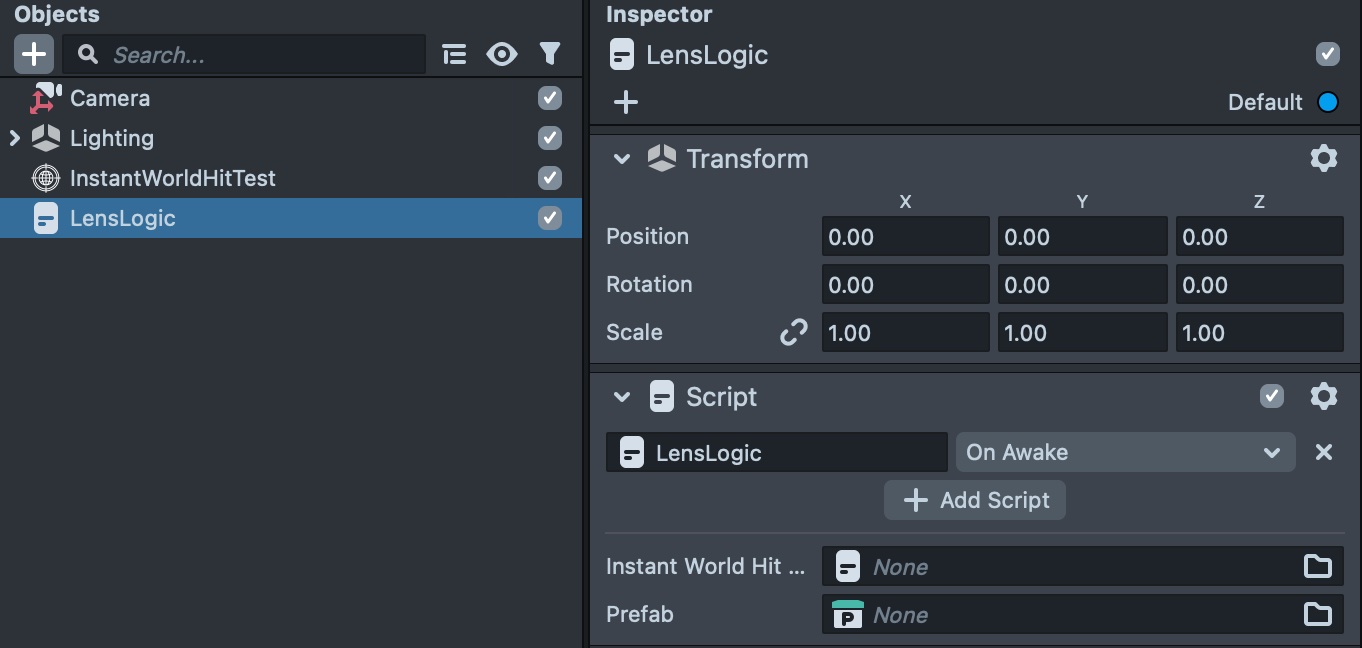
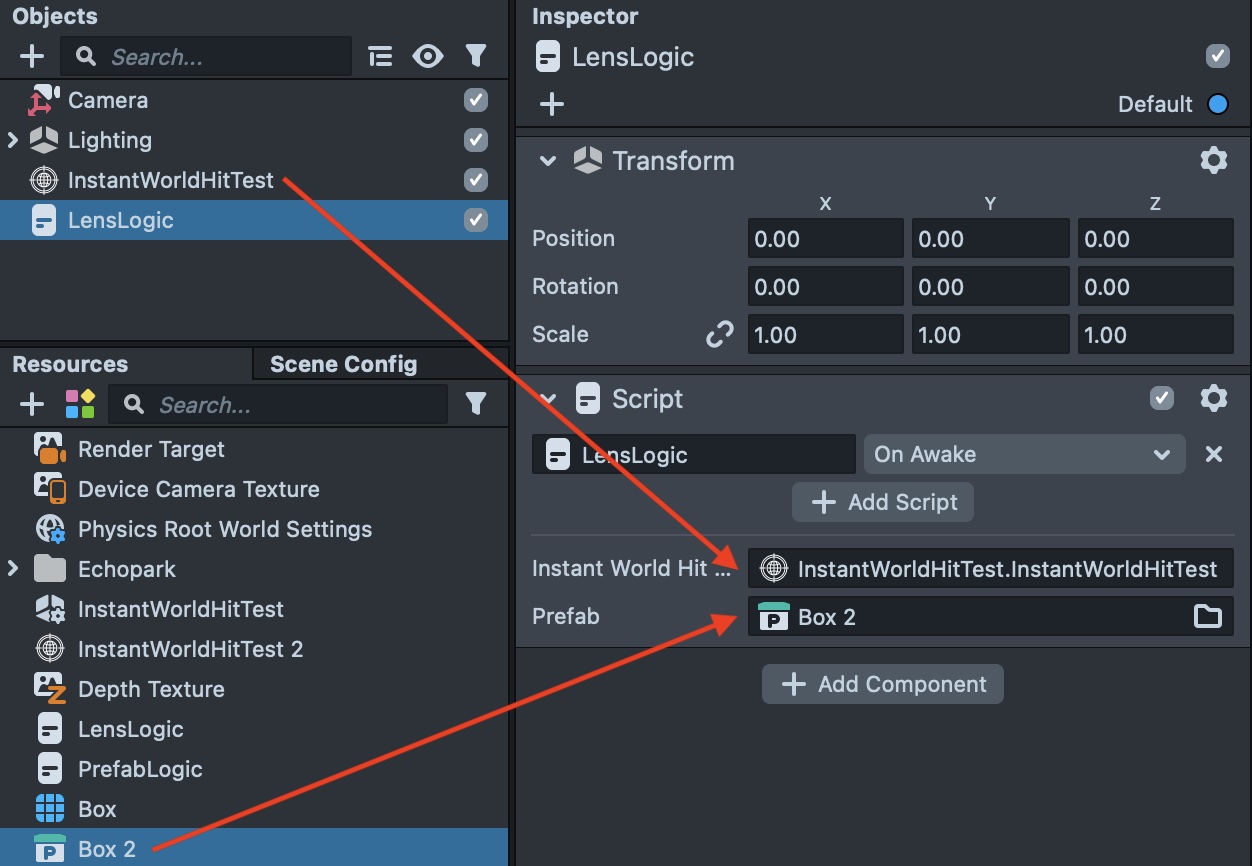
Now create a Scene Object, call it LensLogic and add the Script Resource as a component. Notice there are two references that we need to connect up, the Instant World Hit Test component and a Prefab.
Create another Script Resource, call it PrefabLogic, and save this code in it. This will give logic to prefabs that we instantiate at runtime. It will set the position and rotation of the instantiated prefab's transform with the returned hitResult object from instantWorldHitTest.hitTest method. It also has a callback method in case a depth texture hitResult was found instead of a World Mesh hitResult. The callback is called from instantWorldHitTest when it finds an upgraded hitResult from World Mesh. It is a good convention to remove the callback from the instantWorldHitTest event with the eventHandler.off method so that instantWorldHitTest knows to stop checking for that upgraded hitTest.
var instantWorldHitTestEventHandler = null;
var transform = script.getTransform();

script.setInstance = function (hitResult) {
  if (hitResult.eventHandler) {
    instantWorldHitTestEventHandler = hitResult.eventHandler;
  }
  transform.setWorldPosition(hitResult.hits[0].position);
  var rotation = quat.lookAt(hitResult.hits[0].normal, vec3.up());
  transform.setWorldRotation(rotation);
};

script.onFoundBetterHitTestResult = function (newHitResult) {
  if (instantWorldHitTestEventHandler) {
    instantWorldHitTestEventHandler.off(script.onFoundBetterHitTestResult);
    instantWorldHitTestEventHandler = null;
  }
  transform.setWorldPosition(newHitResult.hits[0].position);
  var rotation = quat.lookAt(newHitResult.hits[0].normal, vec3.up());
  transform.setWorldRotation(rotation);
};
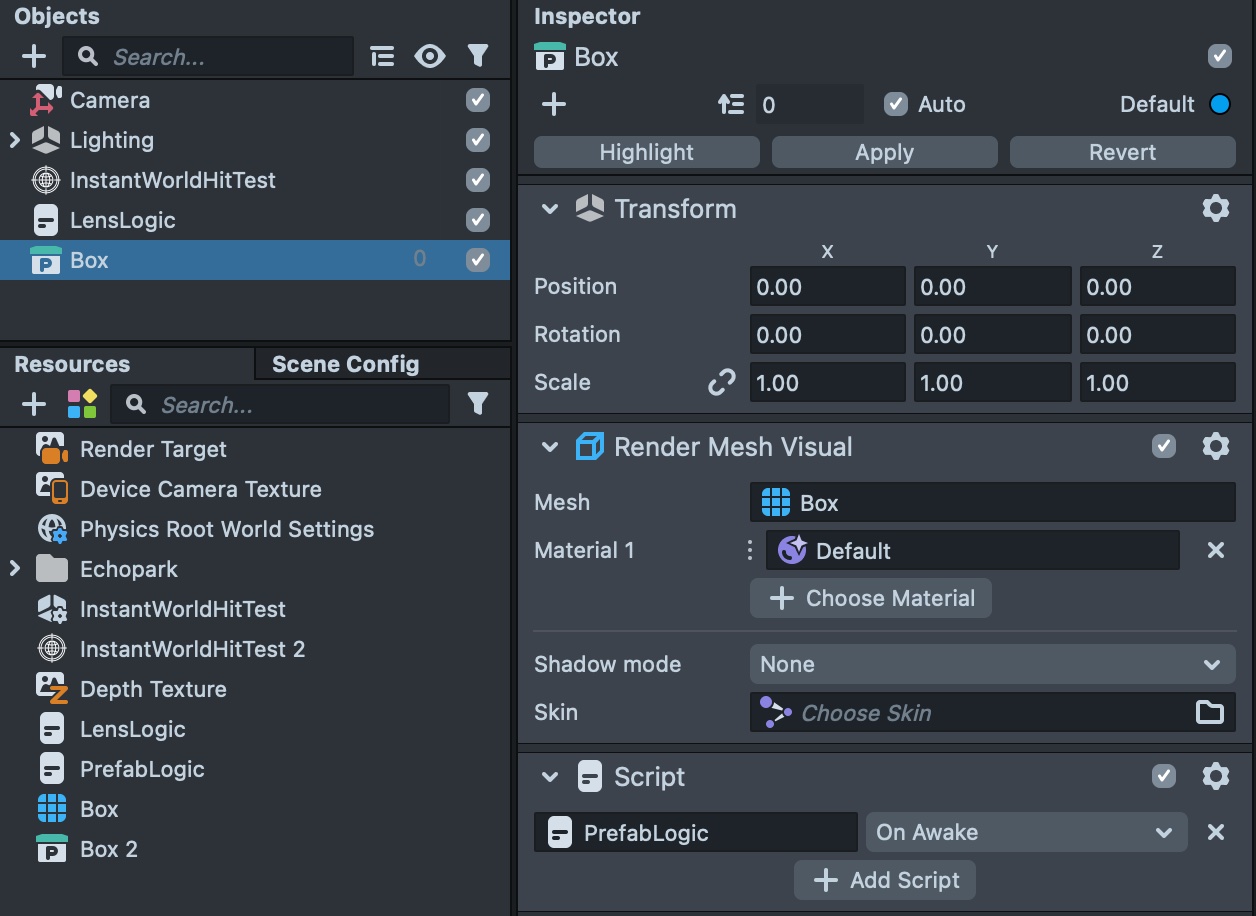
Now let's create a basic prefab. In the Scene Hierarchy, create a Box Scene Object under Mesh tab.
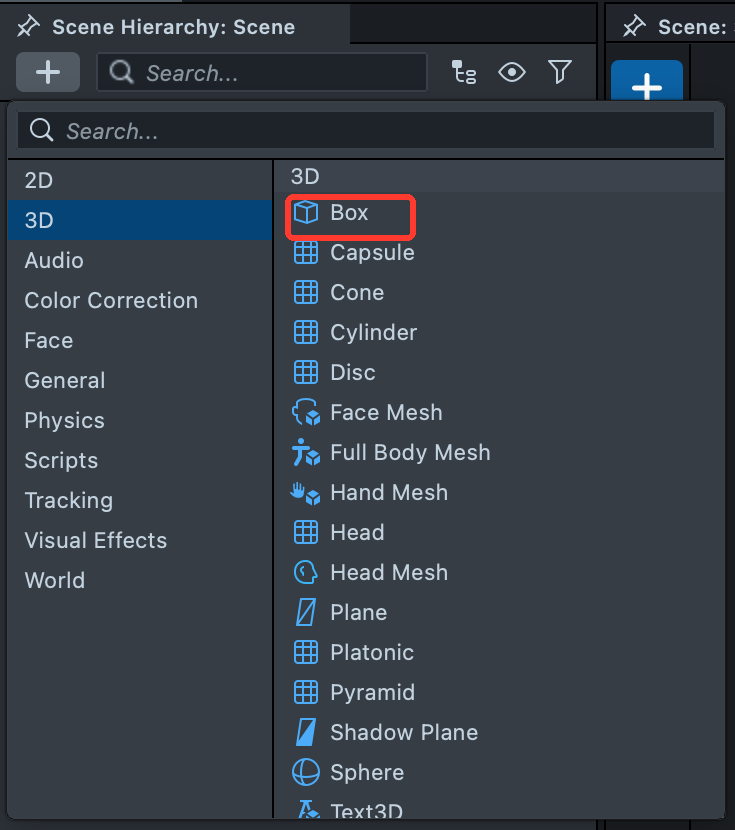
Add the PrefabLogic script to the Box Scene Object as a component to complete the ingredients for our Prefab. Now drag the Box Scene Object down into the Asset Browser. This will create a prefab Resource of this Scene Object for use later during Lens runtime. Delete the Box Scene Object as it's no longer needed since it is saved out as Resource on your file system.
Connect the InstantWorldHitTest Component and the Box Prefab Resource to the LensLogic Component's missing references.
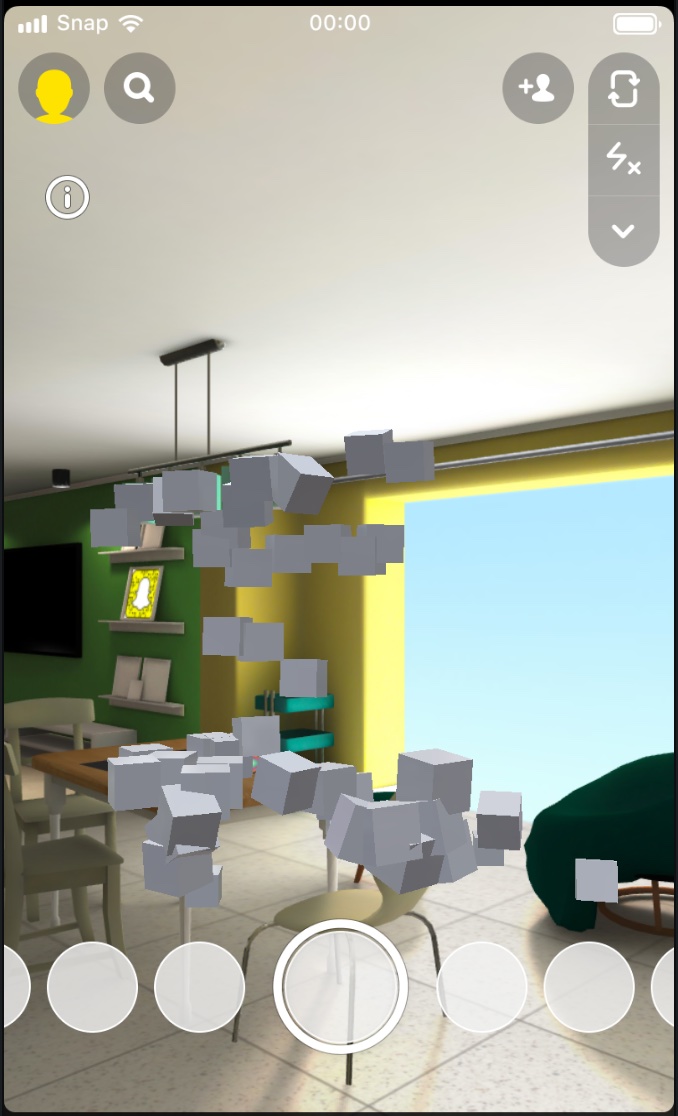
Try out the Lens in the Interactive Preview Panel to make sure it is working correctly by creating Box Scene Objects where you click.
Then Send to Snapchat to try it out on your own device.
Scripting API
Input Variables Exposed in the Inspector
| Signature | Visibility | User facing description |
|---|---|---|
| Camera | Public | Developer must connect the scene camera with a device tracking component set to world |
| Depth Texture | Public | Developer must connect to a depth texture resource |
| Max Raycast Distance (m) | Public | Max distance of ray cast in m. Default 100m, min 10, max 200 |
| Max List Size of Callbacks | Public | Max list size allowed for callbacks. Default 50, min 10, max 200 |
| Max Processing Time Per Frame (ms) | Public | Max processing time per frame in ms. Up to as it depends on size of list. Default 10, min 1, max 20 |
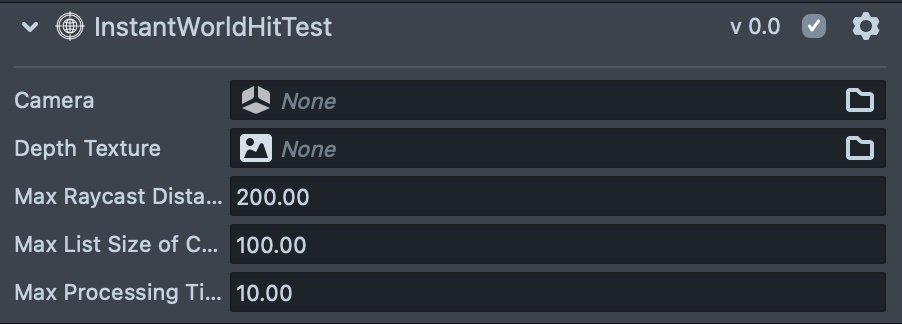 Screenshot of input variables exposed in the inspector when adding CC as a script component.
Make sure to set properties using input variables in the inspector view, and reset Lens session to see the changes.
Read Only Properties
| Signature | Type | Visibility | User facing description |
|---|---|---|---|
isWorldRaycaster | Bool | Public | Can check if script component is of this type before calling its properties and methods |
raycastDisMaxCm | Number | Public | Returns ray casting max distance in cm |
callbackListMax | Number | Public | Returns max size of callback list |
frameProcessingMax | Number | Public | Returns max processing per frame in ms |
Methods
| Signature | Type | Visibility | User facing description |
|---|---|---|---|
hitTest | function(vec2 screenPosition, function onDepthTextureHit (HitTestResult)) : HitTestResult | Public | Returns a HitTestResult object that intersect with a ray cast from screen position screenPos. If an optional callback function is provided as secondary input (onDepthTextureHit) and the hitTestResult is from depth texture since World Mesh wasn't available at that intersection, then the callback is added to a list for checking if a World Mesh hitTestResult is available in the future. |
HitTest Method Returns an Array of Objects
| Signature | Type | Visibility | User facing description |
|---|---|---|---|
hitTestResult | array of objects [ { vec3 position, vec3 normal, bool worldMesh, TrackedMeshFaceClassification classification, object eventHandler } ] | Public | Returns an array of objects that has details of the hitTest method call. This mirrors the deviceTracking.hitTestWorldMesh method. This includes the world position of the hit, the world normal of the hit, a bool to indicate if this hitTestResult is coming from the World Mesh or depth texture, an enum for classification of mesh face, and an eventHandler object that provides access to add more callbacks and to remove callbacks to the event. |