Previewing Your Lens
You can preview and test your Lens in two ways: using the Preview panel inside Lens Studio or Pairing to Snapchat to test on actual devices. For information on previewing your Lens in Snapchat, follow the Pairing to Snapchat guide.
You can preview and test your Lens in two ways: using the Preview panel inside Lens Studio, which simulates SPECS, or on your SPECS. To test on the device, follow the Connect Lens Studio to SPECS and Send a Lens to SPECS guides. For setting up the Preview panel for SPECS step by step, see Preview Lenses for SPECS.
You can also open multiple previews at once. You can open an additional Preview panel via left clicking on Window > Preview, in the top menu.
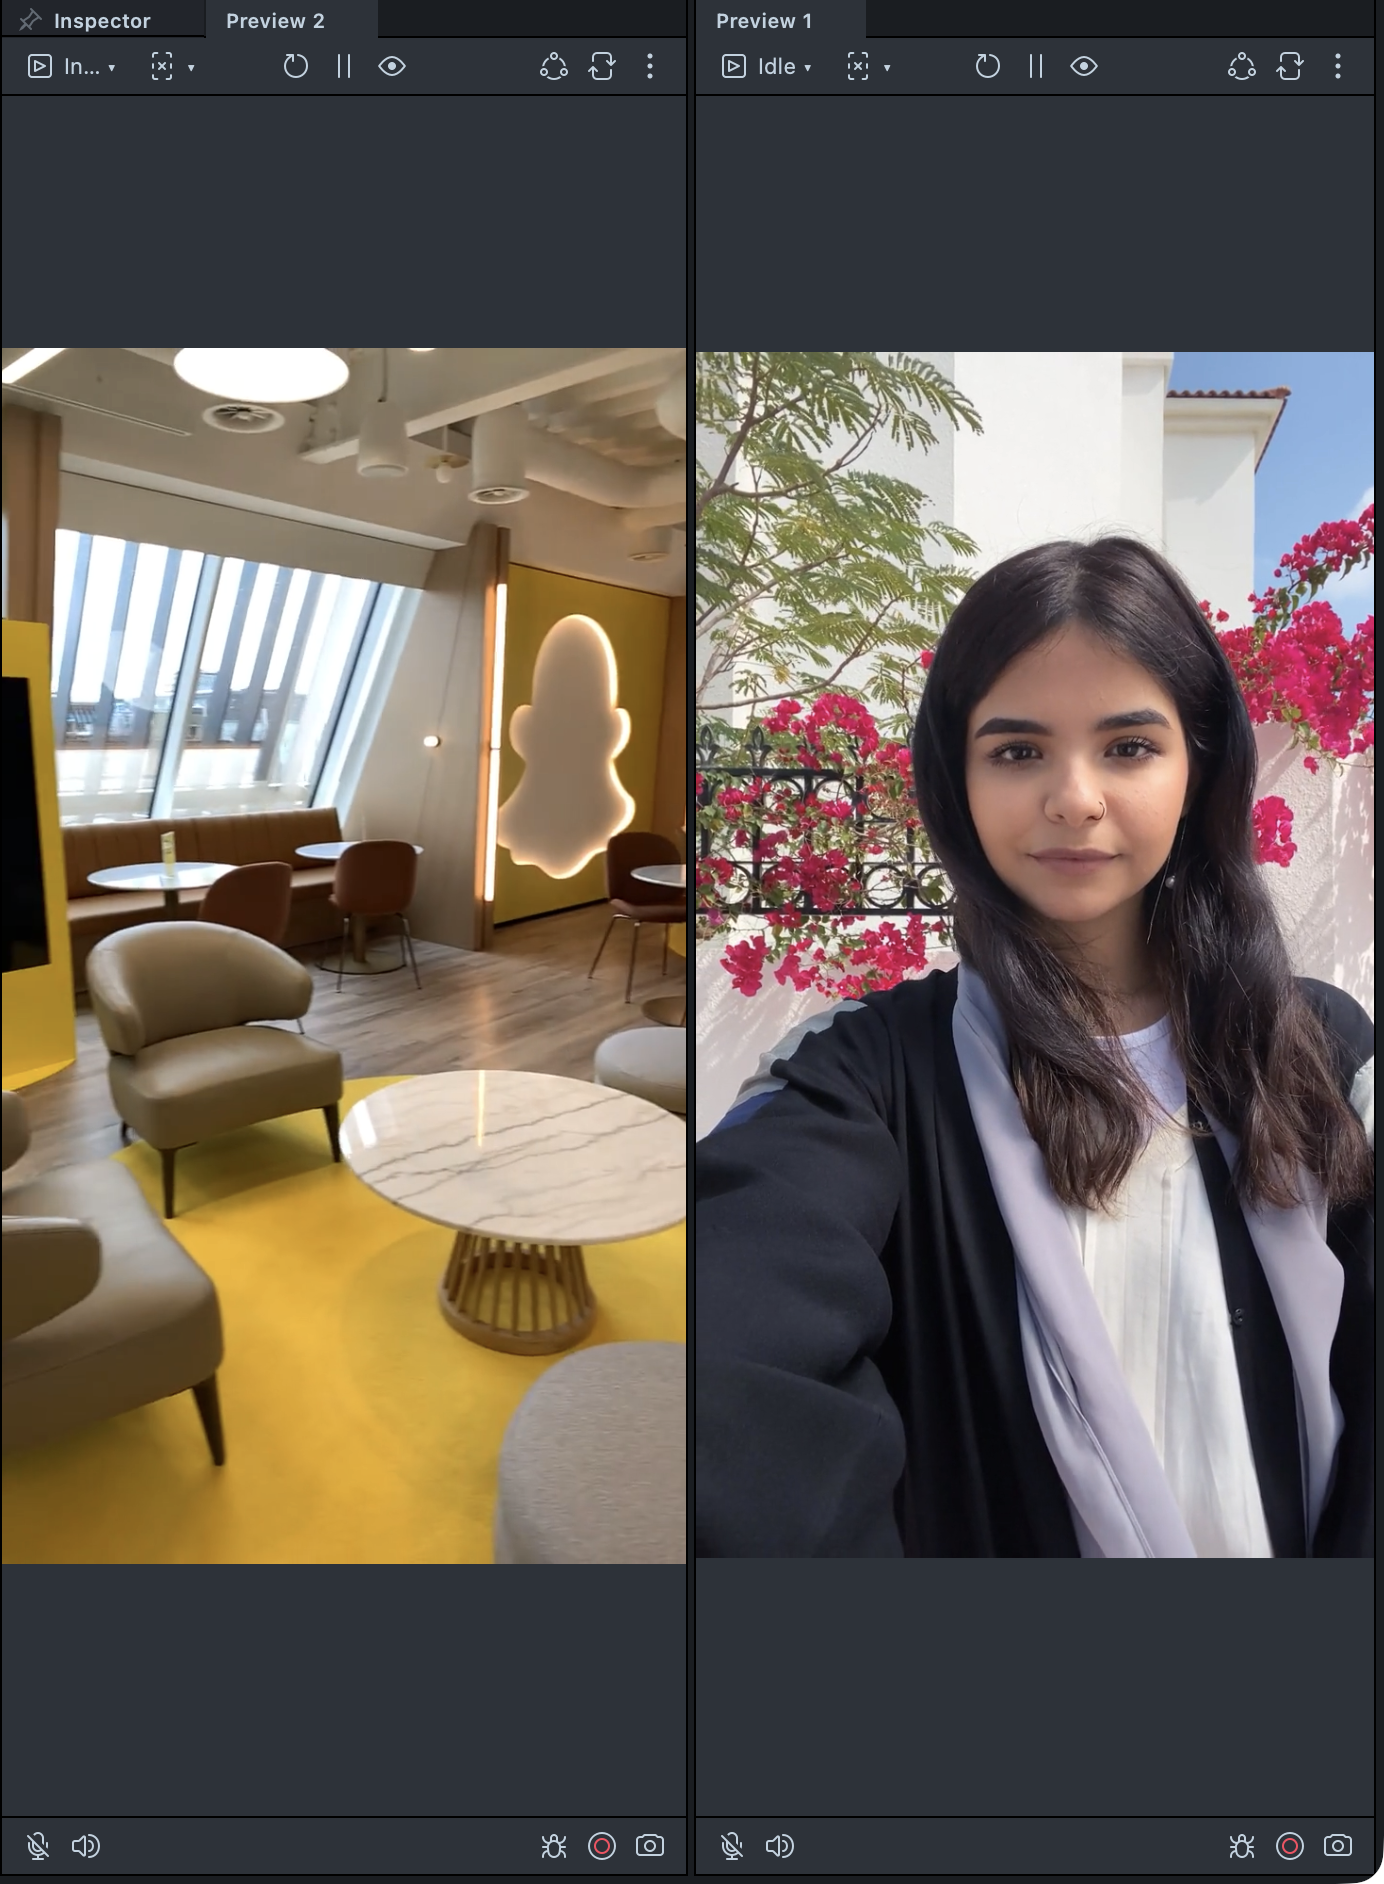
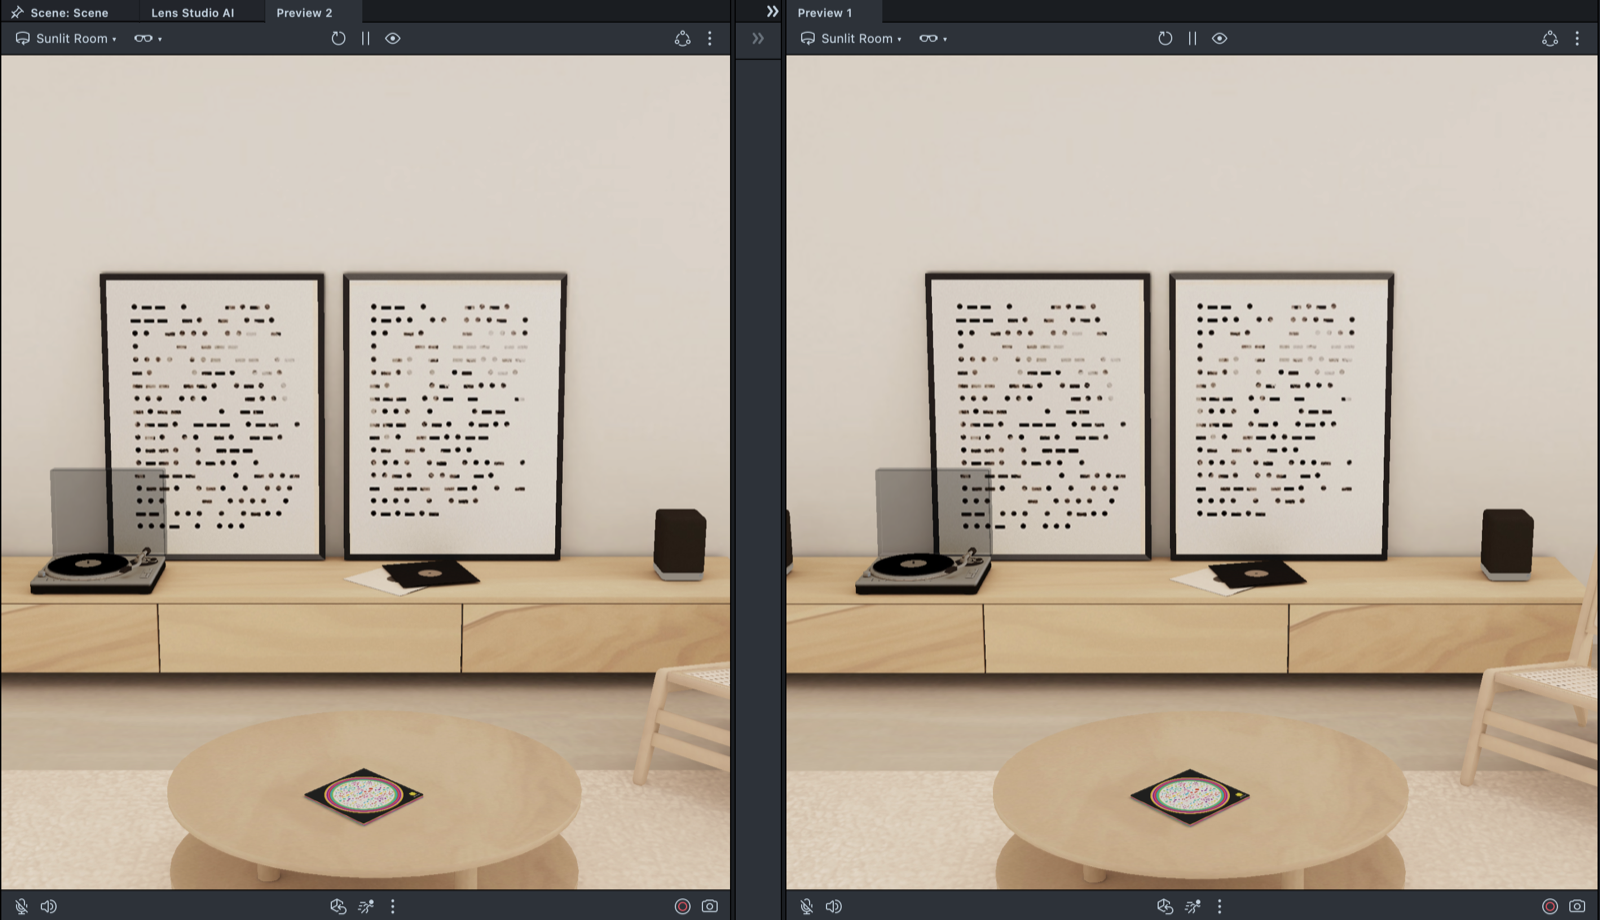
Preview control
The Preview panel allows you to see what your Lens would look like within Snapchat without having to open your device. The Preview panel updates in real time as you make changes to your scene. The Preview panel has various modes for visualization which are detailed below.
The Preview panel allows you to see what your Lens would look like on SPECS, the way the SPECS displays show it in a simulated room, without having to put on your SPECS. The Preview panel updates in real time as you make changes to your scene. The Preview panel has various modes for visualization which are detailed below.
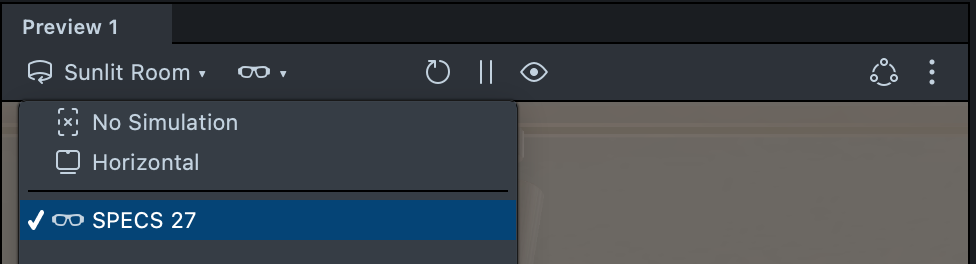
When building for SPECS, open the device menu (the glasses icon) in the Preview panel toolbar and select SPECS 27, then open the environment menu and pick a room under Interactive Previews. Interaction Kit, Sync Kit, and the Fetch API need the panel to run the Lens as SPECS. See Preview Lenses for SPECS.
Multimedia Preview
Photo Mode

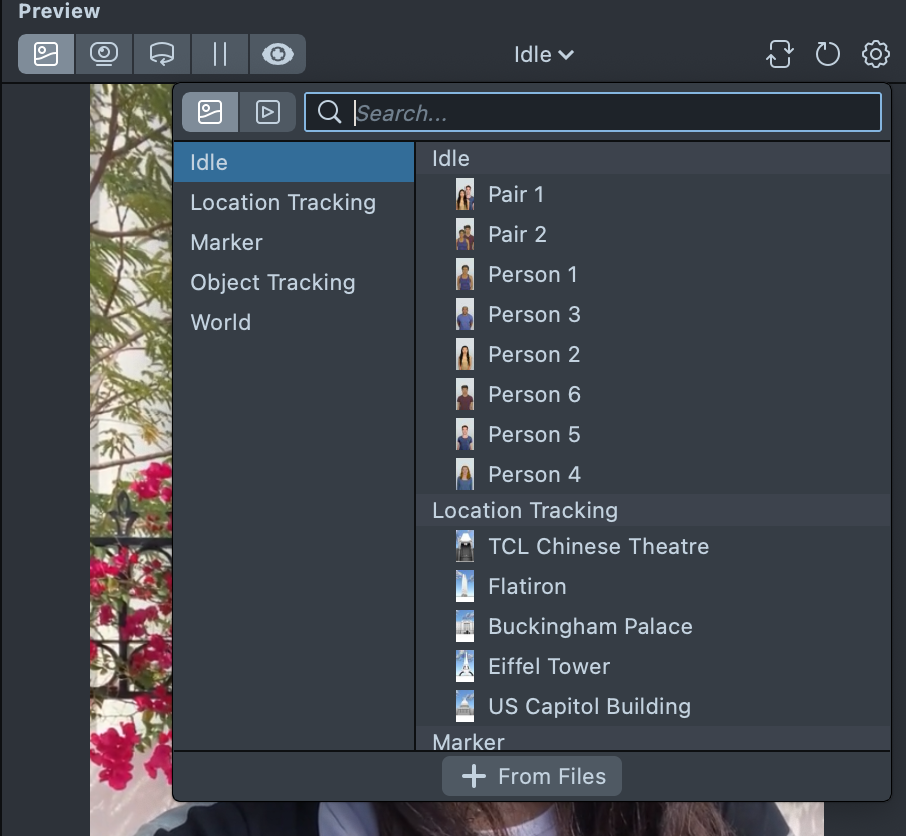
Click the top bar in the Preview panel to select a preview background. Then, select the Photo tab. Here you can select from a number of static face and world photos to preview your content against. You can also add your own preview photos by selecting + From Files.
Video Mode
Click the top bar in the Preview panel to select a preview background. Then, select the Video tab. Here you can select from a number of pre-recorded videos of faces and world videos with tracking data. You can also add your own custom videos by selecting + From Files.
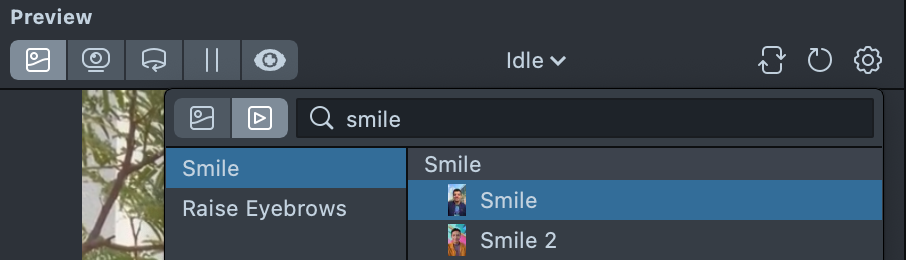
You can also add your own custom preview videos. Face Tracking, Marker Tracking and Object Tracking will work with custom preview videos. Custom preview videos will not have the proper tracking data for Rotation, Surface and World tracking to work.
Tip: It's best to provide a .mp4 formatted video. One way to do this is to use the following settings for FFmpeg: ffmpeg -i my_video.MOV -vcodec h264 -acodec mp2 my_video.mp4
When building for SPECS, the Preview panel set to SPECS 27 has no Photo or Video tab: its input menu offers only Cameras (your webcam) and Interactive Previews.
Webcam Mode
This mode allows you to test your Lens using your webcam in realtime. This mode is extremely useful when working on face Lenses, as you can test out various face triggers by moving your own face.

Interactive Preview Mode

The Interactive Preview Mode allows you to walk around the scene as if you were using the Lens on your device. You can use it to preview Lenses with World Device Tracking or World Mesh right in Lens Studio without using the Lens on your device.
To walk around the scene, you can use Q (down), W (forward), E (up), A (left), S (back), D (right), or the Arrow Keys on your keyboard.
Holding down Shift switches to rotation mode: Q (roll left), W (pitch forward), E (roll right), A (yaw left), S (pitch backward), D (yaw right).
Scroll Wheel will move the camera forward or backward. To change the orientation of the camera, hold down the Right Mouse Button and drag your mouse around.
Holding down Shift while using the Scroll Wheel will speed-up or slow-down the movement of the camera when pressing the hot keys. Spacebar will reset the camera speed.
Double Right-Click on a mesh object to translate the camera to focus on that object.
On SPECS, Interaction Kit's MouseInteractor stands in for the user's hands: point at an Interactable to hover over it, and click to select it, as a pinch selects it on SPECS.
Holding down Control while using the Scroll Wheel will zoom in/out on the preview window. Control plus Left Mouse Drag will translate the preview region if it doesn't already fit in the window. Right Click will reset the window zoom. This feature works in Inspect, Webcam, and Interactive preview modes.

On SPECS 27, the bottom bar has no lock button: Lock Y Axis is an item in the ⋮ (More Interactive Preview Settings) menu at the bottom of the panel.
To go back to the camera's original position, press the Reset Button.

Try this mode with LiDAR enabled template!
To go back to the camera's original position, select Reset View to Origin at the bottom of the panel.

On SPECS, the Interactive Previews rooms supply simulated depth, world mesh, and surfaces, so content you place in the world sits on them.
Stop Preview

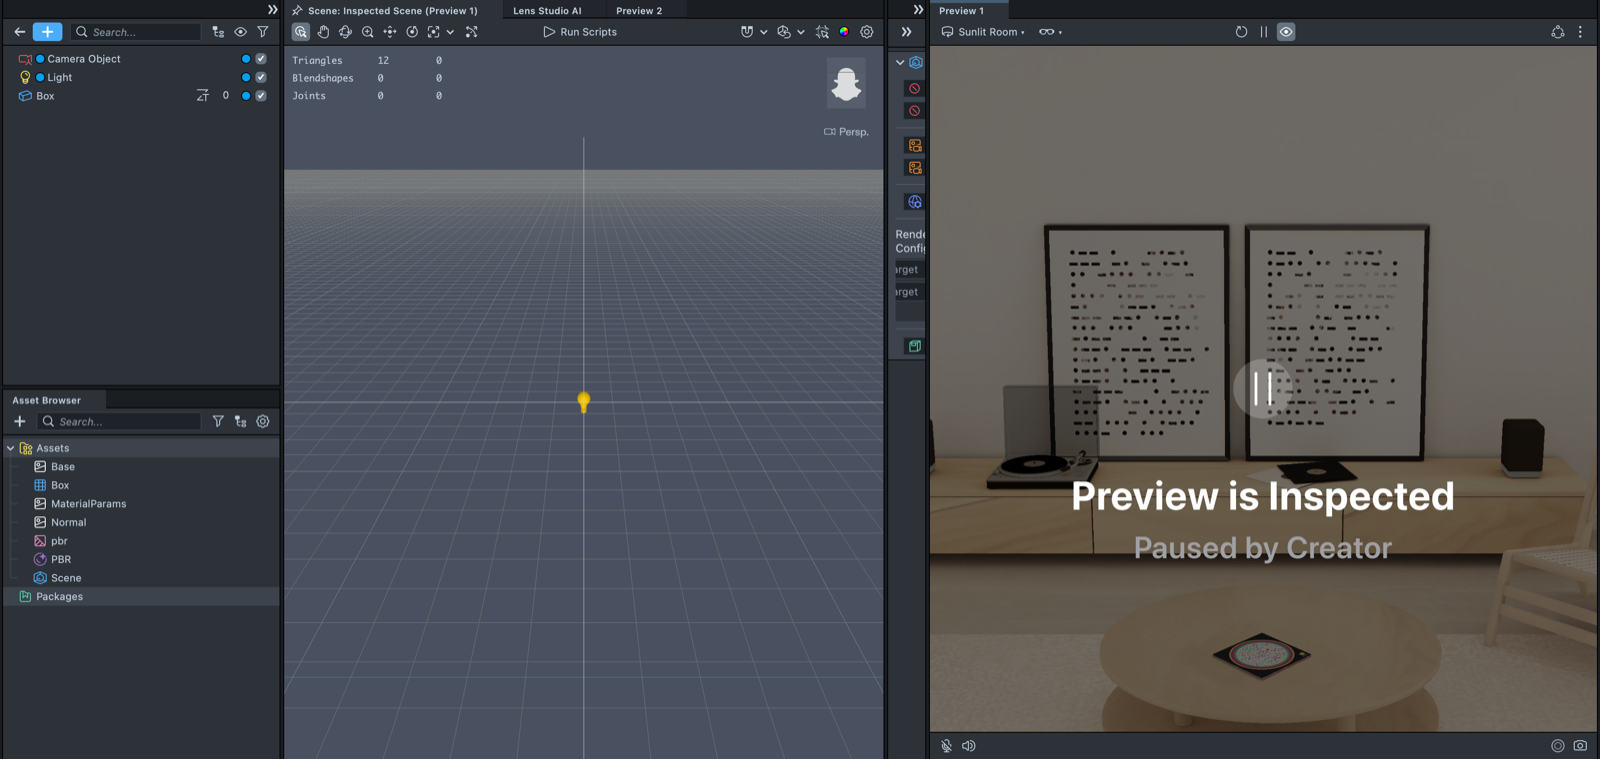
Pressing this button will pause the state of the Lens at the given time.
Inspect Preview

Pressing this button will pause the state of the Lens at the given time, as well as show the state of the Lens in the Scene Hierarchy.
Pressing this is useful when you have scripts and components that can modify the Scene Hierarchy (for example, instantiating prefab).
Preview Settings
Swap Cameras

Simulates swapping between the front and rear camera.
Lens Reset

Restarts the Lens as if it was freshly selected by the user. Anytime you make modifications to scripts, make sure to reset the Lens using the Lens Reset button.
You can press cmd+r on Mac or ctrl+r on Windows, to trigger the Lens reset.
Settings
The ⋮ menu, at the top right of the Preview panel, allows you to access additional settings about how your Lens is previewed. For example, you can use it to clear or print the Persistent Storage.
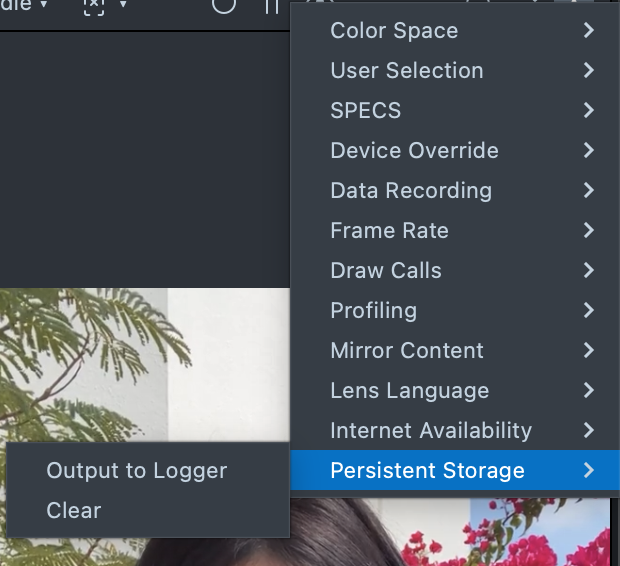
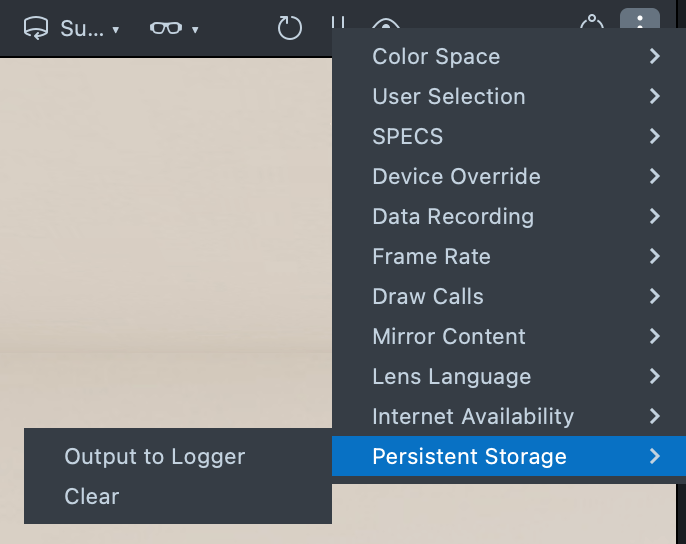
When building for SPECS, the ⋮ menu also sends the Lens pause, suspend and foreground events (⋮ > SPECS) and emulates going offline (⋮ > Internet Availability). See Test pause, suspend, and going offline.
Bottom Controls
Live Microphone Input

Toggle microphone. If your Lens can respond to microphone input, make sure to toggle this when you're testing.
Mute Sound

Mutes all sound coming from the Lens.
Device Simulation
Your Lens might look different on different devices due to the screen size and device's native UI. At the bottom of the Preview panel, you can choose from a set of devices to simulate how your Lens looks like on that device.
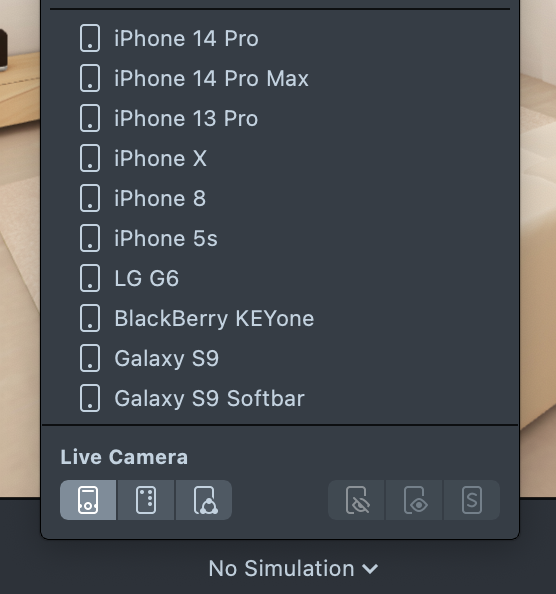
You can drag the preview panel off the main panel to enable the floating device mode.
Toggle UI
Click on the button to toggle the mock of the Snapchat UI. Open the drop-down for more UI options.
- Capture Mode: When disabled, the UI will represent what Snapchat looks like in the live camera and while recording. When enabled, the UI will represent what Snapchat looks like after recording
- Show Sponsored UI: For Lens Creators creating Sponsored Lenses, this option when enabled, will show you the additional sponsored UI that's added to the Lens
The device menu (the glasses icon) in the Preview panel toolbar sets the device the panel simulates. When building for SPECS, select SPECS 27. To keep the panel's current simulation but run the Lens as SPECS, select ⋮ (Additional Options) > Device Override > SPECS.
The SPECS displays add light to what the user sees: black isn't rendered, so the room shows through. To compare with your content as authored, select ⋮ > SPECS and turn off Simulate Device Display.
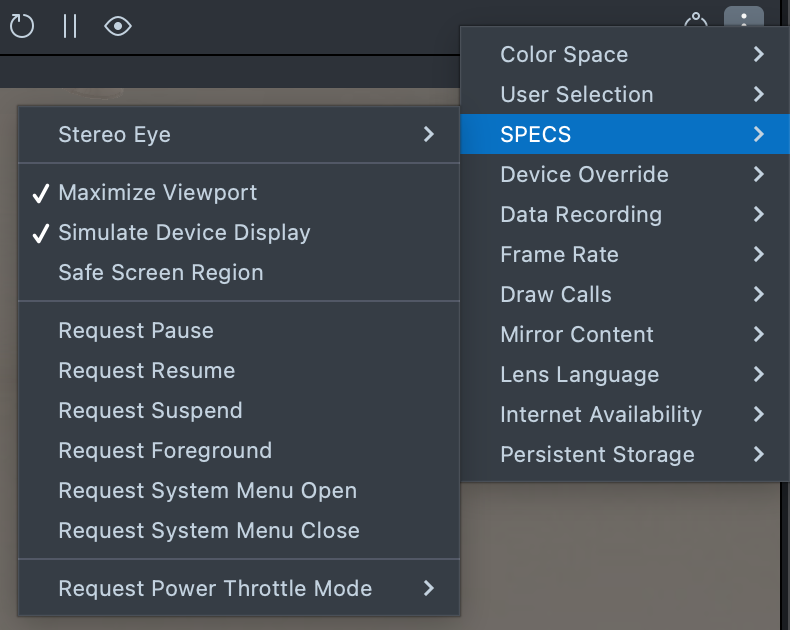
Connected Lenses

If your Lens leverages Connected Lenses, this button allows your preview panel to connect to a session.
When building for SPECS with Sync Kit, set every Preview panel you test with to SPECS 27.
Screen Recording

Starts recording a video of the Lens from within the Preview panel. Then, prompts you to save the video to your machine.
Screenshot

Takes a screenshot of the Lens from within the Preview panel. Then, prompts you to save the screenshot to your machine.