Send a Lens to SPECS
Send your Lens from Lens Studio to connected SPECS, resend it on every save, and debug it on the glasses.
With SPECS connected to Lens Studio, you can run your Lens on the glasses in one click. To connect first, see Connect Lens Studio to SPECS.
Send your Lens
- Open the menu beside Preview in the toolbar (the arrow).
- Select the Send to SPECS card.
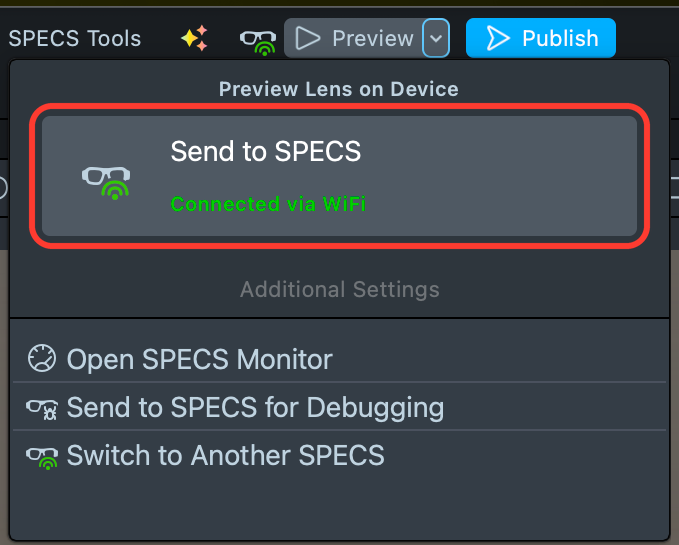
The toolbar shows Lens Sent when the upload finishes, and the Lens starts on your SPECS. The
Logger confirms both: The Lens was sent in 131 ms, then
The sent Lens has successfully started on SPECS.

Send your Lens on every save
To see each change on the glasses as you work, select Lens Studio > Preferences > Send to Device and set Send On Project Save to SPECS. Lens Studio then sends the Lens each time you save the project.

More ways to send
The same menu lists more options under Additional Settings:
| Option | What it does |
|---|---|
| Open SPECS Monitor | Opens SPECS Monitor to profile the Lens on the glasses |
| Send to SPECS for Debugging | Sends the Lens so a debugger can attach. See Debug your Lens on SPECS |
| Switch to Another SPECS | Disconnects the connected SPECS and connects another one on your account. See Connect to another SPECS |
Debug your Lens on SPECS
To pause your scripts on breakpoints and inspect variables while the Lens runs on the glasses:
- Select Send to SPECS for Debugging. A normal send uses optimized bytecode with no debug information, so a debugger can't attach to it.
- Wait until the Logger shows
The sent Lens has successfully started on SPECS. Attaching before then fails. - Attach the JavaScript debugger from VS Code, Cursor, or another VS Code fork.
You can't reload a Lens on SPECS while the debugger stays attached. To debug code that runs when the
Lens starts, such as onAwake, debug it in the Preview panel instead. For setup, see
External Debugger and
Debug a Lens With the JavaScript Debugger.
Check your Lens size
File > Project Settings shows how much of the size budget your Lens uses. To publish, a Lens made only for SPECS can be up to 25 MB, and its SnapML models up to 10 MB. For testing, you can send a Lens of up to 200 MB to SPECS.
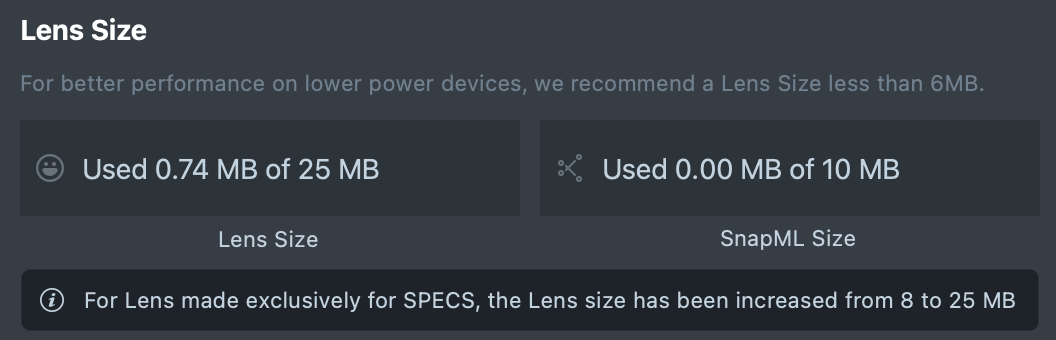
To use more content than fits in the Lens, load it while the Lens runs. Download images, video, audio, and 3D models from a URL with the Remote Media Module (see Internet Access), or keep them in a Snap Cloud storage bucket (see Storage).
Troubleshooting sending a Lens to SPECS
The toolbar shows "Lens Sending Error"
The Logger says why, after:
The Lens was not sent. Please fix the issues or try again later:
Fix the issues it lists, then send again. If the Send to SPECS card shows Connection Failed or Disconnected, see Connect Lens Studio to SPECS.
Related
- Connect Lens Studio to SPECS: connect the glasses first.
- Preview Lenses for SPECS: test without the glasses.
- External Debugger: breakpoints in the Preview panel.