Building Connected Lenses
The Lens Studio tools for building and testing Connected Lenses on SPECS: Sync Kit, session IDs, multiple Previews, the Connected Lens Monitor, and testing on several devices.
- Snapchat: not supported
- SPECS: fully supported
- Camera Kit Web: not supported
- Camera Kit Mobile: not supported
- SnapchatNot supported
- SPECSFully supported
- Camera Kit WebNot supported
- Camera Kit MobileNot supported
You build Connected Lenses for SPECS in Lens Studio. Lens Studio has tools for building and testing Connected Lenses in the editor and on SPECS; this page describes each one.
Sync Kit for Connected Lenses
Sync Kit (formerly Spectacles Sync Kit) is a Lens Studio package that provides the core logic, APIs, and components for building Connected Lenses on SPECS. To set up a project with Sync Kit, see the Sync Kit docs.
Check TypeScript compilation in the TypeScript Status panel
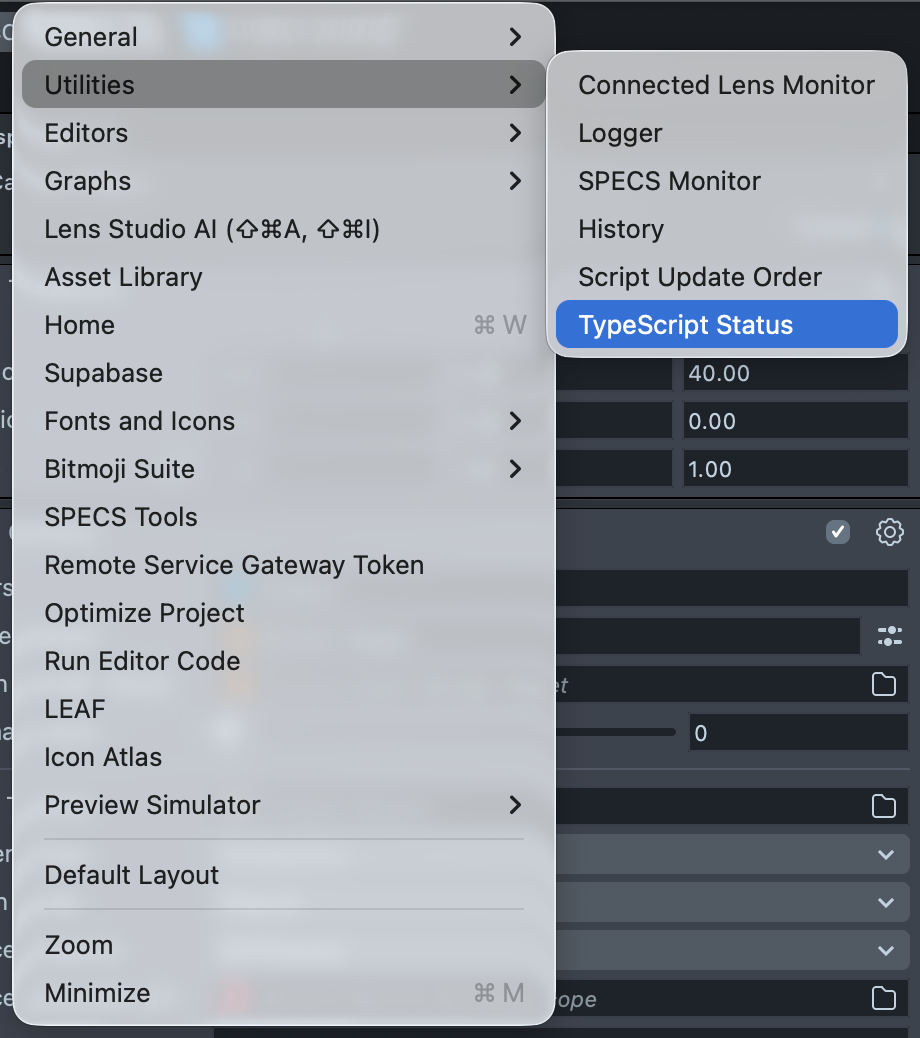
The Sync Kit package is written in TypeScript, which must compile before you can preview your Lens. To confirm that compilation is complete, open the TypeScript Status panel: Window > Utilities > TypeScript Status.
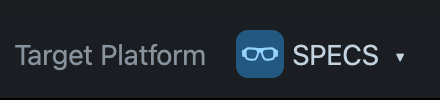
Set the project's target platform to SPECS
Select File > Project Settings and set Target Platform to SPECS. A project created from a template for Snapchat targets Snapchat: Sync Kit still runs in the Preview panel, but the Lens builds for Snapchat until you change the target platform.
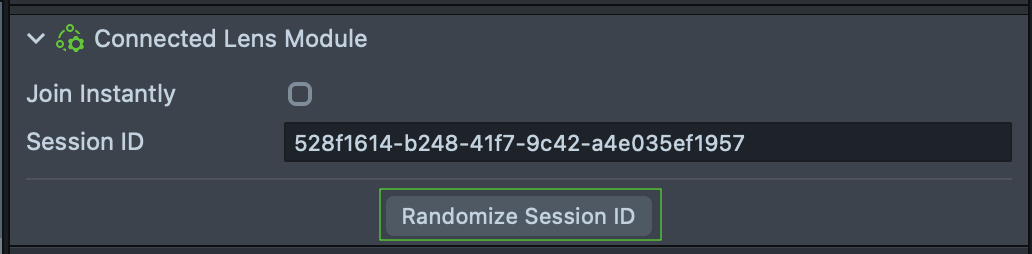
The Connected Lens Module and its Session ID
The Sync Kit package includes a Connected Lens Module, the asset that connects your Lens to the Connected Lenses backend. Select it in the Asset Browser to see its settings in the Inspector, including the Session ID field. The session ID is a unique string that identifies the session. Select Randomize Session ID to create a new session, or to reset the session for all Preview panels at once.
Use the same session ID in Lens Studio and on SPECS
Setting the same session ID in Lens Studio and on SPECS puts them in one session, which makes it faster to develop and test Connected Lenses. You no longer select a session by hand in Lens Studio, and you can test a Connected Lens with a single SPECS device: the device joins the same session as the Preview panels in Lens Studio.
-
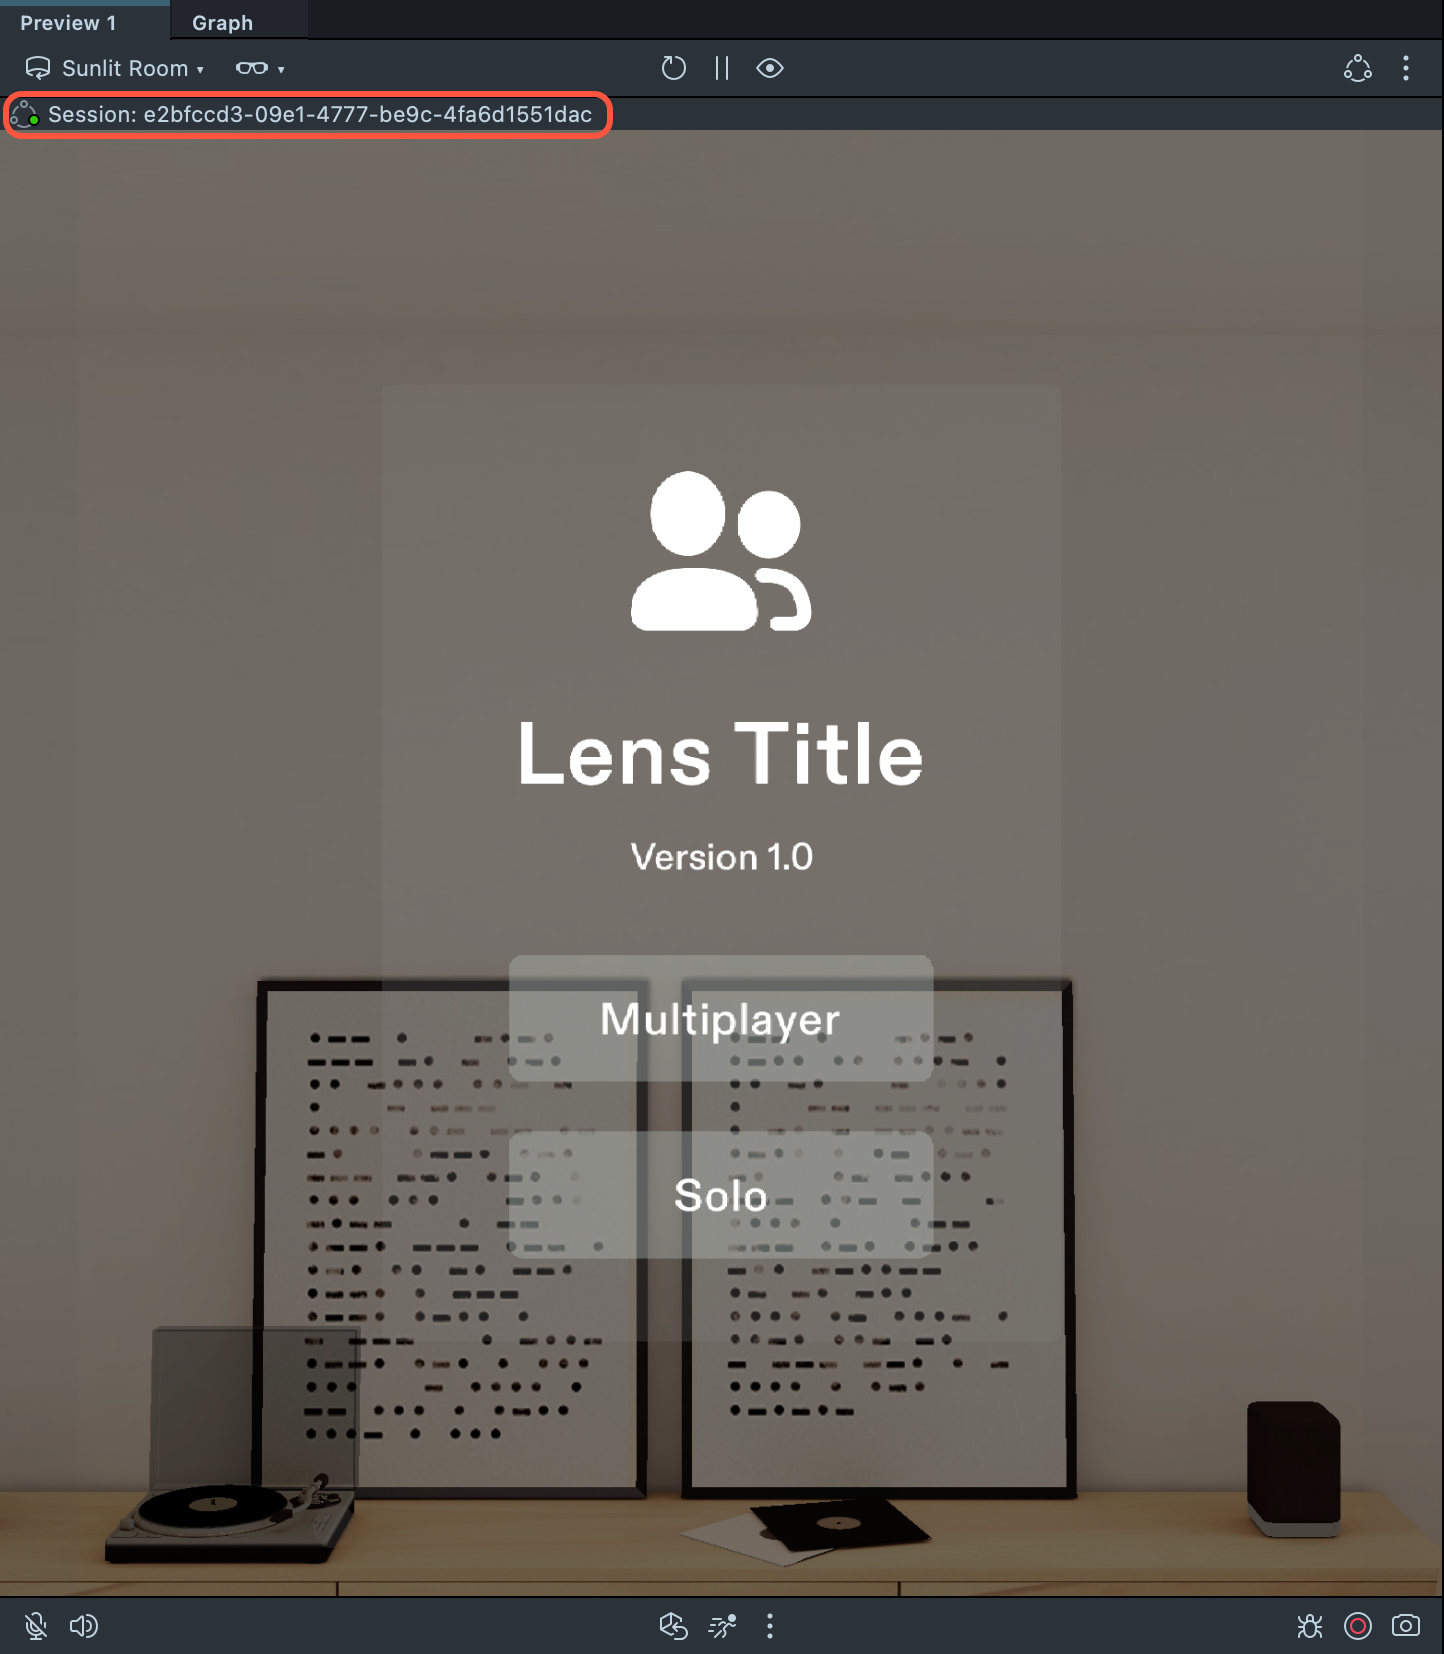
Find the session ID at the top of the Preview panel in Lens Studio.
-
In the SPECS App, open Developer Settings, turn on Skip Session Selection, and enter the session ID.
With the same session ID set, a Lens launched on SPECS connects directly to that session, so users join it automatically instead of selecting a session.
Set the same session ID in the SPECS App for every SPECS device that should join the session.
The session ID must be a valid UUID (Universally Unique Identifier), such as
123e4567-e89b-12d3-a456-426614174000. The session ID is the key that puts devices in the same
session, so a correctly formatted UUID keeps session management and communication between SPECS and
Lens Studio reliable. To get a valid UUID, select Randomize Session ID in the Connected Lens
Module: it generates one for you and avoids formatting errors.
Test a Connected Lens with multiple Preview panels
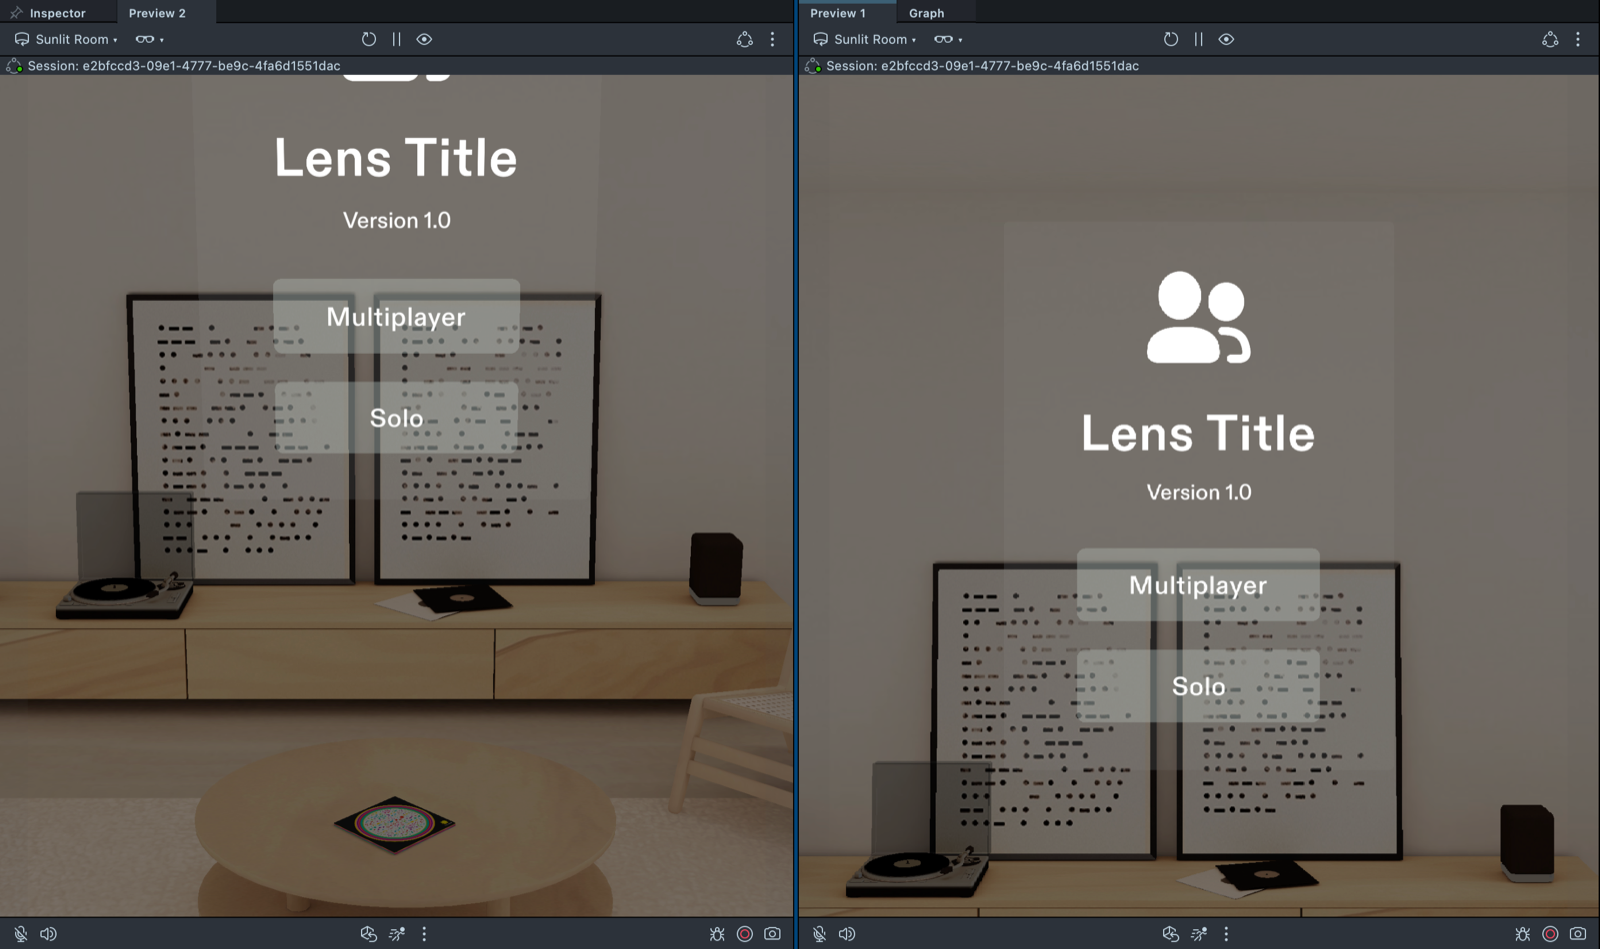
You can test a Connected Lens in Lens Studio with several Preview panels. Each Preview panel is a different user in the same Connected Lens session.
-
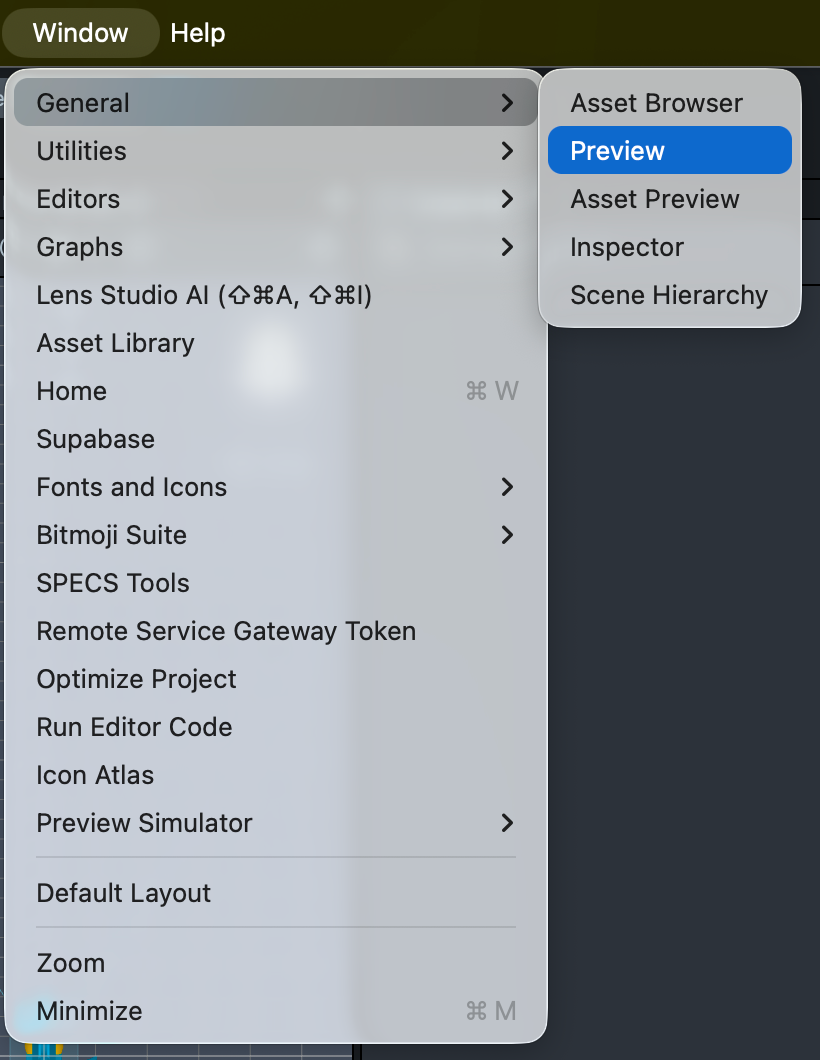
To add a Preview panel to your layout, select Window > General > Preview.
-
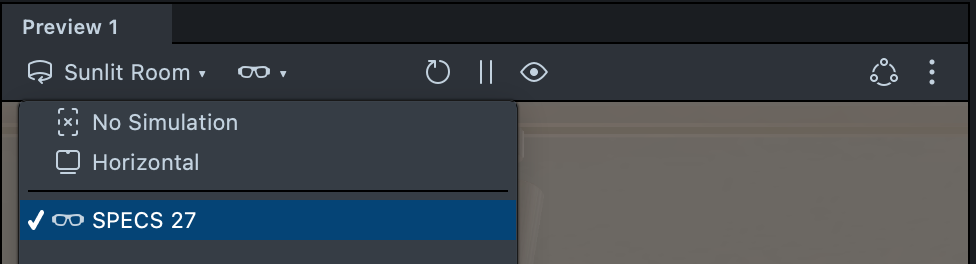
In the new Preview panel's toolbar, open the device menu (the glasses icon) and select SPECS 27. A new Preview panel doesn't copy the simulation settings of the others; see Preview Lenses for SPECS for the rest of the setup.
Each Preview panel shows the session ID it is connected to. Compare them to check that the Preview panels joined the same session.
To leave the session from a Preview panel, select Reset (the circular arrow) in the panel's toolbar. The Lens restarts at the Start Menu. To restart every Preview panel in a fresh session, select Randomize Session ID in the Connected Lens Module instead: a Preview panel that you reset on its own rejoins the session while the others stay connected, so the session state doesn't fully reset.

Watch a session in the Connected Lens Monitor
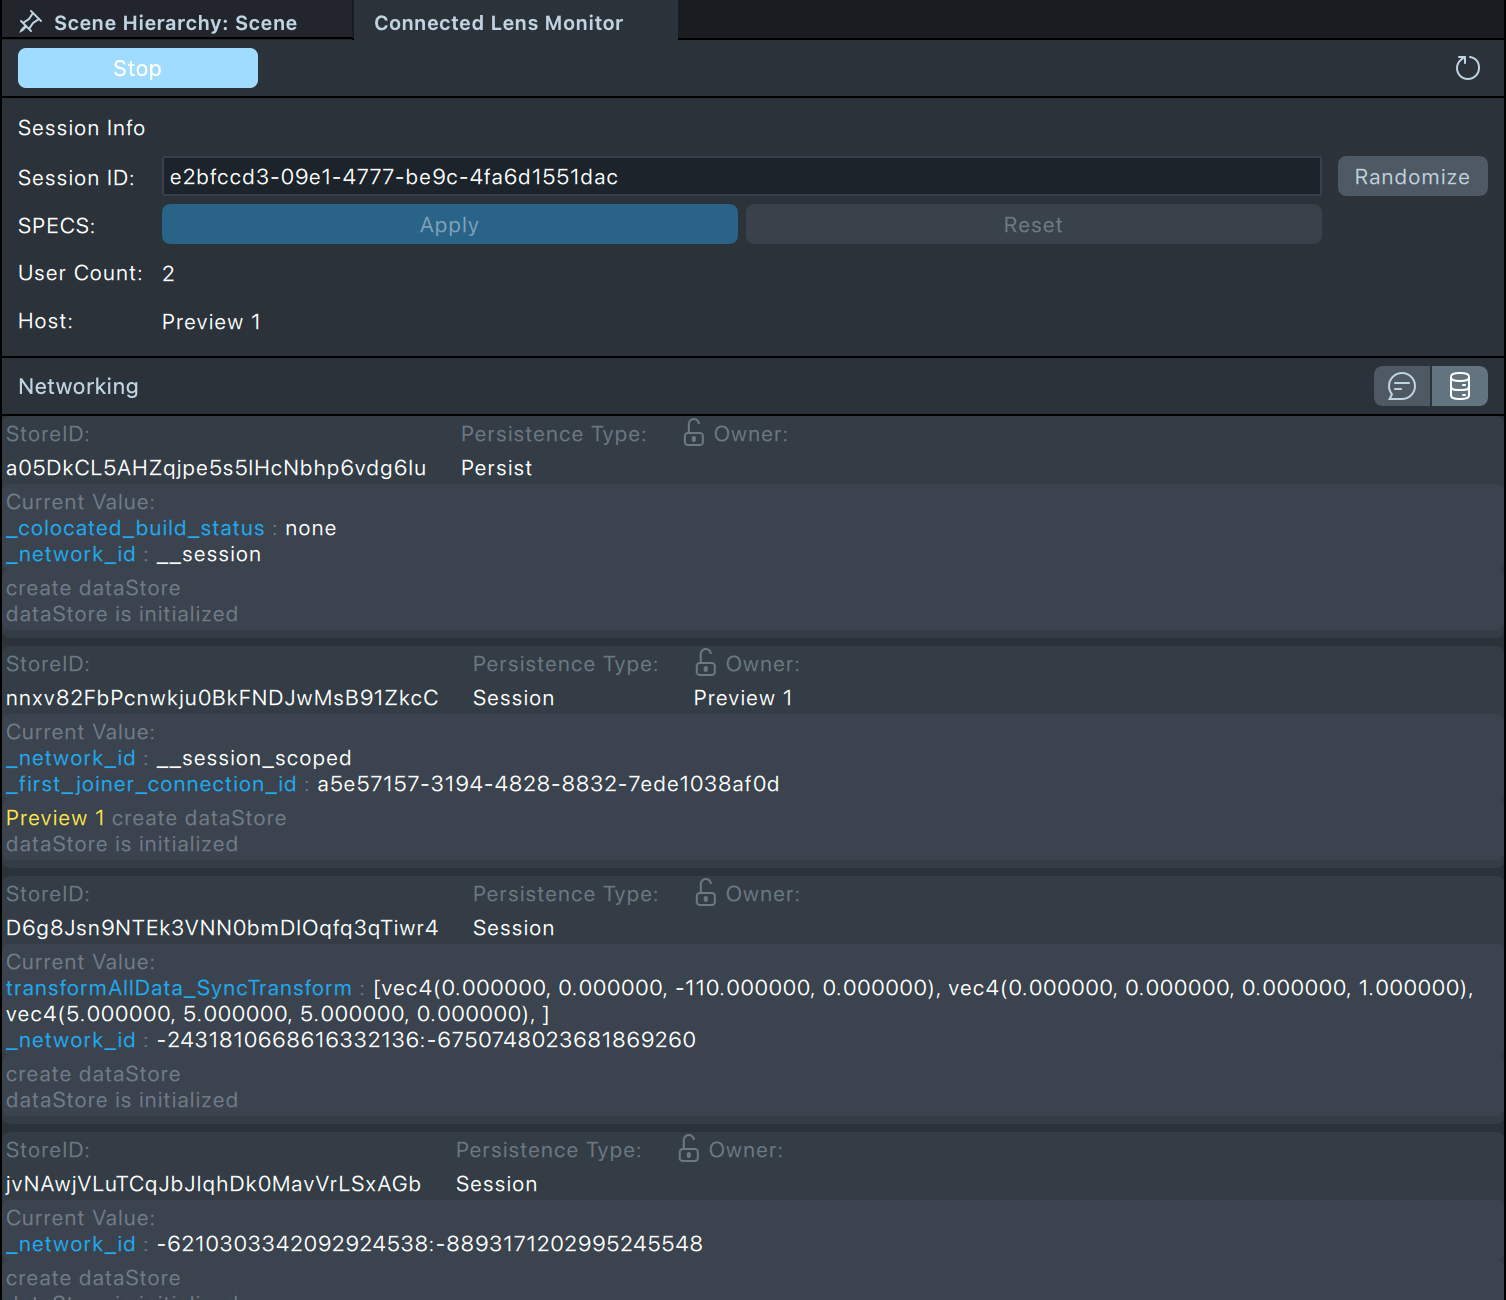
The Connected Lens Monitor gives a real-time view of a Connected Lens session, including its messages and its Realtime Stores. To open it, select Window > Utilities > Connected Lens Monitor. Development Workflow describes how to use it.
Test a Connected Lens on SPECS
To test your Connected Lens on SPECS devices, connect them to Lens Studio, send the Lens to each device, and then join the session on each device.
Connect SPECS to Lens Studio
- Connect each SPECS device to Lens Studio; see Connect Lens Studio to SPECS.
- For several SPECS devices, pair each device with the SPECS App, and connect every device to Wi-Fi.
Send a Connected Lens to several SPECS from one computer
Lens Studio connects to one SPECS at a time, so send the Lens to each device in turn:
- Send the Lens to the connected SPECS device.
- In the menu beside Preview, select Switch to Another SPECS, then send the Lens again.
- Repeat for each device.
For more details, see Connect to another SPECS and Send a Lens to SPECS.
If one SPECS device doesn't see the session started on another, try this order:
- Send the Lens to the first SPECS device, switch to the second, and send the Lens to it.
- Start the Lens on the second device, start a new session, and complete colocation.
- On the first device, wait for the session to show in Active Nearby, or launch the Lens from Drafts and join the session.
Send a Connected Lens to several SPECS from several computers
-
In each computer's Lens Studio, set the same Session ID in the Connected Lens Module before you send the Lens to SPECS. Lens Studio randomizes the session ID when it opens a project that has a Connected Lens Module, so set it again each time you open the project.
-
Send the Lens to each SPECS device from its own computer's Lens Studio.
Test a Connected Lens with SPECS and Lens Studio together
When a session ID is set and the Lens doesn't use a Connected Custom Location, join the session from SPECS first. Lens Studio can't build a map that SPECS can colocate against, so the SPECS device must complete colocation first. Once the SPECS device has colocated and joined the session, the Preview panels in Lens Studio can join with the same session ID for synchronized interactions.
Test a Connected Lens with several SPECS devices
- To test with several people, start and join a session as described in Using Connected Lenses.
- To test alone with several SPECS devices, turn on Colocate for Solo Development in the SPECS App's Developer Settings. The devices then colocate through mapping only, so you don't need to look at another person.
APIs that are restricted in Connected Lenses
When you build and use Connected Lenses, some APIs are restricted to protect users' privacy. For the list, see How Connected Lenses Work.