Material Editor
- Available on all platforms
You can find this sample project on Lens Studio Home Page.
The Material Editor sample project includes a number of materials made with the Material Editor that can be exported and imported into other projects. The materials used in this project can also be found in the Material Section in the Asset Browser panel. Each material can be modified through the Material Editor, or the Inspector panel.
Guide
The sample project is filled with all sorts of cool materials that you can tweak and modify to use in your own project.
Under the WorldObjectController > Examples > Default Examples in the Scene Hierarchy panel, we have 9 different materials.
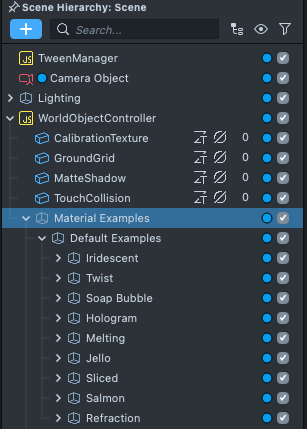
The More Examples object contains 5 more examples. It is at the bottom of the Material Examples object.
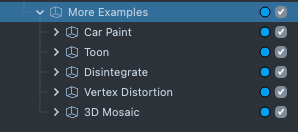
To see the other example you can disable the Default Example object and enable the More Example scene object by pressing the checkbox next to the object’s name in the Scene Hierarchy panel.
Tweaking a Material
Each material has options that you can tweak. You can select an object, and click on the Settings icon next to the Material field to find some of the material's setting. Then, click on the Open Full Inspector button to see all the settings of the material.
This is the same as selecting the material being used in the Asset Browser panel.
Additionally, you can customize the material itself and how it works. To customize each material, double-click the material in Asset Browser to open the material's shader.
Now you can see Material Editor panel is now open and you can start to customize the material.
Lens Studio opens the material's graph in a Graph tab named after the material (for example Graph: Iridescence), and the Inspector shows the material preview. You can start to customize the material.
A material has a reference to a shader that defines what the material does. You can have multiple materials, each with different settings, point to the same shader.
Take a look at the Material Editor guide section on the Lens Studio website for more information on how the material editor work.
Create a Graph Material
To create your own custom material, you can create a new Graph material. To do this, click on the + button in the Asset Browser panel and search for Empty Material.
Adding new materials, the usage of a shader, will usually include the shader that it uses. However, if you add a material, and your existing project already has the same shader, it will not import a new one.
Adding Materials from the Asset Library
Alternatively, you can base your material on a number of pre-made materials available in the Asset Library.
To do this, click on the Asset Library button in the top toolbar.

Then, select the Materials section in the sidebar. Hover over the item you'd like, and click the Import button.
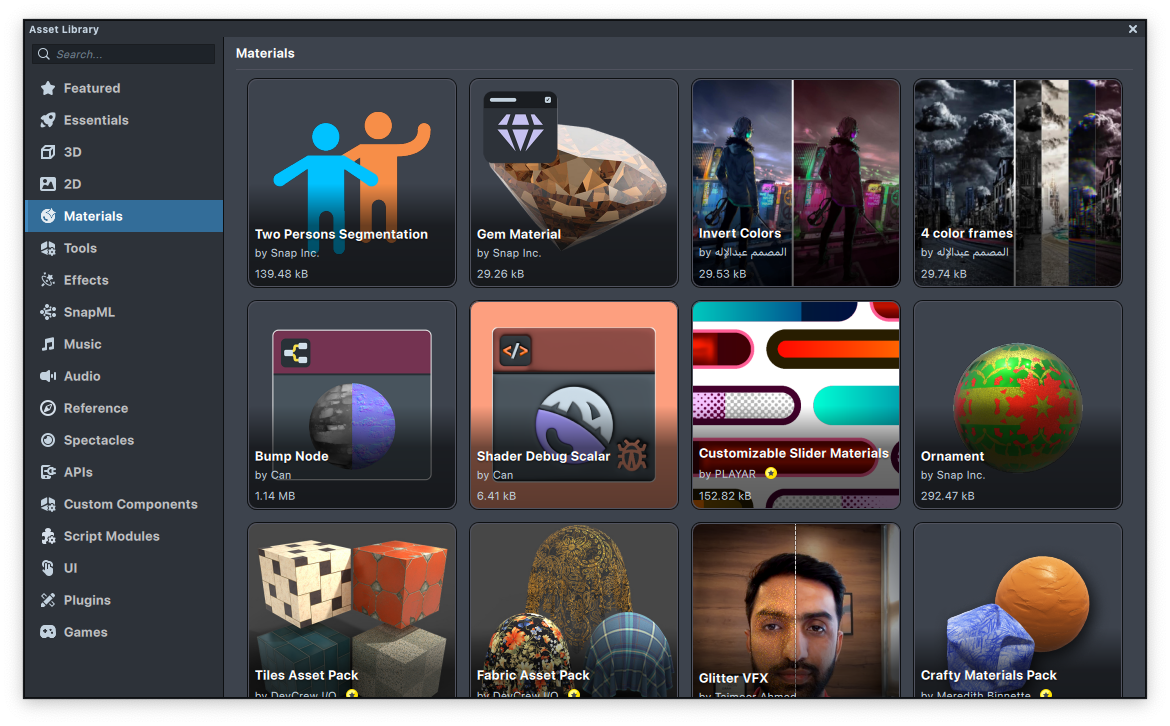
This will add a new graph material into your project resources which you can customize.
Previewing Your Lens
You’re now ready to preview your Lens! To preview your Lens in Snapchat, follow the Pairing to Snapchat guide.
You’re now ready to preview your Lens! To preview your Lens on SPECS, follow the Send a Lens to SPECS guide.