Custom Locations
Map real-world areas with the Custom Locations Scanner Lens and import them into Lens Studio to create persistent location-based AR experiences.
- Snapchat: not supported
- SPECS: fully supported
- Camera Kit Web: not supported
- Camera Kit Mobile: not supported
- SnapchatNot supported
- SPECSFully supported
- Camera Kit WebNot supported
- Camera Kit MobileNot supported
Overview
Custom Locations lets you map real-world areas and build AR experiences around them. First, use the Custom Locations Scanner Lens on SPECS to scan a location and create a Custom Location map. Then, import the Custom Location into Lens Studio to author AR content for it.
Get the Custom Locations Scanner Lens
Open the Custom Locations Scanner Lens on the Lens Store, or scan this QR code with the phone paired with your SPECS. Your SPECS then opens the Lens in Lens Explorer.

With the Custom Locations Scanner Lens, you can map individual locations, create groups of locations, and add more viewpoints to an existing location.
Previous Versions
This Lens and its components are an evolution of the Custom Location Creator Lens available on mobile.
LocatedAtComponent is still used, and the Import Mesh to Lens Studio guide is still applicable.
What does each Custom Location contain?
- A colored mesh of the scanned location
- A series of localization viewpoints (represented by camera frame icons)
The colored mesh is visible in the Lens Studio Preview panel and serves as a spatial reference, so you can position your AR content relative to the real-world location before deploying to your device.
You could also use the mesh as an occluder. Apply an occluder material to it, and real-world surfaces hide the AR content behind them. To set one up, see Occluders.
The viewpoints are snapshots of the location captured during scanning. Your Lens uses them to work out where the device is in the real world, which is called localizing. When the device sees part of the scanned location, your Lens matches what it sees to these snapshots, works out the user's position, and displays your AR content in the right place.
Viewpoints
The Custom Locations Scanner Lens captures viewpoints as you scan. While scanning, move laterally around the location and look at it from many different angles.
Yellow camera frames appear during a scan to show where each viewpoint was captured and which direction it faces.
More viewpoints mean better localization. To add viewpoints to an existing scan later, for example in different lighting, see Create an Incremental Scan.
The following sections include example videos of scanning, such as Scan and publish a location.
Scanned locations are uploaded publicly. Anyone with a location's ID can use it in their own Lens. Deleting a location in the Custom Locations Scanner Lens removes it from the list on your device, but not from the cloud.
Before you start
- Lens Studio:
v5.25+ - SPECS OS:
v7.0+ - SPECS App iOS:
v1.7+ - SPECS App Android:
v1.7+ - Interaction Kit (optional)
Create a Custom Location
Scan and publish a location
Scan a location with the Custom Locations Scanner Lens on your SPECS. To get it, open the Custom Locations Scanner page on the Lens Store.
-
Go to the location you want to scan.
-
Open the Custom Locations Scanner Lens and select New Scan at the bottom.
-
Name your new scan.
-
Select Start Scanning, then move around the location. View it from many different angles and move laterally as you scan. As the scan progresses, the scanned mesh updates as SPECS tracks the shape of the location more accurately.
-
Select Finish Scan. The button appears as soon as the scan meets the minimum requirements, but keep scanning for longer to capture more viewpoints.
-
Accept the disclaimer and publish the location.
The Lens then shows the new location ID, the scan name, and the scan size. Use this ID to import the location into Lens Studio.
The disclaimer you accept before you publish reads:
After you upload this Location to Snap, you will receive a unique reference ID. Anyone with access to this ID will be able to use this Location in Lens Studio to publish a Lens, so avoid uploading a Location that contains sensitive personal information.
Verify a scan
Before you import a location into Lens Studio, you can preview the scan on SPECS. Verifying a scan shows the scanned mesh as a grid over the real space, so you can check what the scan covers without opening Lens Studio.
-
In the Custom Locations Scanner Lens, select
...on the scan you want to check. -
Select the check mark (✓) and confirm.
-
Walk around the scanned area. The Lens shows the scanned mesh as a grid over the space.
-
Select Return to go back to the main menu.
Import a location into Lens Studio
Once you've published a location with the Custom Locations Scanner Lens, you can import it into Lens Studio. First, open a SPECS project made from the Base Template and sign in to Lens Studio with your SPECS account. If you haven't done either yet, see Set Up Lens Studio for SPECS.
You can import a location in two ways:
- With its location ID: works for any published location, including one published from another SPECS account. Ask the owner for its ID.
- From the Map panel: lists the locations published from your SPECS account, so you don't need to copy the ID.
Import with a location ID
-
In the Scene Hierarchy panel, select World > Custom Location.
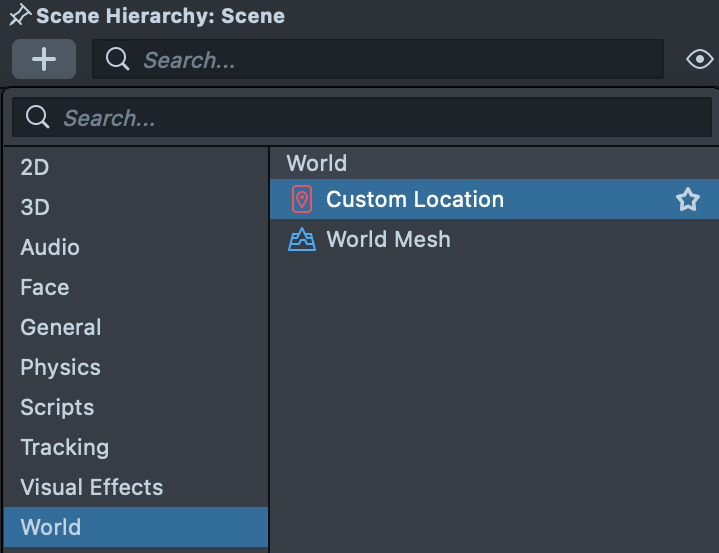
-
Select the new asset in the Asset Browser and enter your location ID.
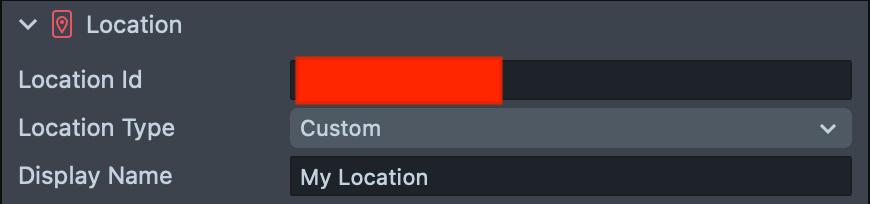
After you enter the ID, Lens Studio shows the location mesh and its tracking asset.
Import from the Map panel
-
In Lens Studio, select Window > Editors > Map.
-
In the Map panel, open the Custom Location tab. It lists every Custom Location you've published, with its ID, name, and publish date. To find one quickly, enter its ID or name in Keyword and select Apply.
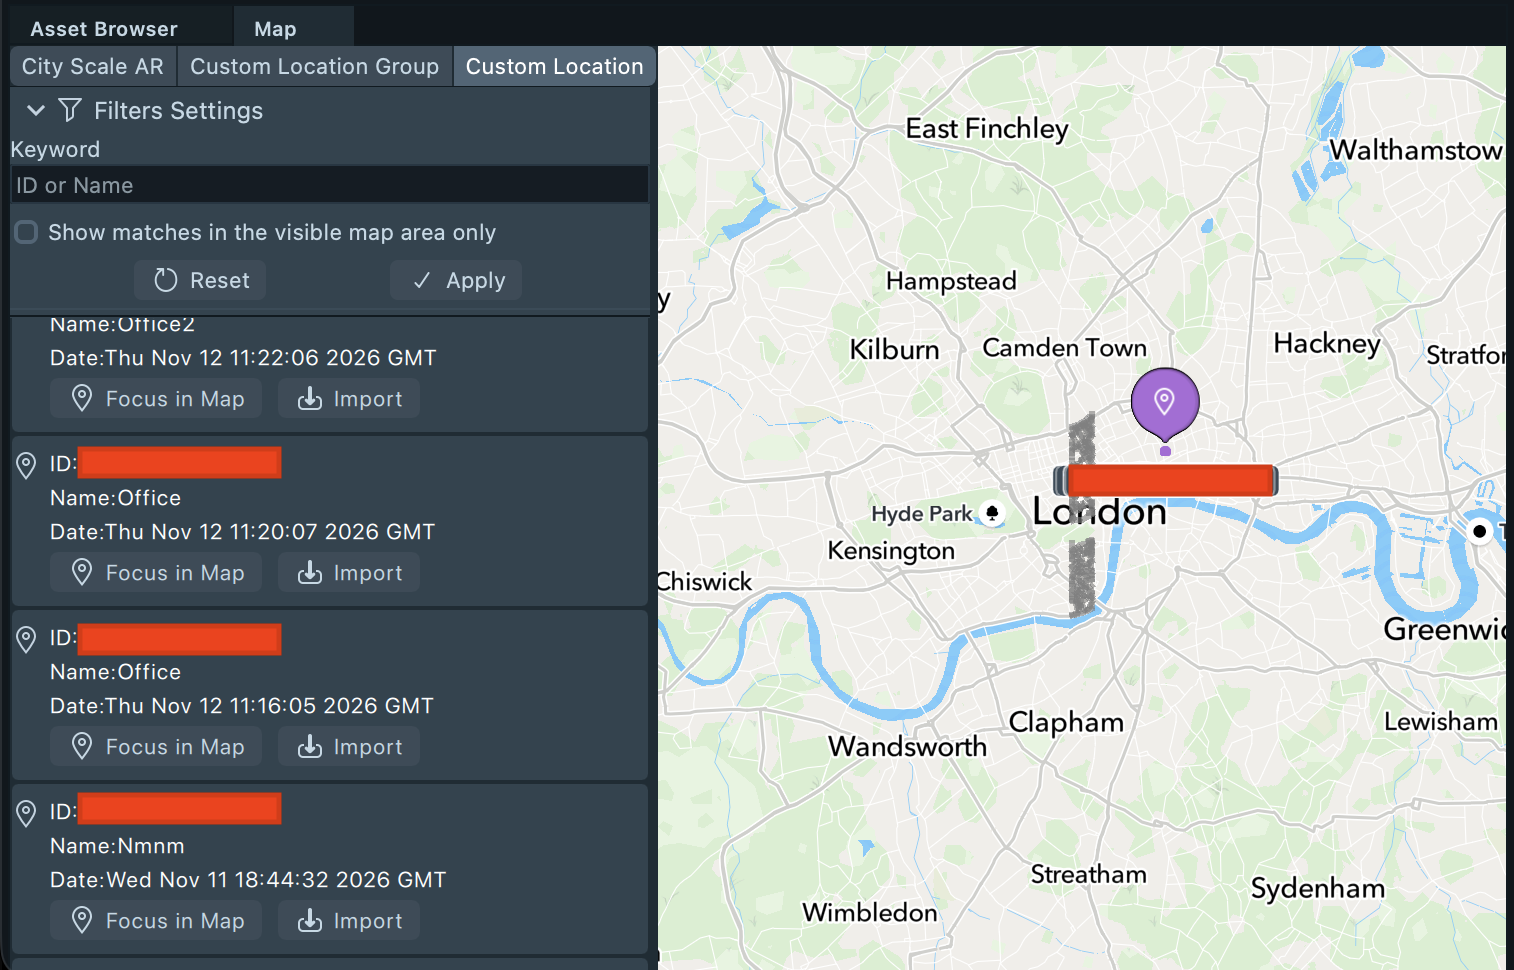
-
Select Import on the location you want.
Lens Studio adds a scene object named after the location ID, with a Located At component set to that ID and a Render Mesh Visual that shows the scanned mesh.
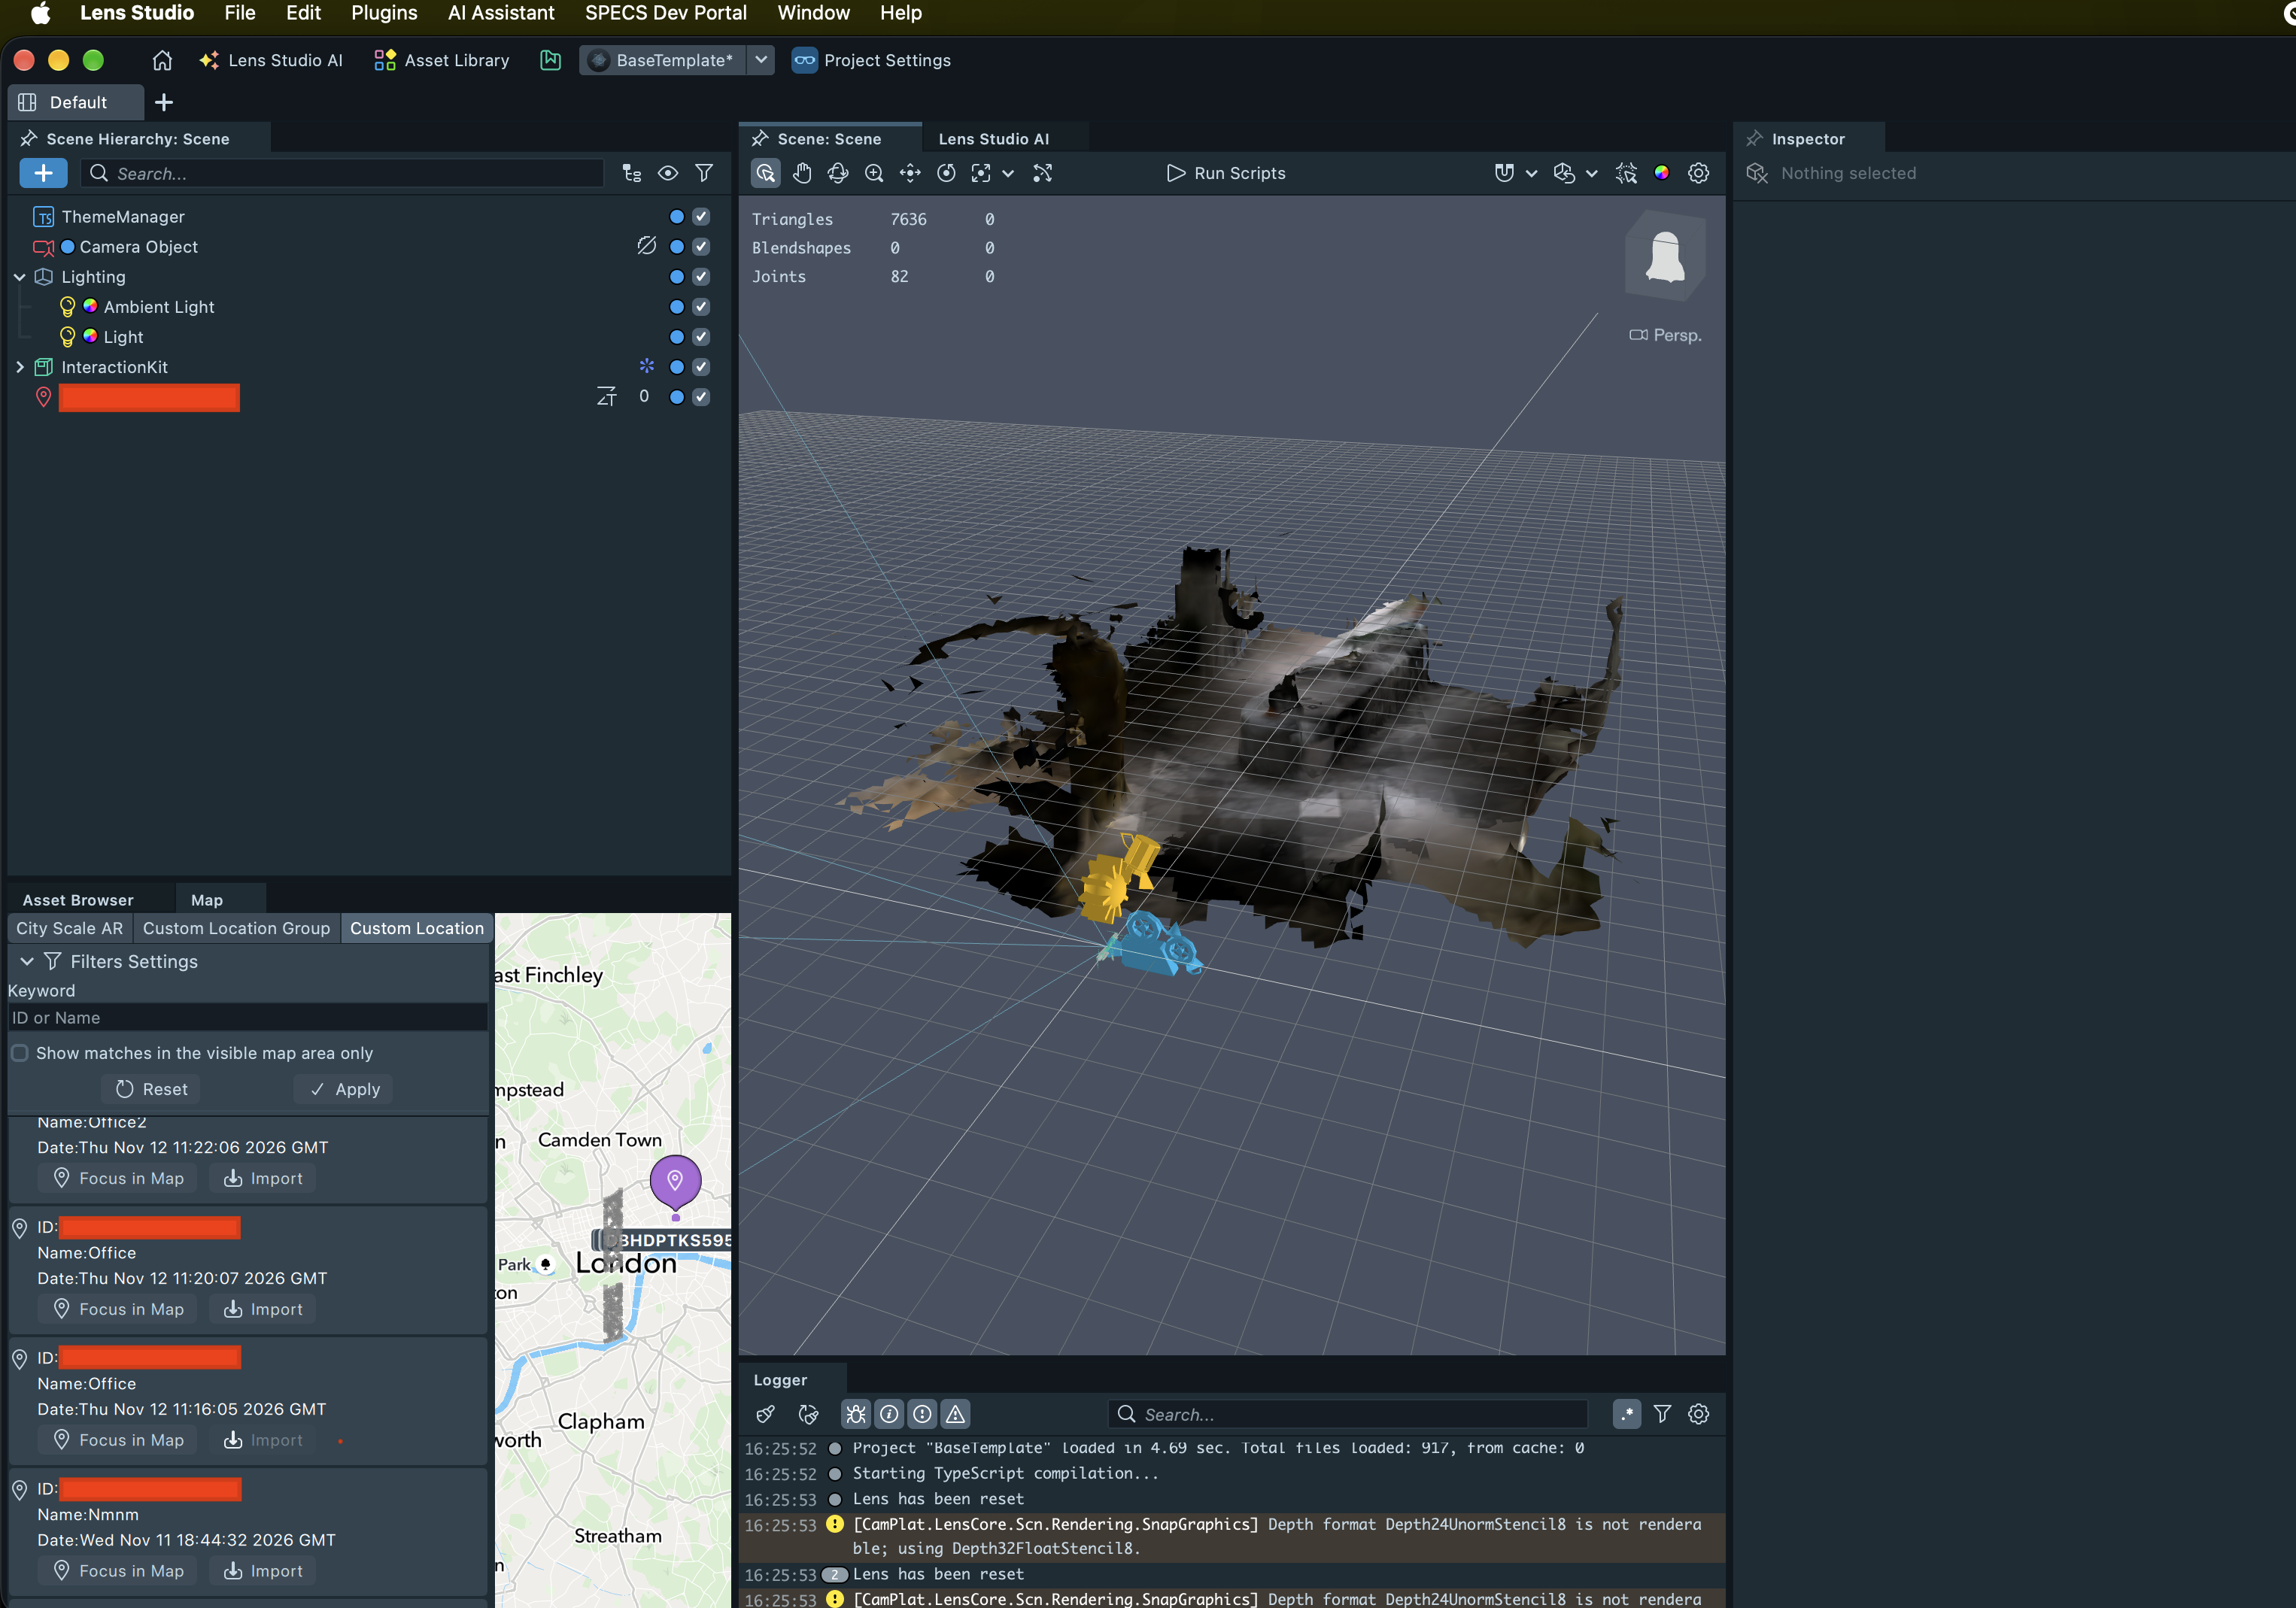
The Map panel lists only the Custom Locations published from the SPECS account you're signed in with. It doesn't show them if you're signed in with a Snapchat account from Spectacles (2024).
After you import
Use the scan mesh mainly to place content in the editor. If you keep it in the published Lens, you could use it as an occluder instead of showing it.
Lens Studio needs an internet connection to import a Custom Location and to open a project that contains one.
Create an Incremental Scan
An incremental scan adds viewpoints to an existing scan to improve localization, for example by adding viewpoints under varied light conditions, for example, at night. The incremental scan doesn't add to or update the scanned mesh. It also gets its own ID and name, so update your Lens to use the new ID.
To add viewpoints, the Lens must first localize against the existing scan (step 3). If the lighting has changed significantly since the original scan, for example, at night for a daytime scan, the Lens can struggle to localize. Bridge the gap in steps: first add an incremental scan at dusk, then return at night and add another incremental scan on top of the dusk scan.
-
In the Custom Locations Scanner Lens, select
...on an existing scan. -
Select
+and confirm. -
Look around the scanned location. The Lens shows a scanning animation until it localizes against the existing scan.
-
Rename the incremental scan. You can do this before or after the Lens localizes.
-
Once the existing scan is localized, the Start Adding button appears.
-
Select Start Adding to begin the incremental scan.
-
Move around the location to gather new viewpoints.
-
When you're done, publish the scan to get the new ID.
-
In the Lens Studio project that uses the previous ID, replace it with the new ID.
-
Publish the updated Lens.
The incremental scan uses the same coordinate frame as the original, so you don't need to move your virtual objects.
Create a Custom Location Group
Create and publish a group
You can tie up to five Custom Locations together into a Custom Location Group. First, scan and publish at least two locations that are close to each other. Locations that are less than 20 m from each other work best.
-
Select the + button in the top-left corner.
-
Check the locations you want in the group. You can select up to five locations per group.
-
Select Create a new group.
-
One by one, select each of the locations and:
- Go to that location and await stabilization.
- Select the next location.
-
Once all locations are stabilized, the Create a group button appears.
-
Select Create a group. The Lens shows the group ID and lets you name the group.
-
Name the group, then select OK to publish it.
During grouping, selecting a location that's already stabilized remaps it. This helps if you think its located position is wrong.
Import a group into Lens Studio
Once a group has been published, you can import it into Lens Studio in two ways:
- With its group ID: works for any published group, including one published from another SPECS account. Ask the owner for its ID.
- From the Map panel: lists the groups published from your SPECS account, so you don't need to copy the ID.
Import with a group ID
-
Create an empty scene object.
-
On the object, select Add Component.
-
Select Custom Location Group.
-
On the new component, enter the ID into the Group ID field.
-
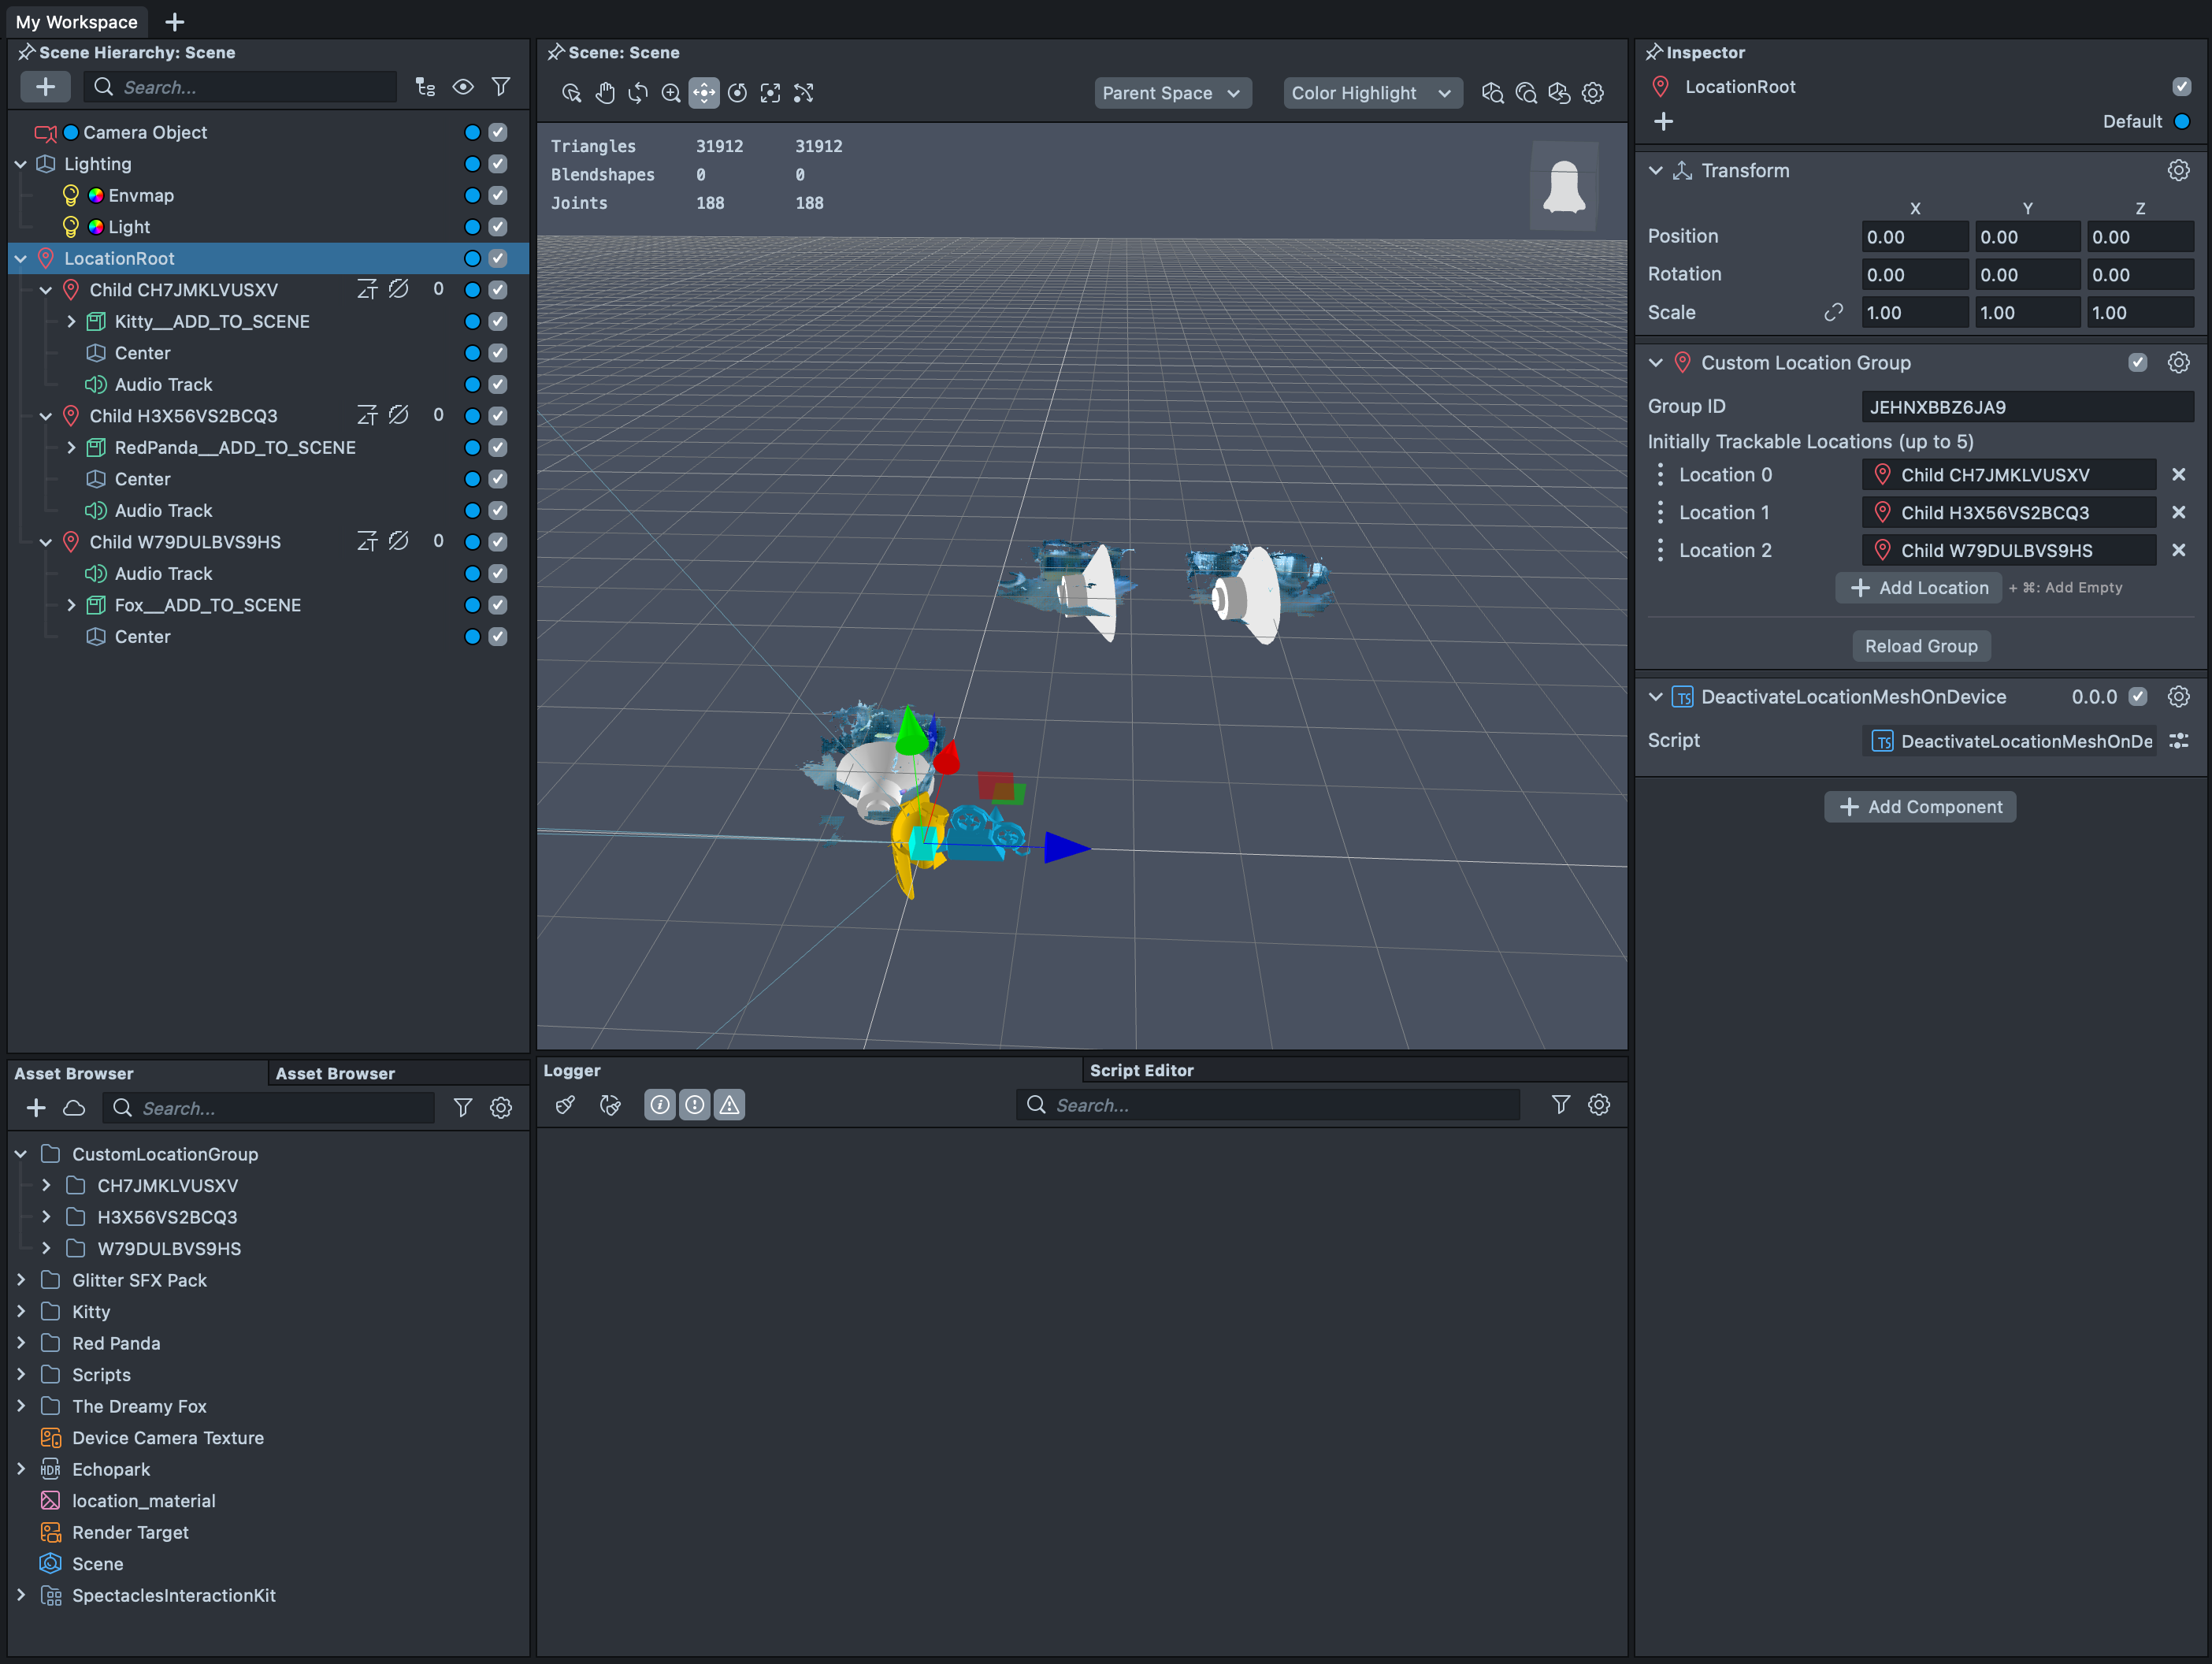
Select Reload Group.
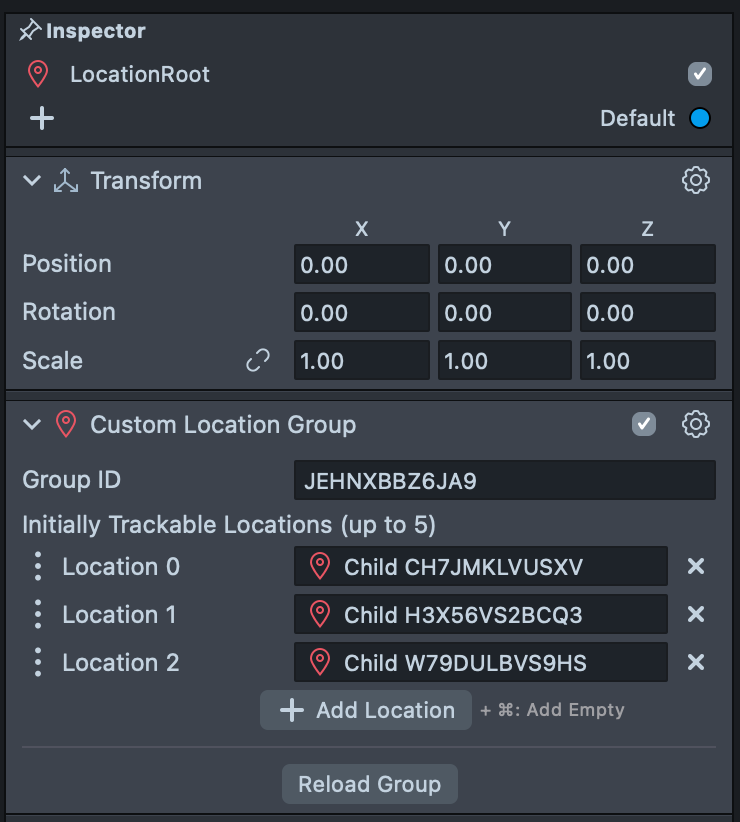
Lens Studio generates a Custom Location child for every member of the group.
Import a group from the Map panel
-
In Lens Studio, select Window > Editors > Map.
-
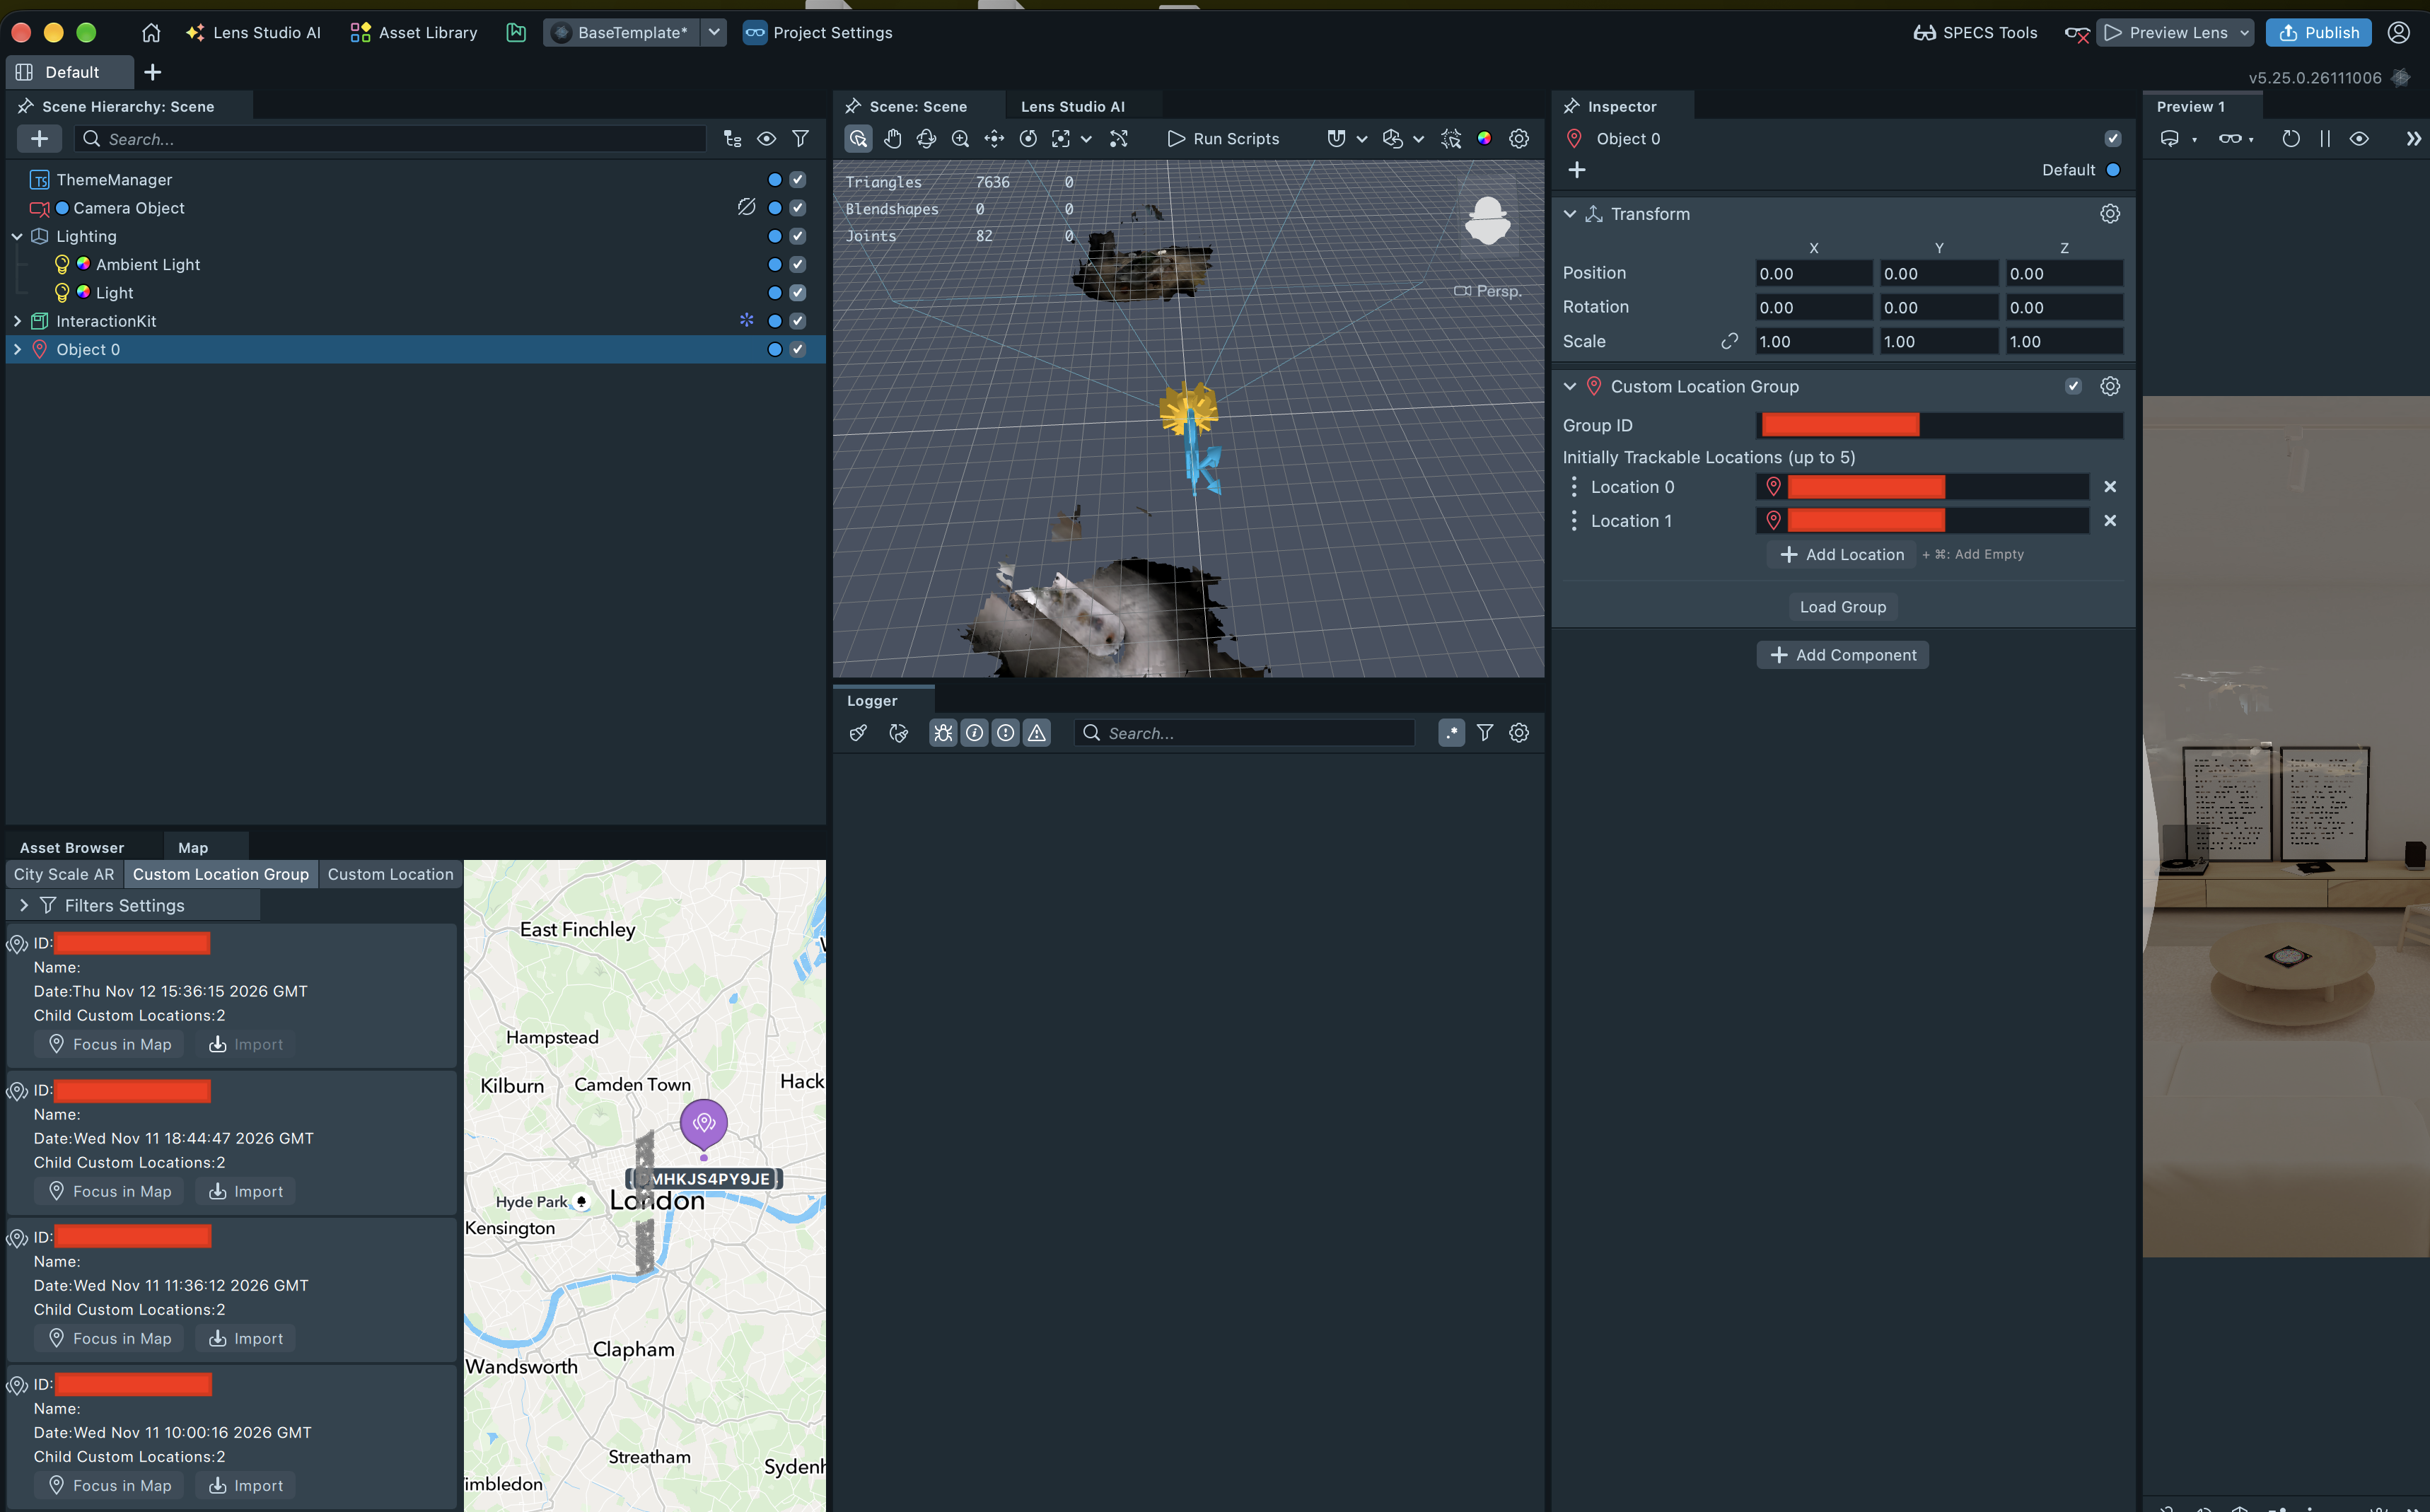
In the Map panel, open the Custom Location Group tab. It lists every Custom Location Group you've published.
-
Select Import on the group you want. Lens Studio adds a scene object with a Custom Location Group component, set to the group's ID and listing its locations.
Custom Location Groups aren't supported in Connected Lenses: a Connected Lens uses a single Custom Location.
Tips for capturing viewpoints
Follow these tips while you scan to capture more useful viewpoints and a better mesh:
- Keep moving. Make sure that your device is in constant motion.
- Don't stand in one spot. Don't stand still and turn your head around from one spot. Walk around the space instead.
- Avoid extreme angles and fast motion. Don't point straight up or straight down, and don't move your head quickly.
Related
- SPECS samples on GitHub: a sample project whose README walks you through building an example location-based Lens.
- Custom Location Creator Lens: the earlier scanner Lens for mobile, and its guide to importing a mesh.
- Occluders: hide AR content behind real-world surfaces with the scanned mesh.
- LocatedAtComponent: the component that places content at a Custom Location.