Localization
- Snapchat: fully supported
- SPECS: not supported
- Camera Kit Web: not supported
- Camera Kit Mobile: fully supported
- SnapchatFully supported
- SPECSNot supported
- Camera Kit WebNot supported
- Camera Kit MobileFully supported
Localizations Assets allow you to localize text in your Lens so that users all around the world can use it. The Lens will automatically use the correct localized string provided by a Localizations Asset based on the user's device language.
In order to use this feature, you will need to provide your own text localization. Check out the Localization Template which provides several examples of commonly localized text.
Localizations Asset
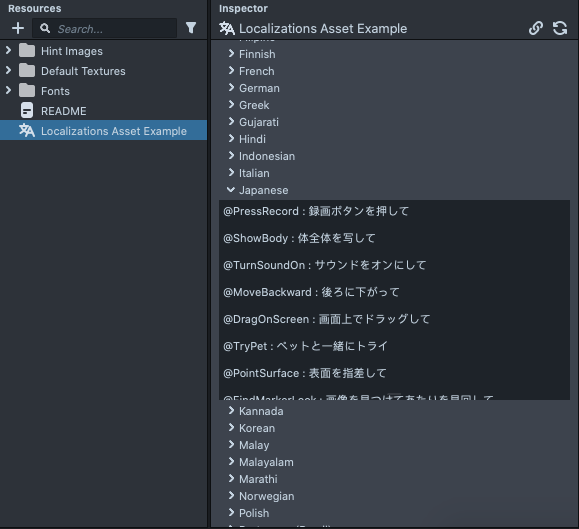
The Localizations Asset is a resource in your Lens Studio project that provides the necessary localized text for your Lens. The asset refers to a folder containing files for each language that you’ve translated your texts to.
Unlike other assets, a Localizations Asset does not need to be added into a Component when its keys are used inside a Component (such as a Text component). In that case it only needs to be in the Asset Browser panel of your current project, and Lens Studio automatically detects that the Lens references the asset and includes it. Detection checks only the keys in strings.json, so every key you use in a component must be defined in strings.json. Locale files only need the keys you want translated for that language.
If a Localizations Asset is not referenced by any Component (for example, its keys are looked up only from script), Lens Studio has no way to know your Lens needs it, and it will not be packaged into the Lens. In that case you must reference it from a script with requireAsset so that it gets included and loaded.
Creating a folder of translations
The process of creating a folder to be imported as Localizations Asset happens outside of Lens Studio. You can use any text editor to create the required files. However, they should follow the following guidelines to be recognized by Lens Studio.
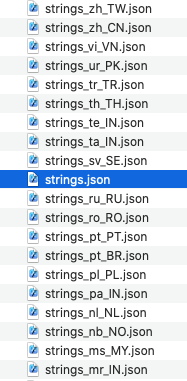
Each file name should be formatted as such: strings_[Locale Code].json,
where the Locale Code represents the content’s language.
The contents of the .json are key value pairs, where the key is used to refer to the text in the Text Component and its value is the localized text. Note that your Key should start with the @ symbol.
{
"@key": "Translated Text",
"@key2": "Another Translated Text"
}
Tip: Lens Studio imports locale files from two places only: strings_[Locale Code].json files next to strings.json, and [Locale Code]/strings_[Locale Code].json in a subfolder named after the locale code. Locale files anywhere else in the folder are not imported.
Lastly, add a strings.json file. It is required: Lens Studio imports the folder through this file and won't import a folder that lacks it. strings.json holds the English (en) text. It is also the fallback when the device language has no matching locale file or key.
Tip: Download an example of this Localization folder
Dynamic Text and Localization
In some cases you may want to add dynamic texts to your localized text. To do so, place the dynamic texts within two curly brackets.
{
"@HelloWorld": "Hello {{DisplayName}}"
}
Adding your folder of localizations as a Localizations Asset
To add your localization folder into your project, in the Asset Browser panel, press +, then Localization from file.

In your computer file selection window, navigate to the folder you created in the previous step, and press Open.
You should now see your Localization file in your Asset Browser panel.
You can select the Localizations asset and see its content in the Inspector panel.
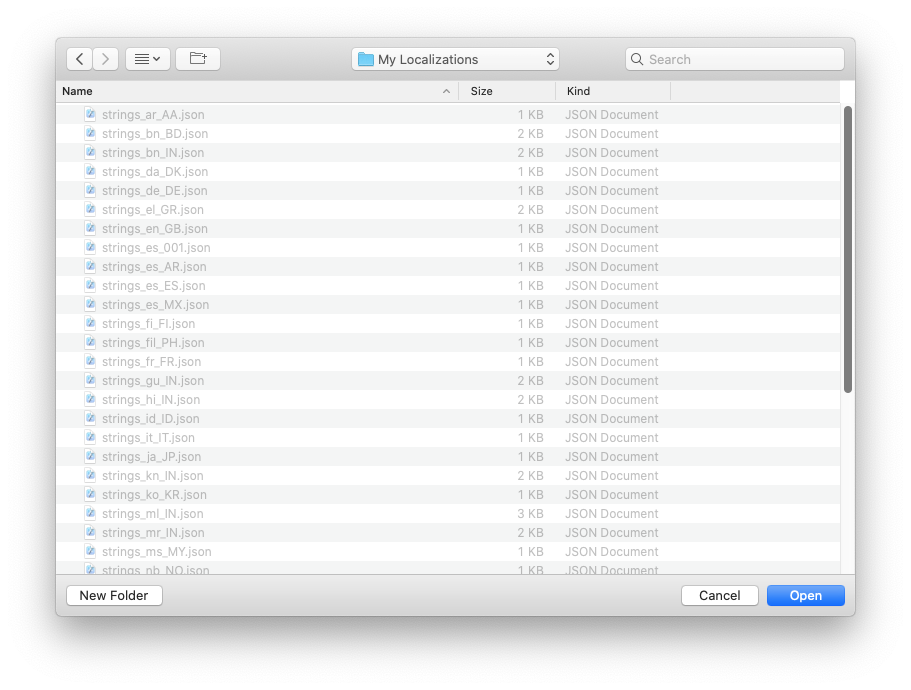
You can add more than one Localization Assets in a Lens! For example you can use the example localization file, while adding your own based on your needs.
Using your Localized text
To use your localized text, use the key you’ve defined before in your Text component.
In your Preview panel, instead of the @Key, you should see its value.
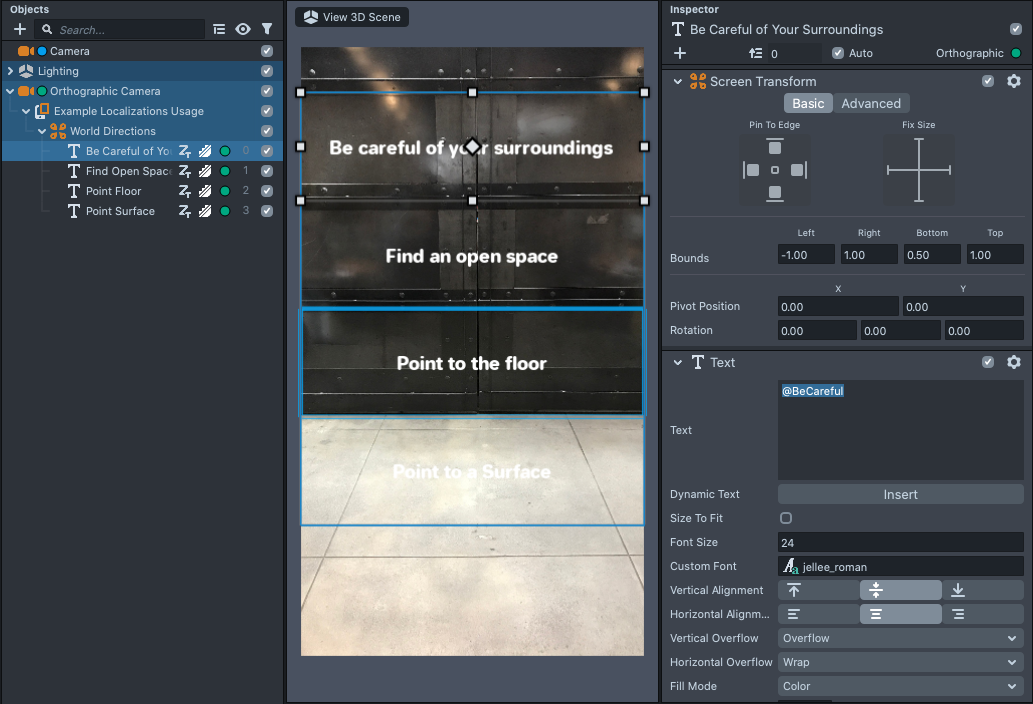
Your Text component should not contain any other characters (including a space) other than the keyword. Since languages may work differently, your localized text should contain the placement for any dynamic text within it.
Testing your Localized text
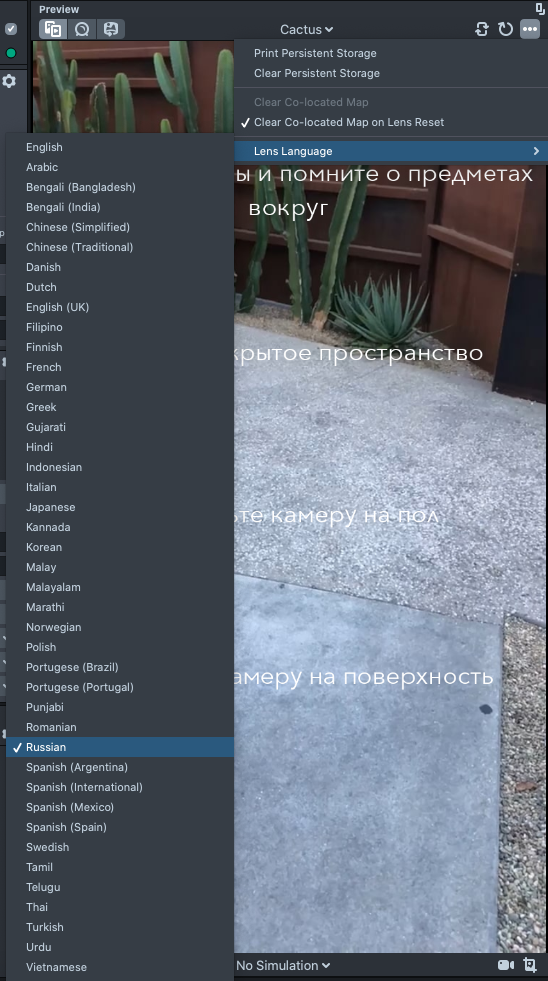
In the Preview panel, you have the option to simulate how your Lens would look in different languages.
Select the Three Dots in the far right corner of the panel, then select Lens Language, and finally choose the language to preview.
Locale Codes
| Language | Translated Language Name | Locale Code |
|---|---|---|
| Arabic | العربية | ar_AA |
| Bengali (Bangladesh) | বাংলা | bn_BD |
| Bengali (India) | বাংলা | bn_IN |
| Chinese (Simplified) | 简体中文 | zh_CN |
| Chinese (Traditional) | 繁體中文 | zh_TW |
| Danish | Dansk | da_DK |
| Dutch | Nederlands | nl_NL |
| English (UK) | English | en_GB |
| English (US) | English | en_US |
| Filipino | Filipino | fil_PH |
| Finnish | Suomi | fi_FI |
| French | Français | fr_FR |
| German | Deutsch | de_DE |
| Greek | Ελληνικά | el_GR |
| Gujarati | ગુજરાતી | gu_IN |
| Hindi | हिंदी | hi_IN |
| Indonesian | Bahasa Indonesia | id_ID |
| Italian | Italiano | it_IT |
| Japanese | 日本語 | ja_JP |
| Kannada | ಕನ್ನಡ | kn_IN |
| Korean | 한국어 | ko_KR |
| Malay | Bahasa Melayu | ms_MY |
| Malayalam | മലയാളം | ml_IN |
| Marathi | मराठी | mr_IN |
| Norwegian | Norsk | nb_NO |
| Polish | Polski | pl_PL |
| Portuguese (Brazil) | Português | pt_BR |
| Portuguese (Portugal) | Português | pt_PT |
| Punjabi | ਪੰਜਾਬੀ | pa_IN |
| Romanian | Român | ro_RO |
| Russian | Русский | ru_RU |
| Spanish (Argentina) | Español (AR) | es_AR |
| Spanish (International) | Español | es_001 |
| Spanish (Mexico) | Español (MX) | es_MX |
| Spanish (Spain) | Español (ES) | es_ES |
| Swedish | Svenska | sv_SE |
| Tamil | தமிழ் | ta_IN |
| Telugu | తెలుగు | te_IN |
| Thai | ภาษาไทย | th_TH |
| Turkish | Türkçe | tr_TR |
| Ukrainian | Українська | uk_UA |
| Urdu | اردو | ur_PK |
| Vietnamese | Tiếng Việt | vi_VN |
Last Update: August 16, 2021