HSV Sliders Tutorial
- Available on all platforms
In this guide, we will add sliders to our material that will modify the hue, saturation, and value of the diffuse map of a texture. Along the way, we'll touch on channels, parameters, and parameter groups
Guide
To begin, I'm starting with the Animated Object template. I created a PBR Graph material and assigned red_panda_base to the Diffuse Map, red_panda_normal to the Normal Map, and red_panda_param to the Material Params map. Then, I assigned this material to the objects red_panda_lo and innertube_lo. Basically, we recreate the panda's default material in the Material Editor.
On SPECS, start from a Graph Unlit material unless the object needs lighting: PBR costs more on SPECS. The technique in this guide works the same in an unlit graph.
Next, we'll add an RGB to HSV node and a HSV to RGB node, and connect them in line between the Diffuse Map and the Albedo parameter of the PBR node. This won't have any visual effect yet- all we're doing is converting from RGB color space to HSV, then right back to RGB again.
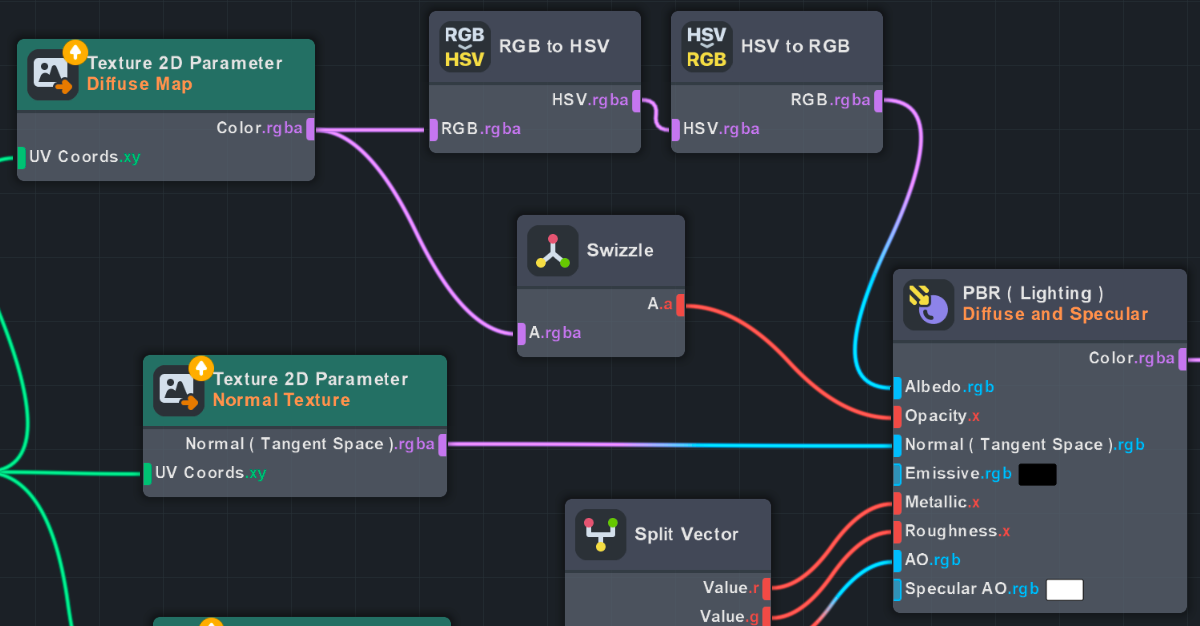
A quick refresher: most images on a computer are in a color space that we call RGB, where each pixel has three channels representing red, green, and blue values. Combined, these channels can display millions of colors. HSV encodes color differently, where each channel represents the hue, saturation, and value. By increasing just the hue channel, we can change the color without changing the brightness or saturation, something that can be hard to do if we're just dealing with RGB values.
Let's change some colors. Drop an Add node between RGB to HSV and HSV to RGB. On the Add node's B channel, change it from Auto to xyzw. Now fiddle with the numbers- the first number will change the hue, the second number will change the saturation, and the third will change the value.
Note that setting a channel to xyzw means it can be any floating point number, including negative numbers, as opposed to rgba, which can only be in the range of 0-1.
Now we're going to make some controls that we can play with on the material. Add a Parameter (Float) node and name it Hue, and tick Enable Min and Enable Max in the Parameter Settings window. This will turn our parameter into a slider.
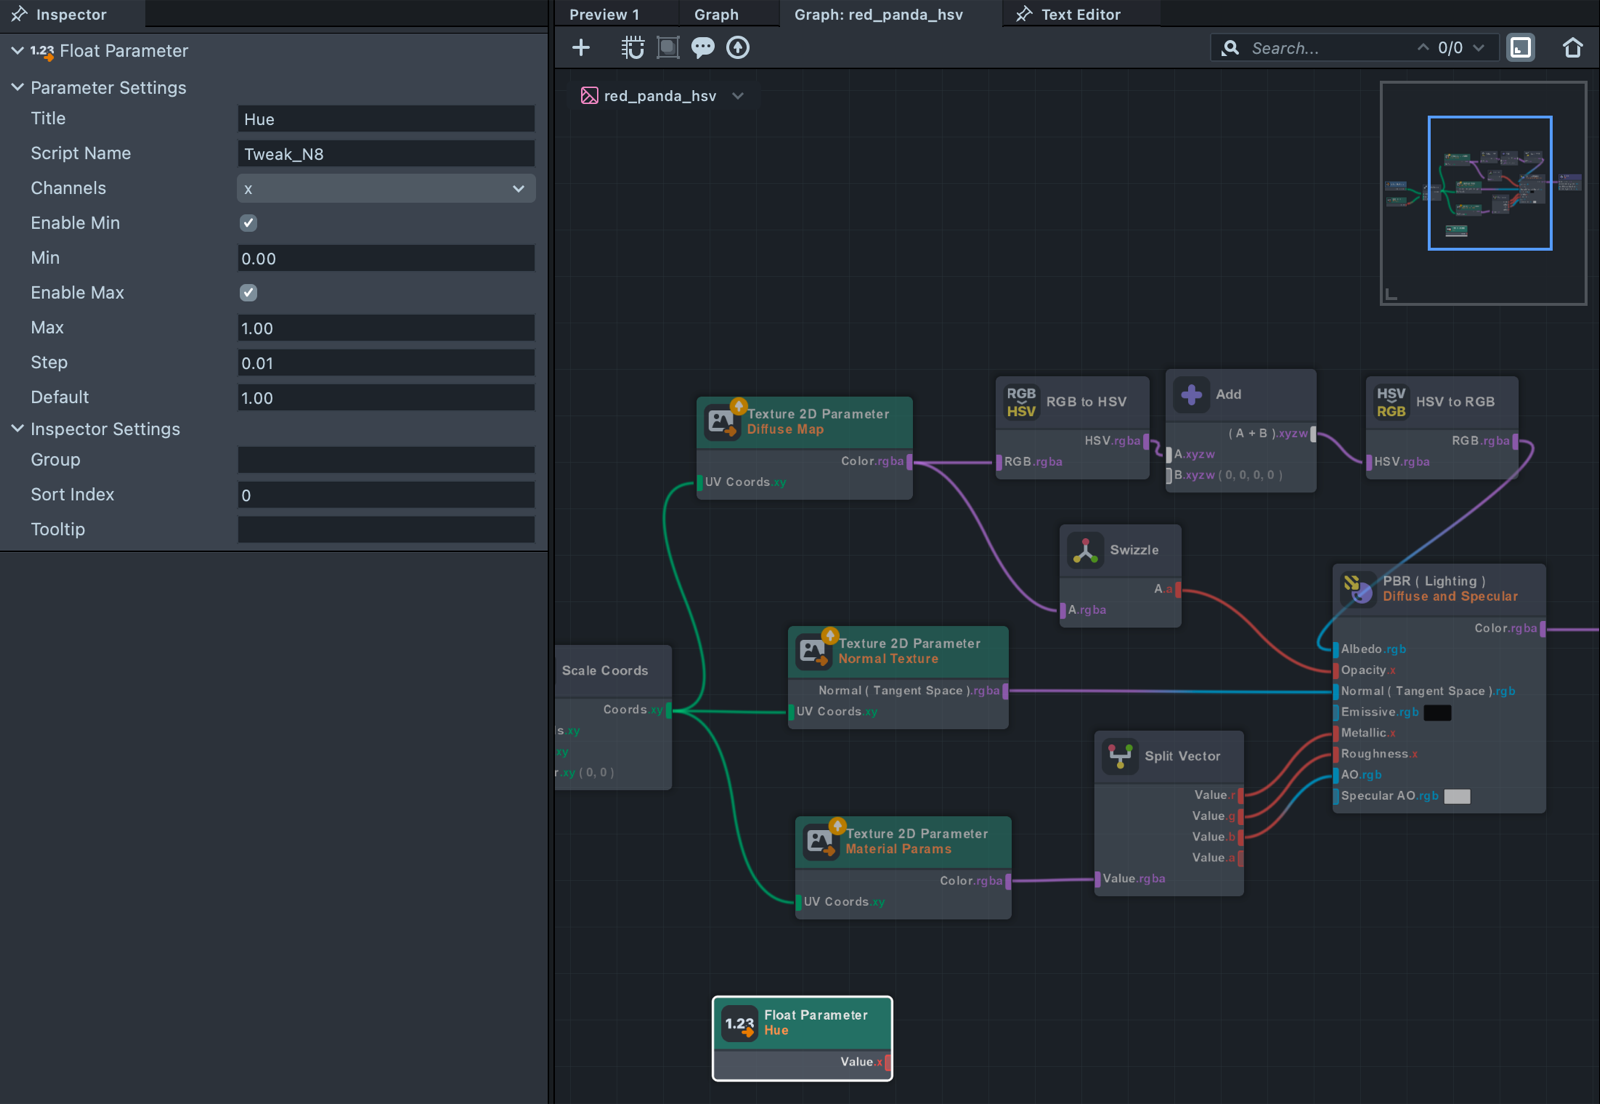
The parameter won't show up on our material until we hook it into our graph, so let's do that. Create a Construct Vector node and wire your Hue parameter into Value.x of the Construct Vector node. Then, plug Construct Vector into the B channel of the Add node. Now your Hue parameter shows up in the material parameter page. Try changing the value there and see if it works.
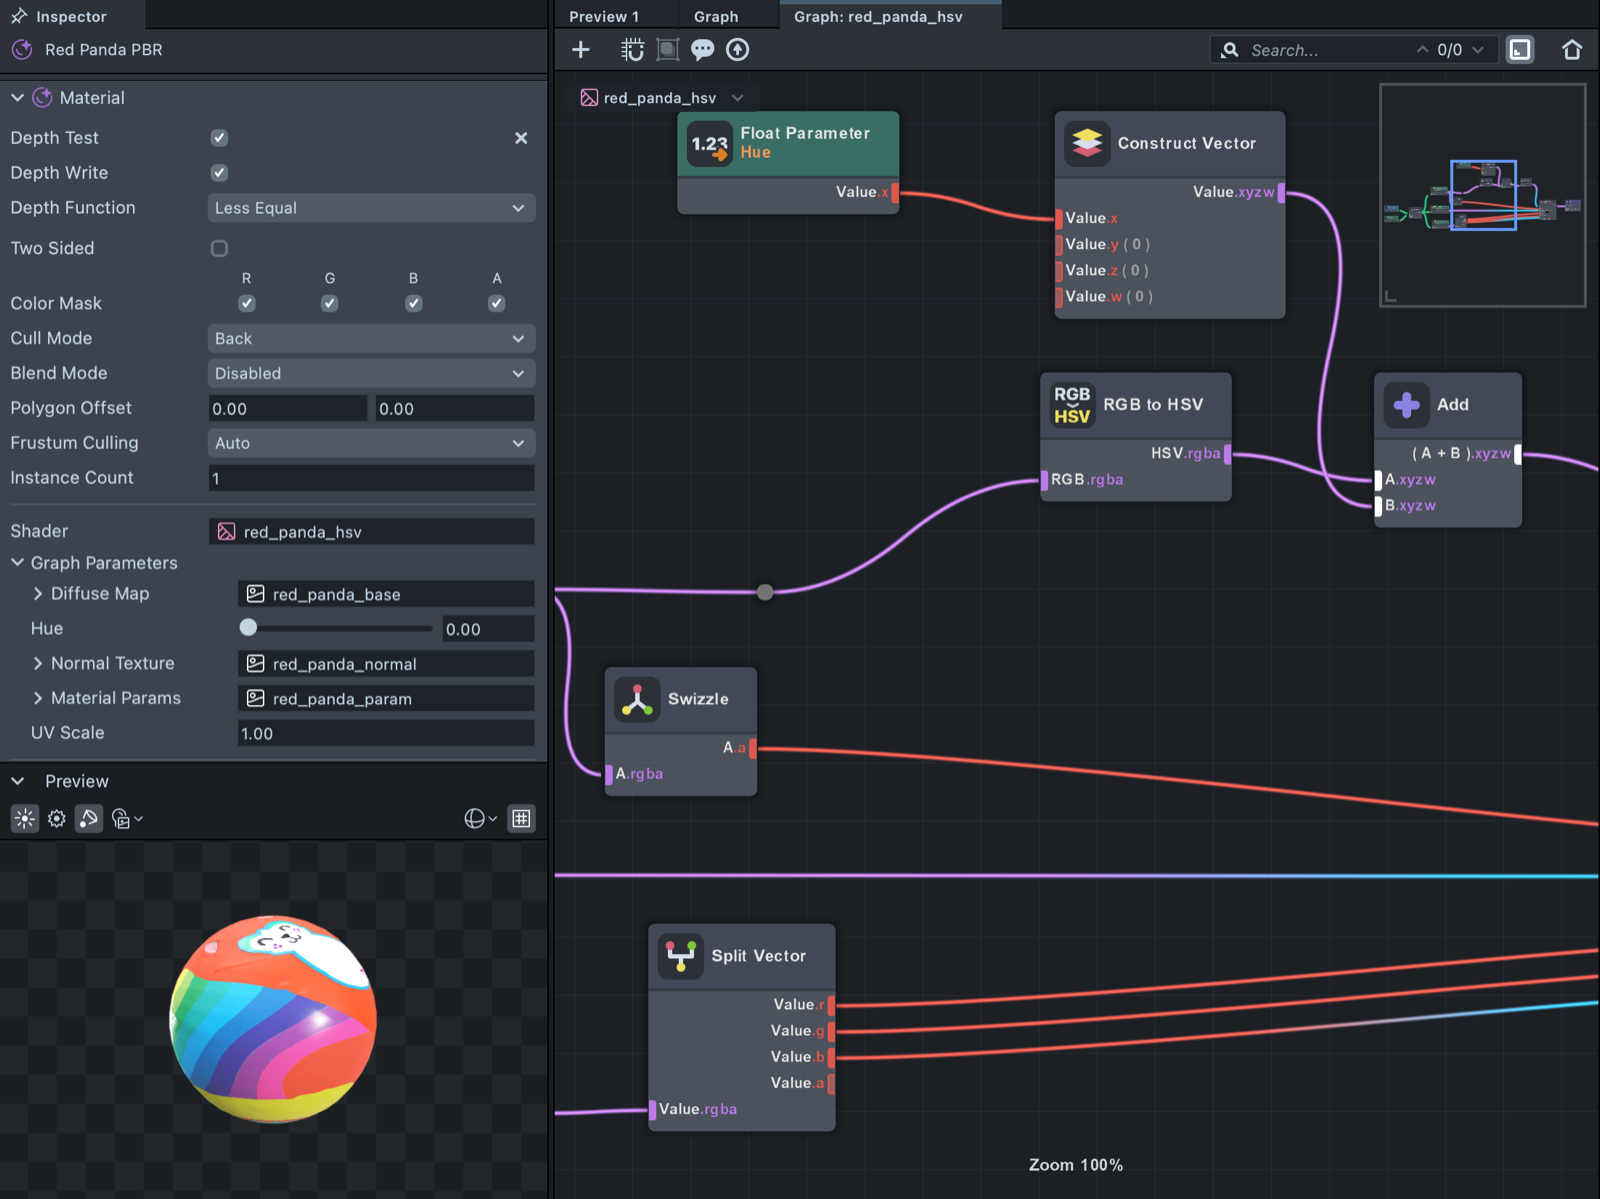
Now we can add two more Parameter (Float) nodes. One should be named Saturation and plugged into Value.y, and the other should be named Value and wired into Value.z of the Construct Vector node. Set the Min value for both of these new nodes to -1.0.
Tip: in addition to your standard copy + paste keyboard shortcuts, you can hold Spacebar then click and drag a node to copy it. This works even with a bunch of nodes selected.
Finally, a bit of tidying up. We can group our new parameters in the material by adding the same name to the Group parameter on each of the Parameter nodes. Let's call it something like HSV Adjust.
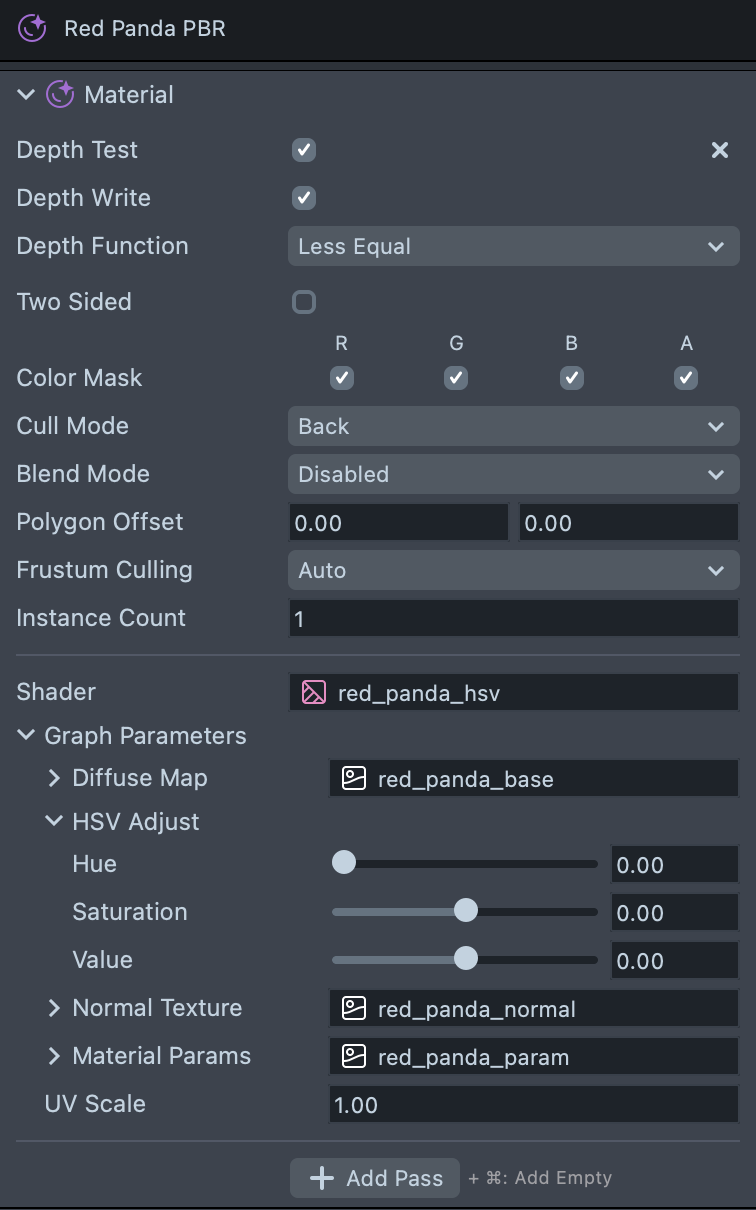
Now you should have your new Hue, Saturation, and Value parameters collected into a group called HSV Adjust on your material. Congrats.