Visual Scripting Overview
- Snapchat: fully supported
- SPECS: fully supported
- Camera Kit Web: not supported
- Camera Kit Mobile: not supported
- SnapchatFully supported
- SPECSFully supported
- Screen touch events fire only in the Lens Studio Preview; on the device, use Interaction Kit or the Gesture Module
- Camera Kit WebNot supported
- Camera Kit MobileNot supported
Visual Scripting is one of the ways to define logic and interactivity within your Lens experience. Interactivity and logic are great as they can create a richer experience for the user: whether it be to respond to an action that they took (for example, when they tap the screen, or open their mouth), or to dynamically cause things to happen (generate objects around the user).
Using Visual Scripting, you have access to all the possibilities of regular code scripting, except without writing any code at all.
To learn more about using JavaScript to define logic, and for general details about scripting, check out the Scripting guide.
Another way to define logic is through the Behavior helper script which allows you to use drop downs to define actions.
You can combine regular scripting with visual scripting using Custom Nodes.
What is Visual Scripting?
Visual Scripting is great for those new to interactivity, or wanting to learn to program as it is node based, meaning you don’t have to worry about typing keywords or special syntax. You can see the list of nodes and think about the logic you want to create rather than how to format it.
It’s also great for programmers as it’s easier to see the flow of logic, as well as reuse and share pieces of logic as you can group logic together. Best of all, you can mix and match text based coding with visual scripting as you can bring in written code as a custom node in visual scripting.
Getting Started with Visual Scripting
Visual Scripting is the process of using a Script Graph to define logic in a Lens.
To create a Script Graph, go to the Asset Browser panel and press + > Script Graph. The new asset is named Empty Script Graph. Then, we can define our logic by editing the file with the Script Graph editor. Double click any Script Graph to open it.
Visual Scripting works in a similar way to Material Editor. Just as Material Editor allows you to write shaders without writing code, the Visual Script Editor allows you to write scripts without writing code.
Finally, we will add this Script Graph to our Lens. To do this, choose an object to attach the Script Graph to, then drag the Script Graph asset from the Asset Browser panel onto the Scene Object in the Inspector panel. This adds a Script component with the Script Graph attached.
Add Component has no plain Script entry: its TypeScript item creates a new .ts file instead of attaching a Script Graph.
Making your first logic
Let’s now add our logic to the Script Graph.
Everything in the graph starts with an Event node. These are the orange ones that a new empty graph starts with two of: OnAwake and UpdateEvent. These nodes have one main output connection, which is where you connect what should happen in response to that event. These “what should happen” connections we call execution.
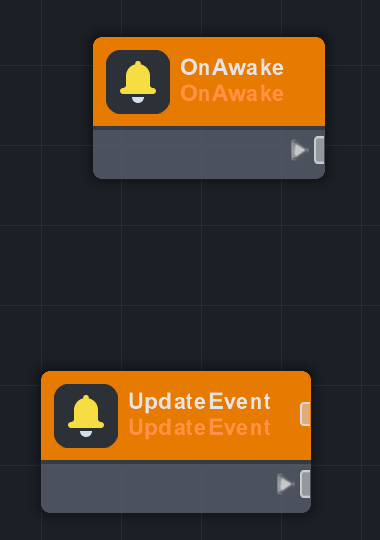
If we wanted something to happen when the Lens starts, we would connect it to the execution port on the OnAwake node. For example, let’s print a message to the Logger when the Lens start. Click on the execution port on the OnAwake node and drag it to activate the new node picker. Since we want to print a message, we will type Print.
Now select the new node and in the Script Graph sidebar, you will see any options it has. In this case, you can set the message to print. Go ahead and set the message you want.
You can hover over a node, and click on the (i) icon to read more about what the node does.
Adding Nodes
Let’s say instead of having the message appear when the Lens start, we want it to appear when the user taps on the screen. To do this, like before we will hook a Print node to an Event node--but this time, a TouchEndEvent.
You can add new nodes by pressing Tab key on the keyboard, or right clicking in the graph and choosing Add Node. This time search for TouchEnd Event.
With the node added, drag its execution connection port to the Print node we made earlier. Now, when you tap on the Preview panel, you should see the message print.
On SPECS, the TouchEndEvent node fires only in the Lens Studio Preview panel. The device has no touchscreen: hand input on SPECS comes from Interaction Kit.
Driving Effects Using Visual Scripting
At this point we've explored how you can add and connect nodes to tell your Lens to do something. Try using what you've learned above and exploring what nodes you can add to create different effects for your Lens.
For example: try making a graph that setText on a Text component depending on whether the Snapchatter had just triggered a MouthOpened or MouthClosed event.
You can get references to components or assets by dragging them into your Script graph. Learn more in the Types of Nodes guide.
Next Steps
Now that you’ve learned the basics of Visual Scripting, try making your own logic.