Timeline Plugin
The Timeline plugin arranges a Lens in time, keying objects, materials, and effects and playing clips, sound, and video on one clock.
The Timeline plugin is a Lens Studio panel for arranging a Lens in time: when objects appear, how they move or change color, and when animation clips, sounds, videos, and effects play. You scrub to any moment to see it, and Build adds one component that plays the sequence in the Lens. It plays the same on a device as in the editor.
Why use the Timeline plugin
| Without Timeline | With Timeline |
|---|---|
| Timing lives in many scripts: tweens, delayed callbacks, Behavior chains. | One visual layout. Drag a block or a key to change its timing. |
| To see second 7 of a Lens, you play it from the start and wait. | Scrub to any moment and see it in the preview. |
| Clips, sounds, videos, materials, and particles each run on their own clock. | One clock per timeline drives them together. |
| Chaining scenes or states needs wiring between scripts. | Timelines start and stop each other through markers. |
Install the Timeline plugin
The Timeline plugin requires Lens Studio 5.24 or newer on macOS or Windows.
The Timeline plugin is in the Asset Library under Plugins.
-
In Lens Studio, open the Asset Library and search for
Timeline, or go to the Plugins category. -
Click Install on the Timeline card.
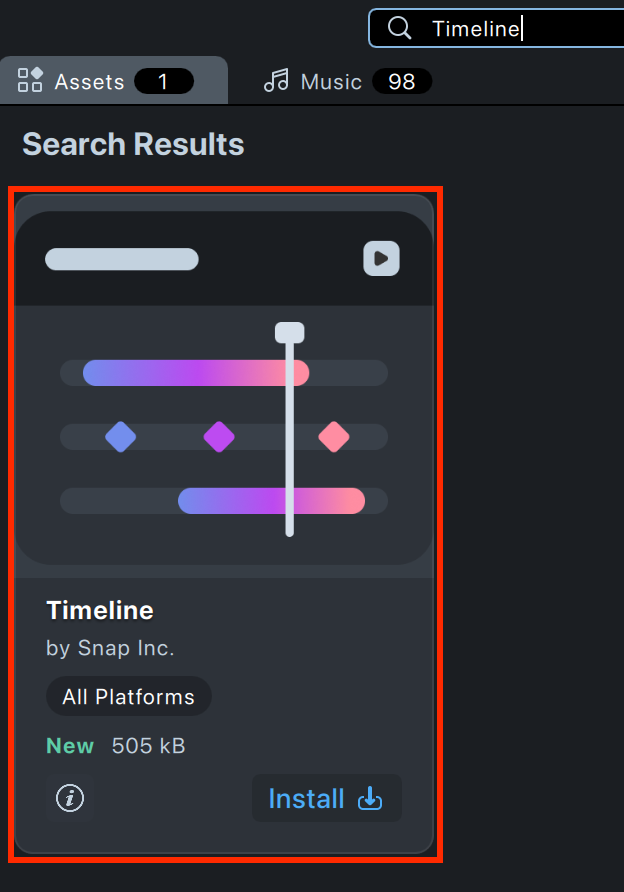
-
Open the panel from Window › Timeline in the menu bar.
Core concepts of the Timeline plugin
- Timeline. One sequence with its own length, frame grid (30 or 60 fps), play count, and start mode. A Lens can have more than one.
- Node View. The map of all timelines in the Lens. Each node is one timeline.
- Layer. One row of a timeline, bound to a scene object, a material, or a VFX asset.
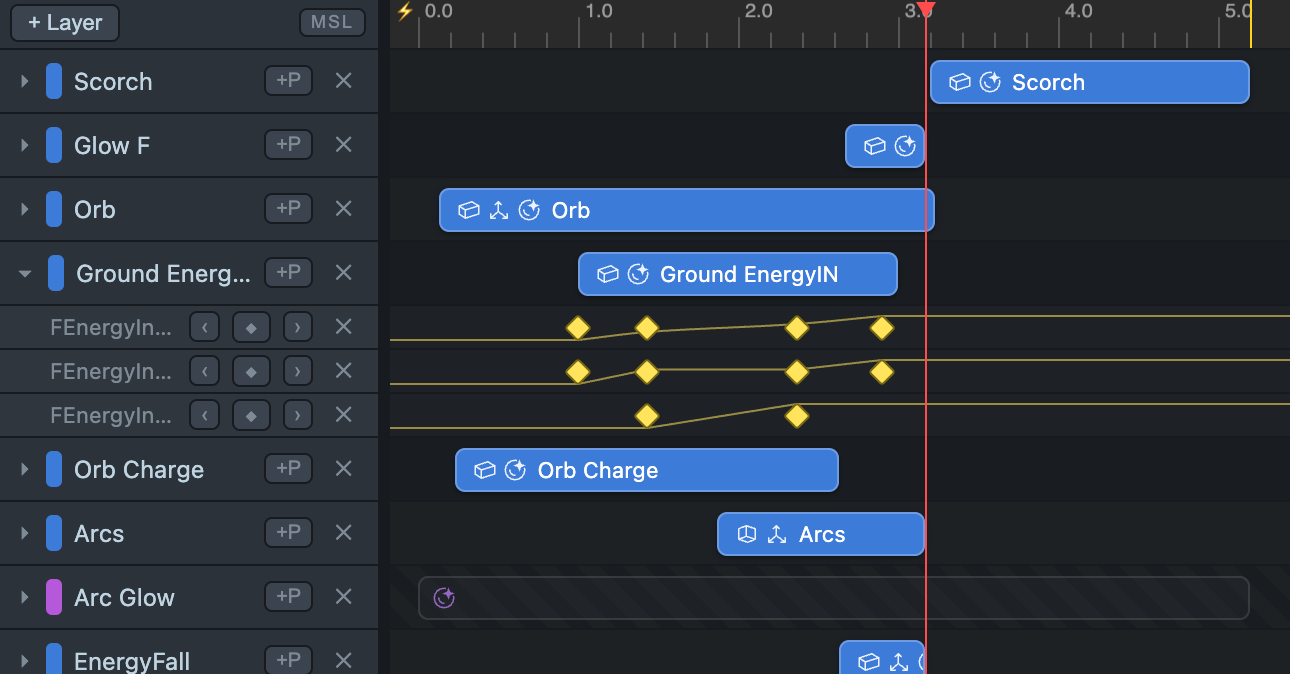
- Block. The time window when a layer is live: the timeline enables the object, plays its audio and video, and runs its animation.
- Track. One animated property of a layer.
- Key. A value at one moment on a track. The track blends between its keys.
- Marker. A point in the Events row. When playback crosses it, it runs an action, for example starts another timeline.
- Build. Writes your timelines into a Timeline component in the scene. The Lens plays what you built last.
Animate your first object with the Timeline plugin
- Open Window › Timeline. A new project has one timeline, Main. Double-click its node to open it.
- Drag a scene object from the Scene Hierarchy onto the panel, or press + Layer.
- Press +P on the layer and pick a property, for example Transform · position.
- Move the playhead to
0:00and press ◆ on the track. This keys the current value. - Move the playhead to 1 second, move the object in the Scene panel or change the value in the Timeline Inspector, and press ◆ again.
- Press Build. Main starts with the Lens, so the object moves in the Preview panel.
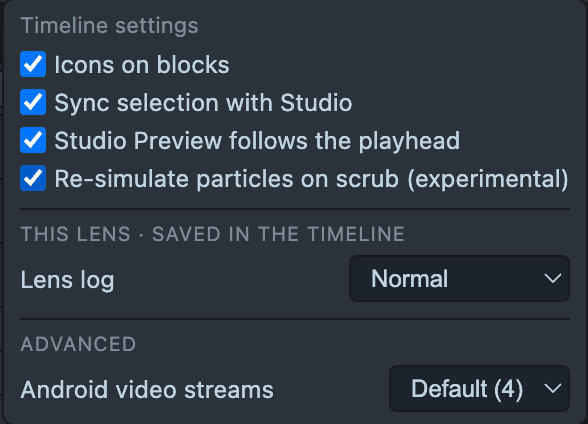
- To scrub, open ⚙ and turn on Studio Preview follows the playhead. The Preview panel then shows the moment under the playhead while you drag it.
The Timeline panel
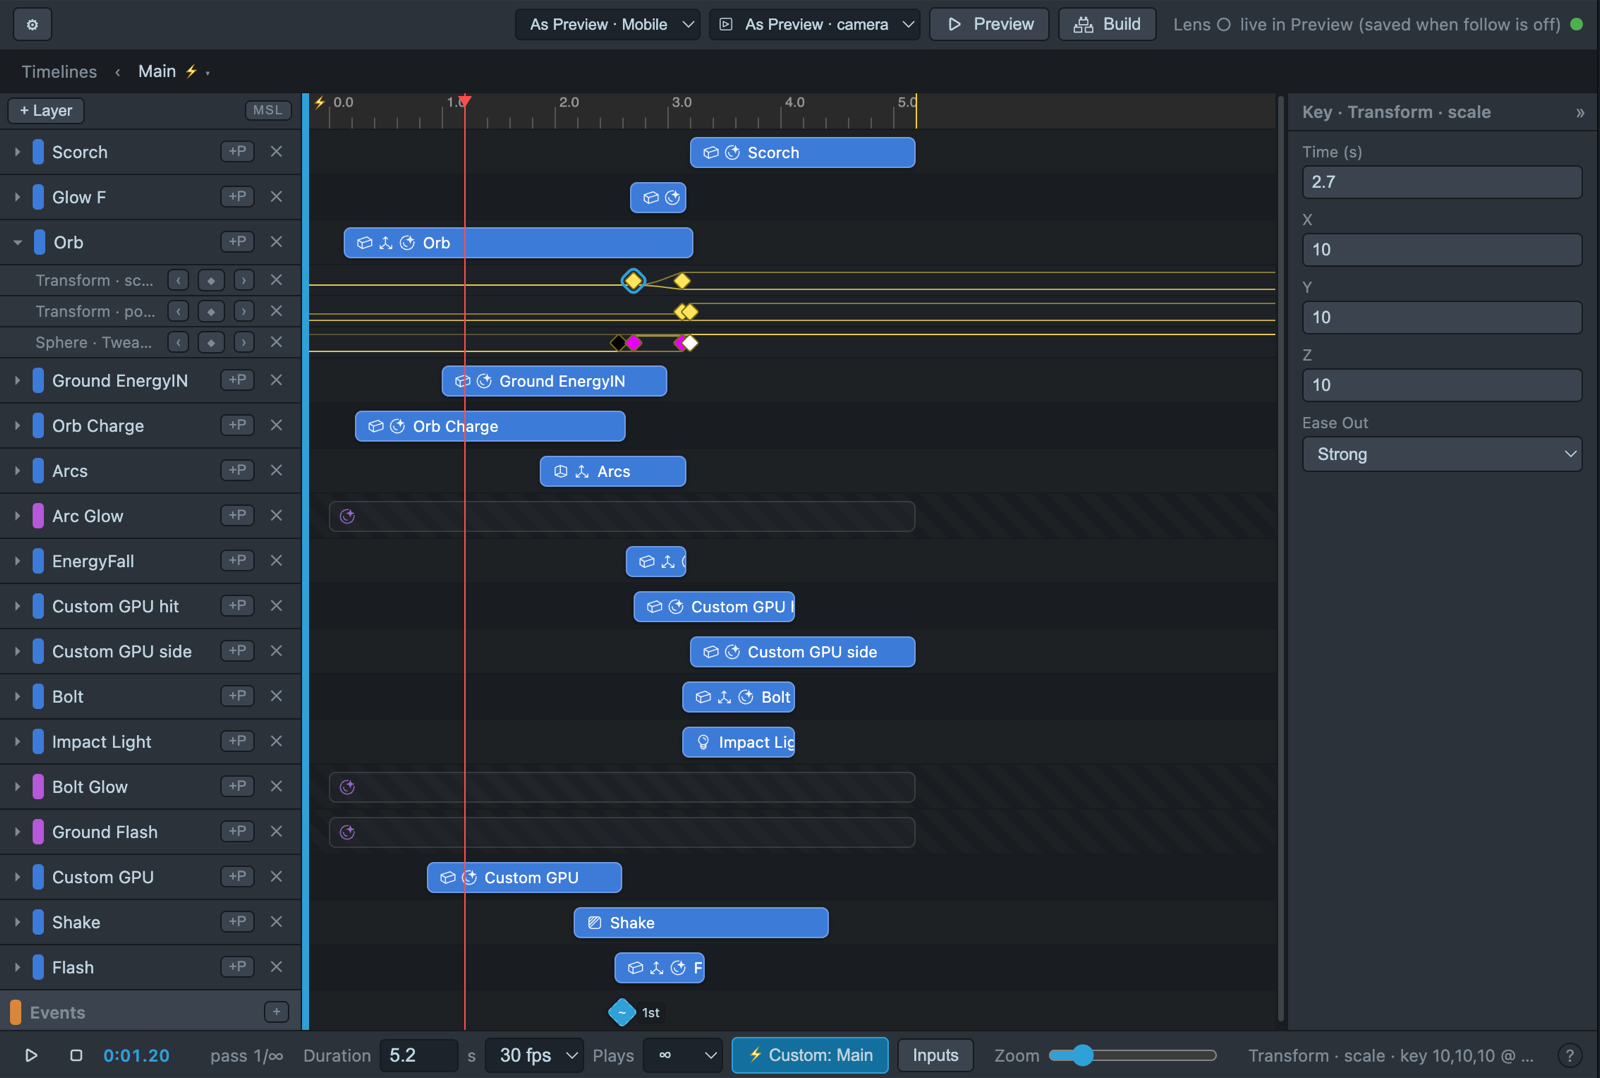
Node View
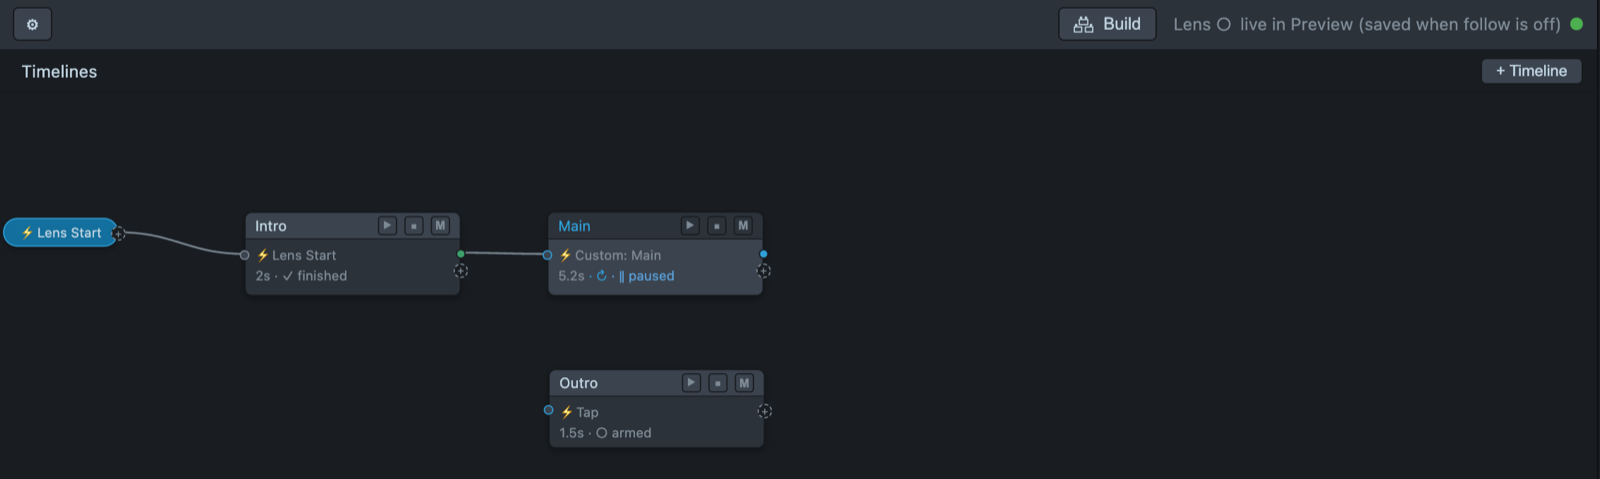
The Timeline panel opens on the Node View.
- + Timeline adds a timeline.
- Double-click a node to open its tracks. Timelines in the top row brings you back.
- Drag the + on a node onto another node to start the second when the first ends. Drag ⚡ Lens Start onto a node to start it with the Lens.
- ▶ and ■ on a node start and stop that timeline in the Preview panel. M mutes it, so it doesn't start.
Top bar
- ⚙ opens the panel settings.
- Build creates or updates the Timeline component in the scene. Press it after your edits so the Lens plays them.
Layers
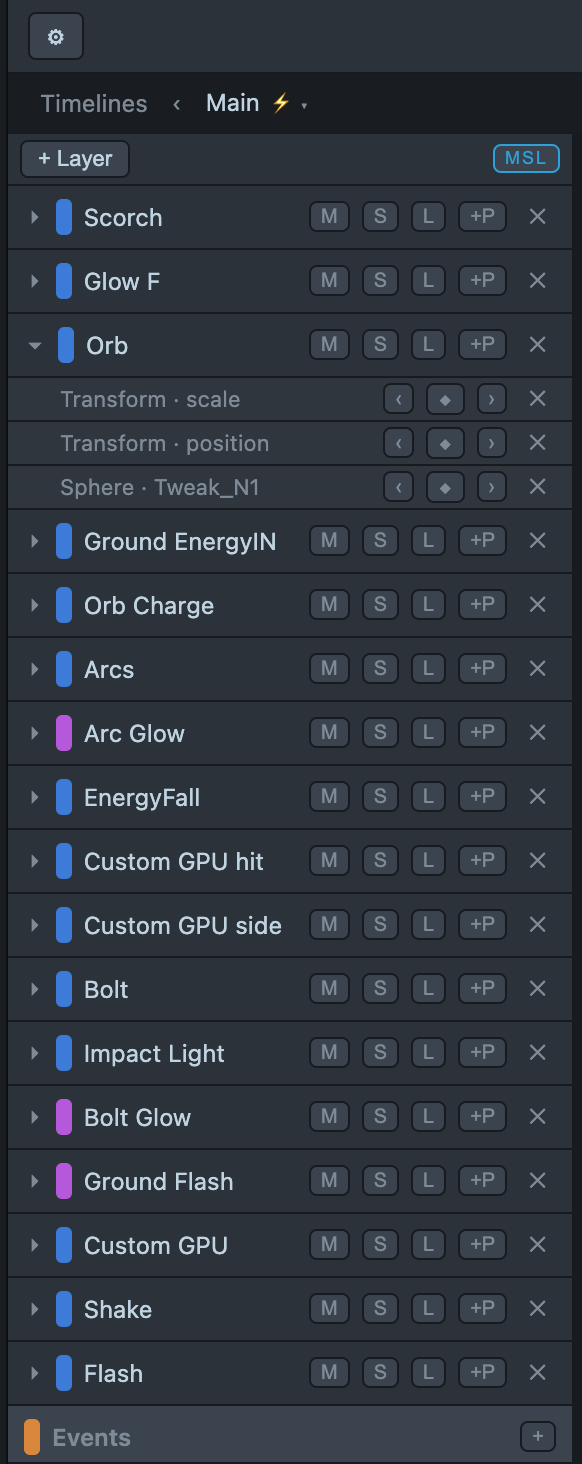
Each row on the left of the Timeline panel is a layer. Its blocks and keys sit to the right of it.
- Drag scene objects, materials, or VFX assets onto the panel, or press + Layer.
- ▸ shows the layer's tracks.
- M mutes the layer: the timeline skips its block, media, and tracks.
- S solos the layer: every other layer of this timeline is silent. Shift-click to solo more than one.
- L locks the layer against edits. Playback doesn't change.
- MSL in the corner shows or hides these three buttons.
- ✕ deletes the layer.
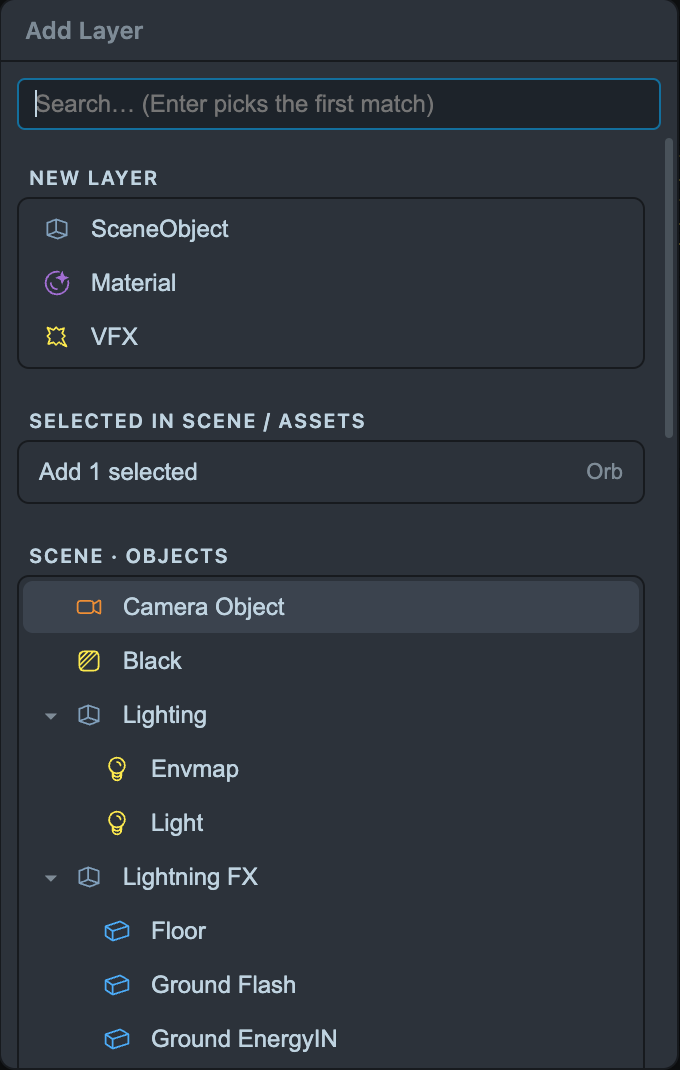
+ Layer opens a list: a new scene object, material, or VFX, your current selection in Lens Studio, or any object of the scene. Cmd-click picks more than one. On Windows, use Ctrl-click.
Add properties to a layer
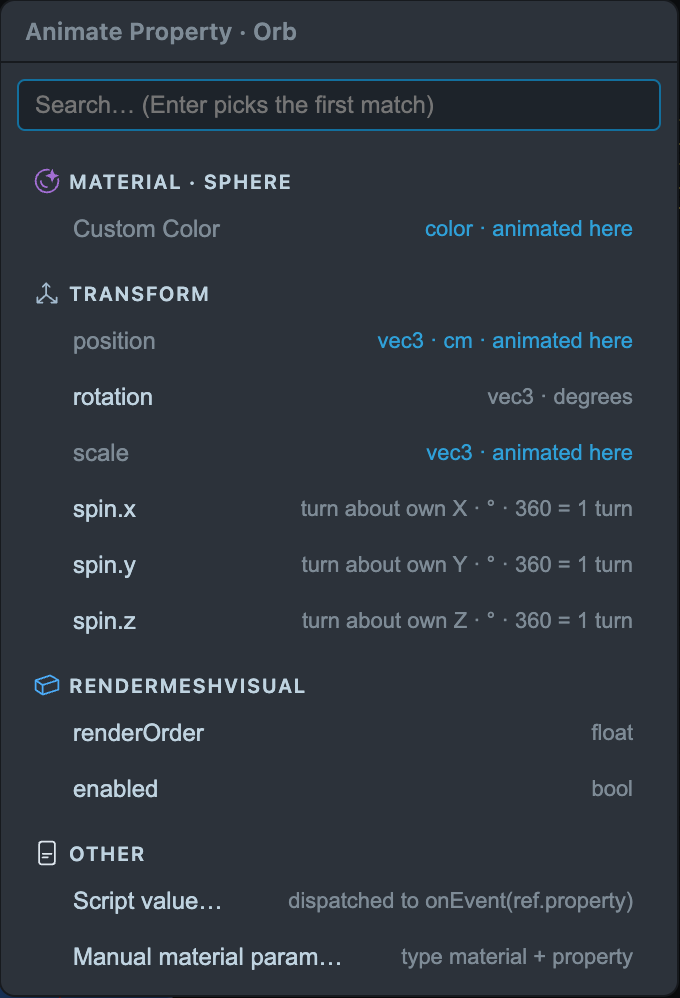
+P (add property) on a layer, or Shift+P, lists what the layer can animate, grouped by source. The sources are Transform or Screen Transform, each component of the object, its materials, or the VFX graph. Pick a property to add a track for it, then press ◆ on the track to key the current value.
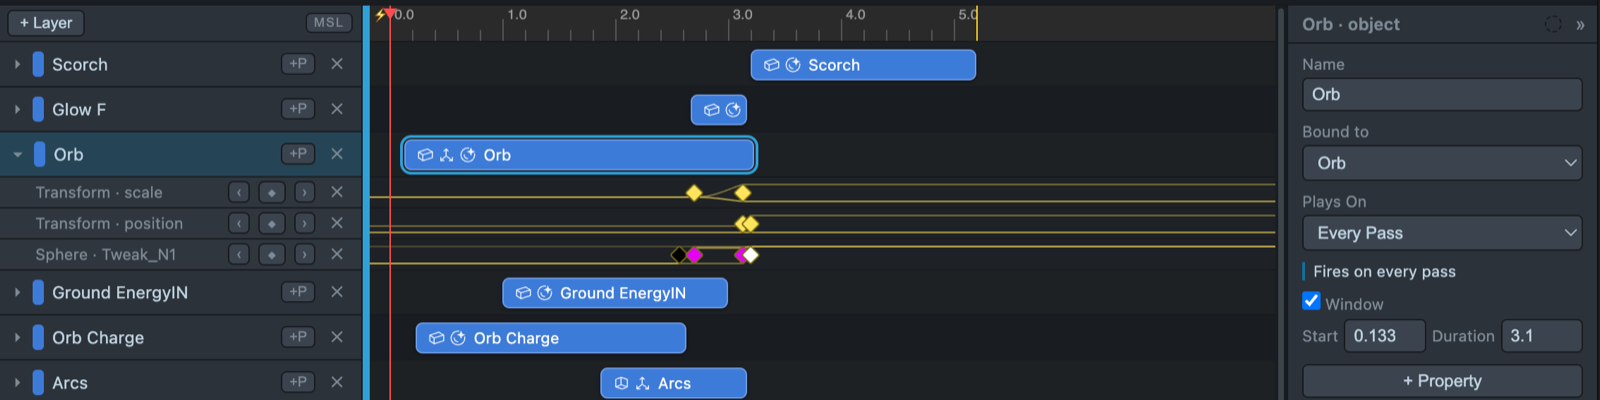
The Events row under the layers holds markers. Press + on it to add a signal marker or a tween from the scene, or drop a scene object with a tween onto the row.

Timeline Inspector
The right side of the Timeline panel shows the settings of the layer, key, or marker you select. » folds it away.

Bottom bar


- ▶ plays and pauses. ■ stops and returns to the start. The readout shows the current time.
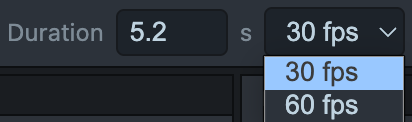
- Duration sets the length of the timeline in seconds.
- 30 fps or 60 fps sets the frame grid that keys, blocks, and markers snap to.
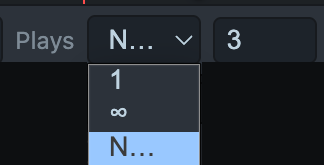
- Plays sets how many times the timeline runs: once, a set number of times, or forever.
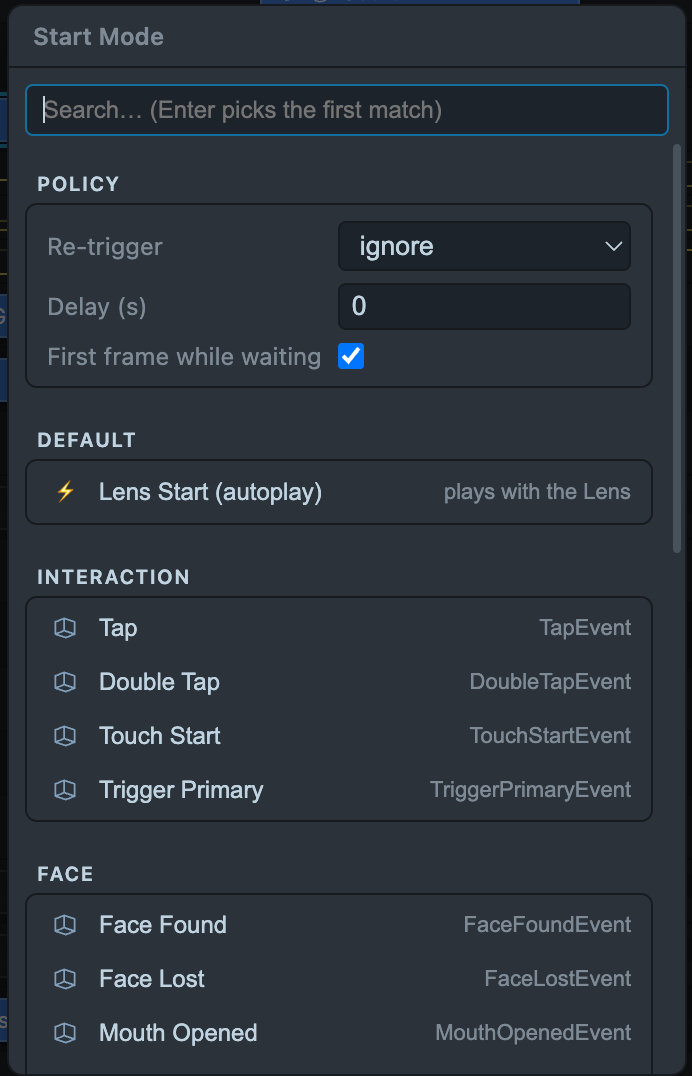
- ⚡ shows how the timeline starts. Click it to choose the start, a delay, and what a repeated trigger does.
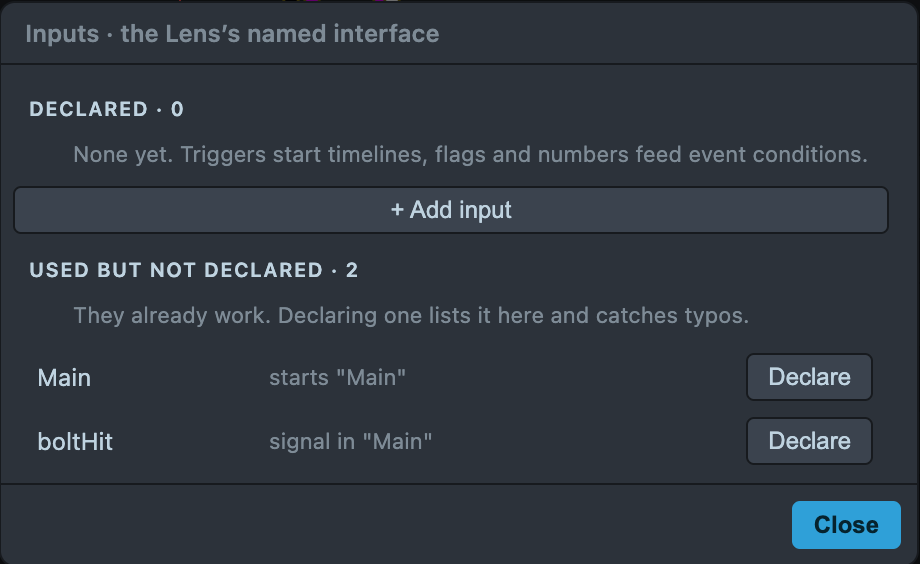
- Inputs lists the named triggers, flags, and numbers that scripts and Behavior send to the Lens.
- Zoom scales the time ruler.
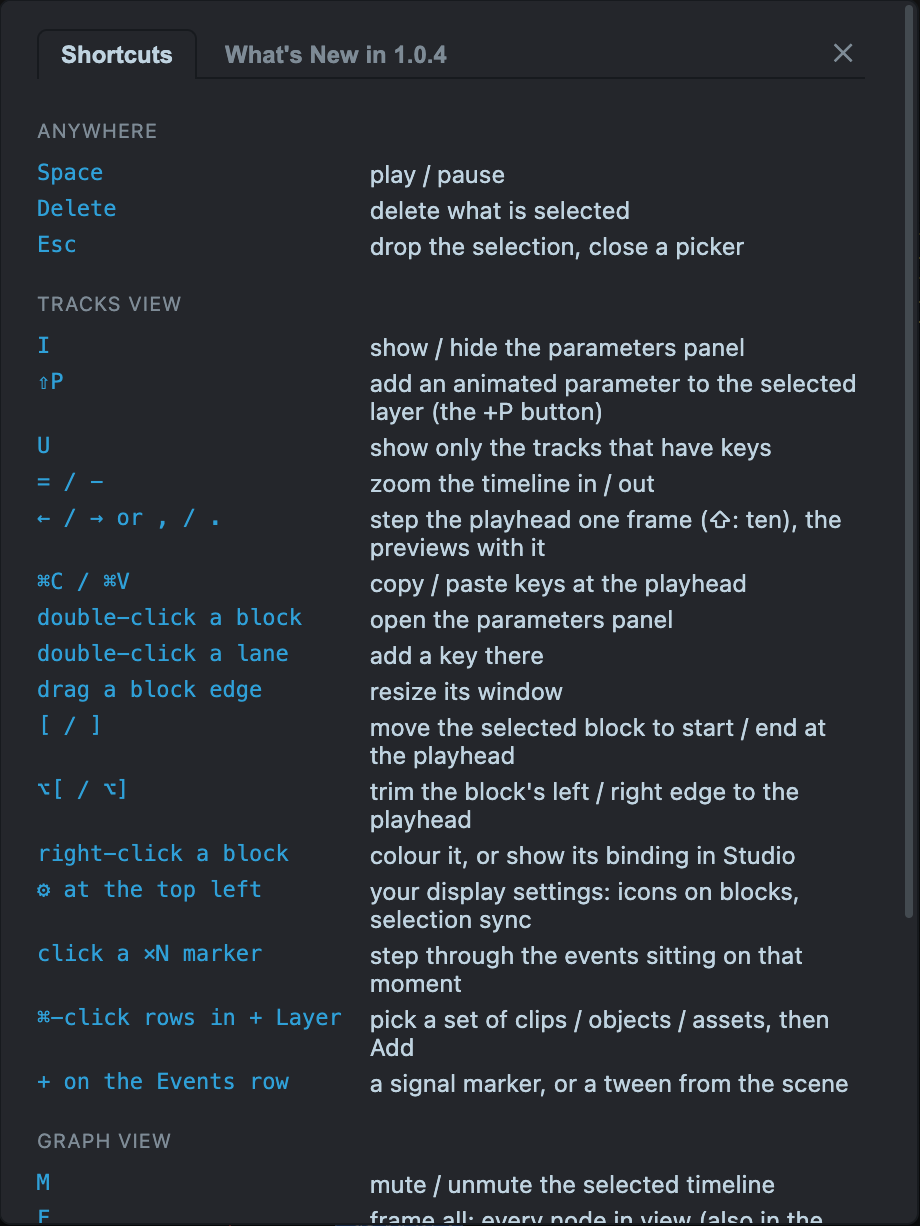
=and−do the same. - ? opens the shortcuts.
What the Timeline plugin can animate
| Family | What you key |
|---|---|
| Objects | Visibility (the block), position, rotation, scale, spin around an axis, Screen Transform layout |
| Components | Text and Text3D, Image, Light, Camera, Retouch, Liquify, Post Effect, Audio volume, enabled on each |
| Script inputs | @input values of a Script Component |
| Face and meshes | Face Stretch features, blend shapes of a Render Mesh Visual |
| Materials | Any number, vector, or color the shader exposes, and texture tracks that swap images, videos, and render targets |
| VFX | VFX graph properties that scripts can set |
| Clips, audio, video | As blocks on the timeline |
Each key has its own ease in and ease out. After the last key, a track can hold, loop, or ping-pong.
Media and effects on a timeline
- 3D animation clips. A clip of an
AnimationPlayerbecomes a block. Trim and stretch it, and overlap two blocks of one player to cross-fade between clips. - Audio. A block starts and stops a sound. Draw a volume envelope on the block.
- Video. A block starts, pauses, and stops a video, and can loop it or start partway in.
- VFX. Graph properties follow their keys. Particles pause and resume with the timeline.
Drag and drop onto the Timeline panel
| Drop | Onto | Result |
|---|---|---|
| Scene objects, materials, VFX assets | An empty part of the panel | New layers |
| An object with animation clips | The panel | A list to pick its clips as blocks, or the object as a layer |
| An audio or video file | An empty part of the panel | A media block |
| A scene object | The block of an object layer | The layer binds to that object. Hold Alt to add a new layer instead. |
| A material | The block of an object layer | The material goes into one of the object's material slots |
| A material or VFX asset | The block of its own kind | The layer switches to the new asset and keeps its tracks |
| A texture, video, or render target | A texture track | A key with that texture. Dropped on a key, it replaces that key's image |
| An object with a tween | The Events row | A marker that runs the tween |
Start modes and events
Each timeline starts on Lens start, on a built-in event such as a tap or a face found, or on a custom trigger, with an optional delay. A timeline's name is also its custom trigger. It can play once, a set number of times, or loop.
When playback crosses a marker in the Events row, the marker can:
- send a trigger to Behavior and scripts
- start or stop another timeline
- pause or seek its own timeline
- start, stop, pause, or resume a Tween Manager tween.
Preview and scrubbing
- The Preview panel. With Studio Preview follows the playhead on in ⚙, the Preview panel shows the moment under the playhead while you play or drag it.
- Frame steps. The left and right arrow keys step one frame. With that setting on, the Preview panel steps with them.
Control timelines from a script
global.timeline controls the timelines of the Timeline plugin by name from any script in the Lens. The name is the timeline's name in the Node View.
script.createEvent('OnStartEvent').bind(function () {
  global.timeline.trigger('Intro'); // start through the timeline's start mode
  global.timeline.play('Main');
  global.timeline.pause('Main');
  global.timeline.stop('Main');
  global.timeline.seek('Main', 2.5); // seconds

  print(global.timeline.isPlaying('Main')); // true or false
  print(global.timeline.timeOf('Main')); // current time in seconds
  print(global.timeline.durationOf('Main')); // length in seconds
  print(global.timeline.names()); // every timeline in the Lens

  global.timeline.setInput('score', 10); // a value listed in Inputs
  global.timeline.onEvent('tl:Main:finished', function () {
    print('Main finished');
  });
});
Each timeline sends tl:<name>:started when it starts, tl:<name>:pass each time a repeating timeline begins its next run, and tl:<name>:finished when it ends. Signal markers send the names you give them. Behavior can listen to them with On Custom Trigger.
Troubleshooting
Edits don't play in the Lens
Press Build. The Lens plays what you built last.
The Preview panel doesn't move with the playhead
In ⚙, turn on Studio Preview follows the playhead.
The Scene panel doesn't change while scrubbing
The Scene panel never follows the playhead. See Known limitations.
The Timeline panel shows a warning
When something would play differently in the Lens than the panel draws it, for example two layers driving one property or a layer bound to a deleted object, the panel shows ⚠ with a count next to ?. Click it to see each warning and its fix.
Before publishing a Lens with timelines
In ⚙, set Lens log to Problems only.
Known limitations
- Timeline edits have no undo (
Cmd+Z). - The Scene panel doesn't follow the playhead.
- Particles are approximate while you scrub. With Re-simulate particles on scrub on in ⚙ (experimental), VFX 2.0 effects catch up to the playhead when you stop dragging. With it off, a scrub clears the particles, and they come back when playback resumes.
- One video file plays one range at a time.
- Scrubbing doesn't move tweens started from markers.