Character Animation
Pick, upload, generate from a text prompt, or capture from video an animation for a Bitmoji 3D or Body Morph character with the Lens Studio Character Animation tool.
- Available on all platforms
The Character Animation tool in the Lens Studio GenAI Suite gives your character an animation in four ways: choose an existing animation from the Animation Library, upload your own animation file, generate a new animation from a text prompt, or upload a video and capture the animation from the person in it.
Every animation can be applied to a Bitmoji 3D character or a Body Morph character, so one tool covers different character types.
When building for SPECS, animate a Bitmoji 3D character; see Bitmoji 3D.
Open the Character Animation tool in Lens Studio
Launch the Character Animation tool
-
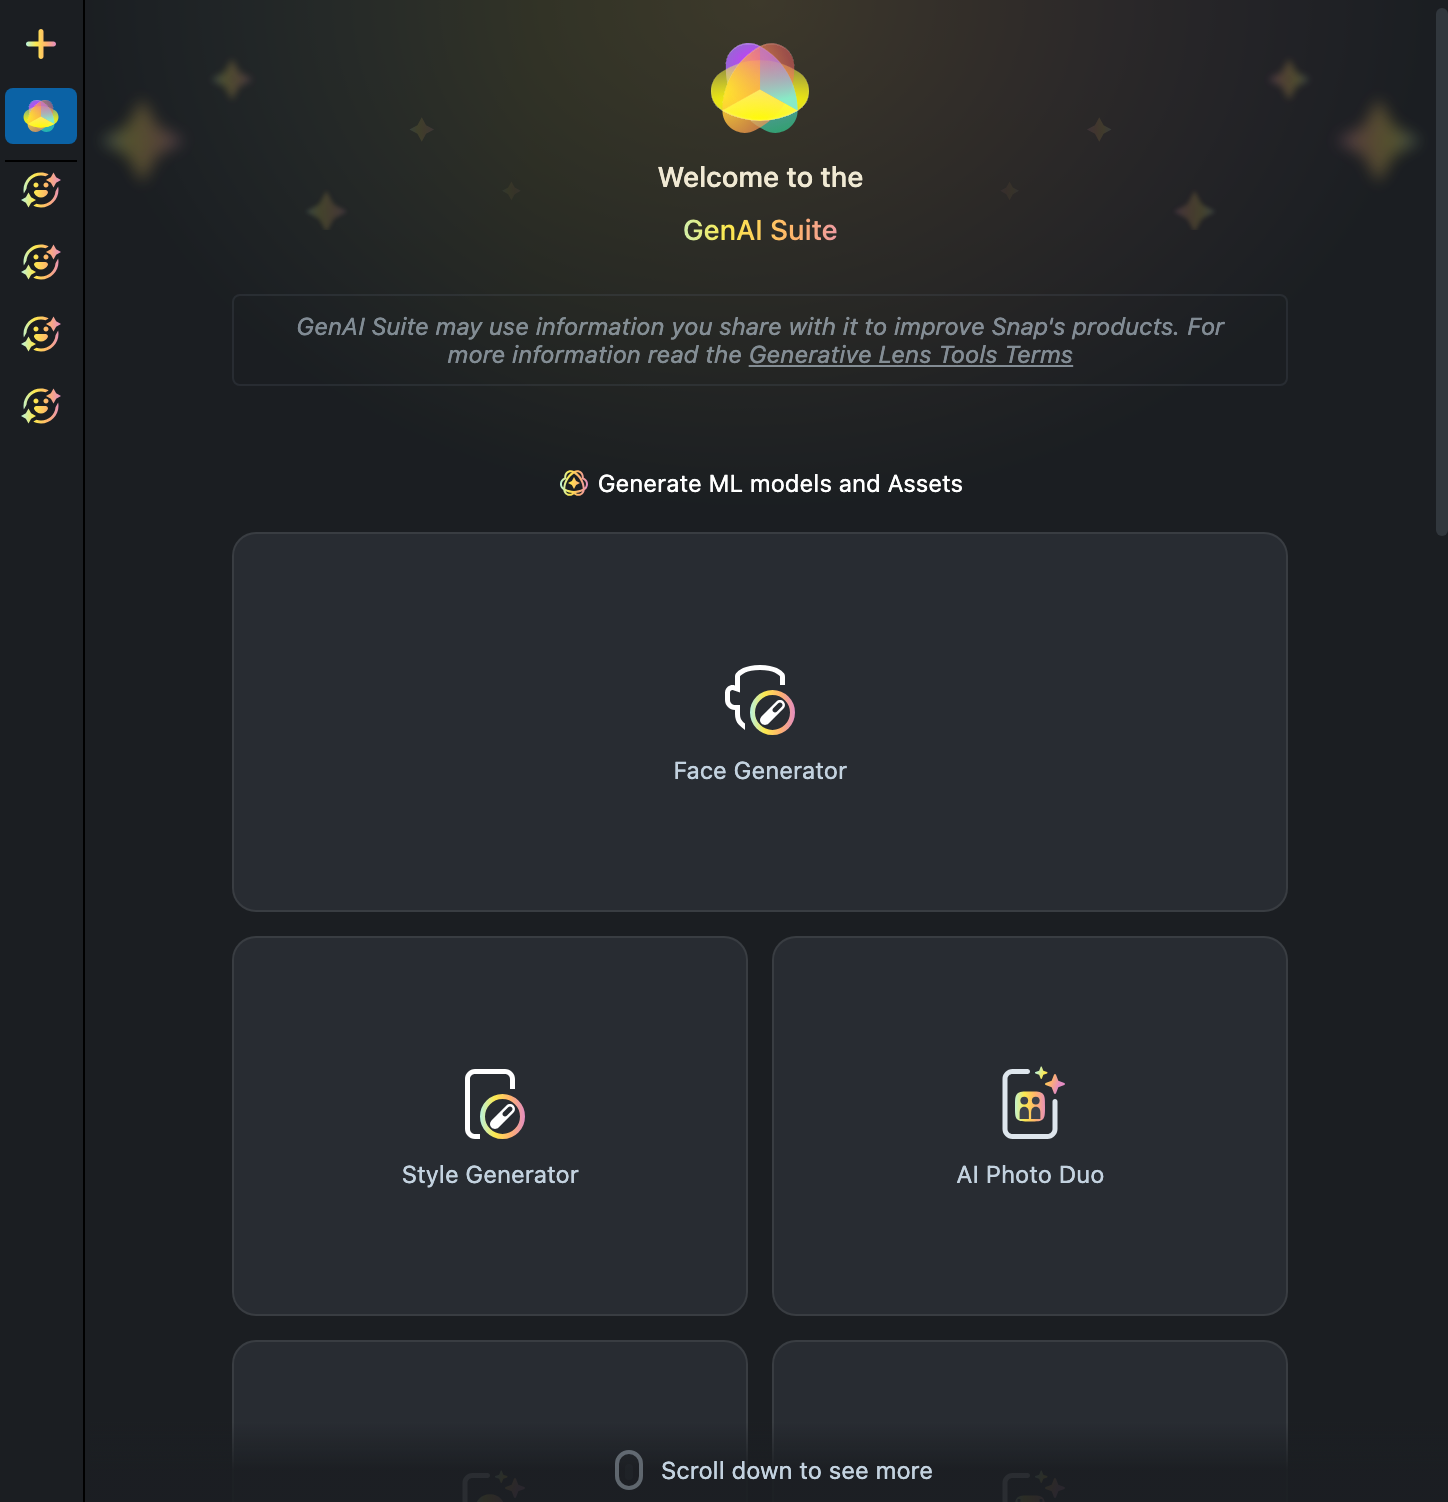
In the Lens Studio toolbar, select Lens Studio AI.

The Lens Studio AI panel opens on the GenAI Suite home, Welcome to the GenAI Suite, with a grid of tool cards under Generate ML models and Assets.
-
Scroll the tool grid to the Character Animation card and select it.
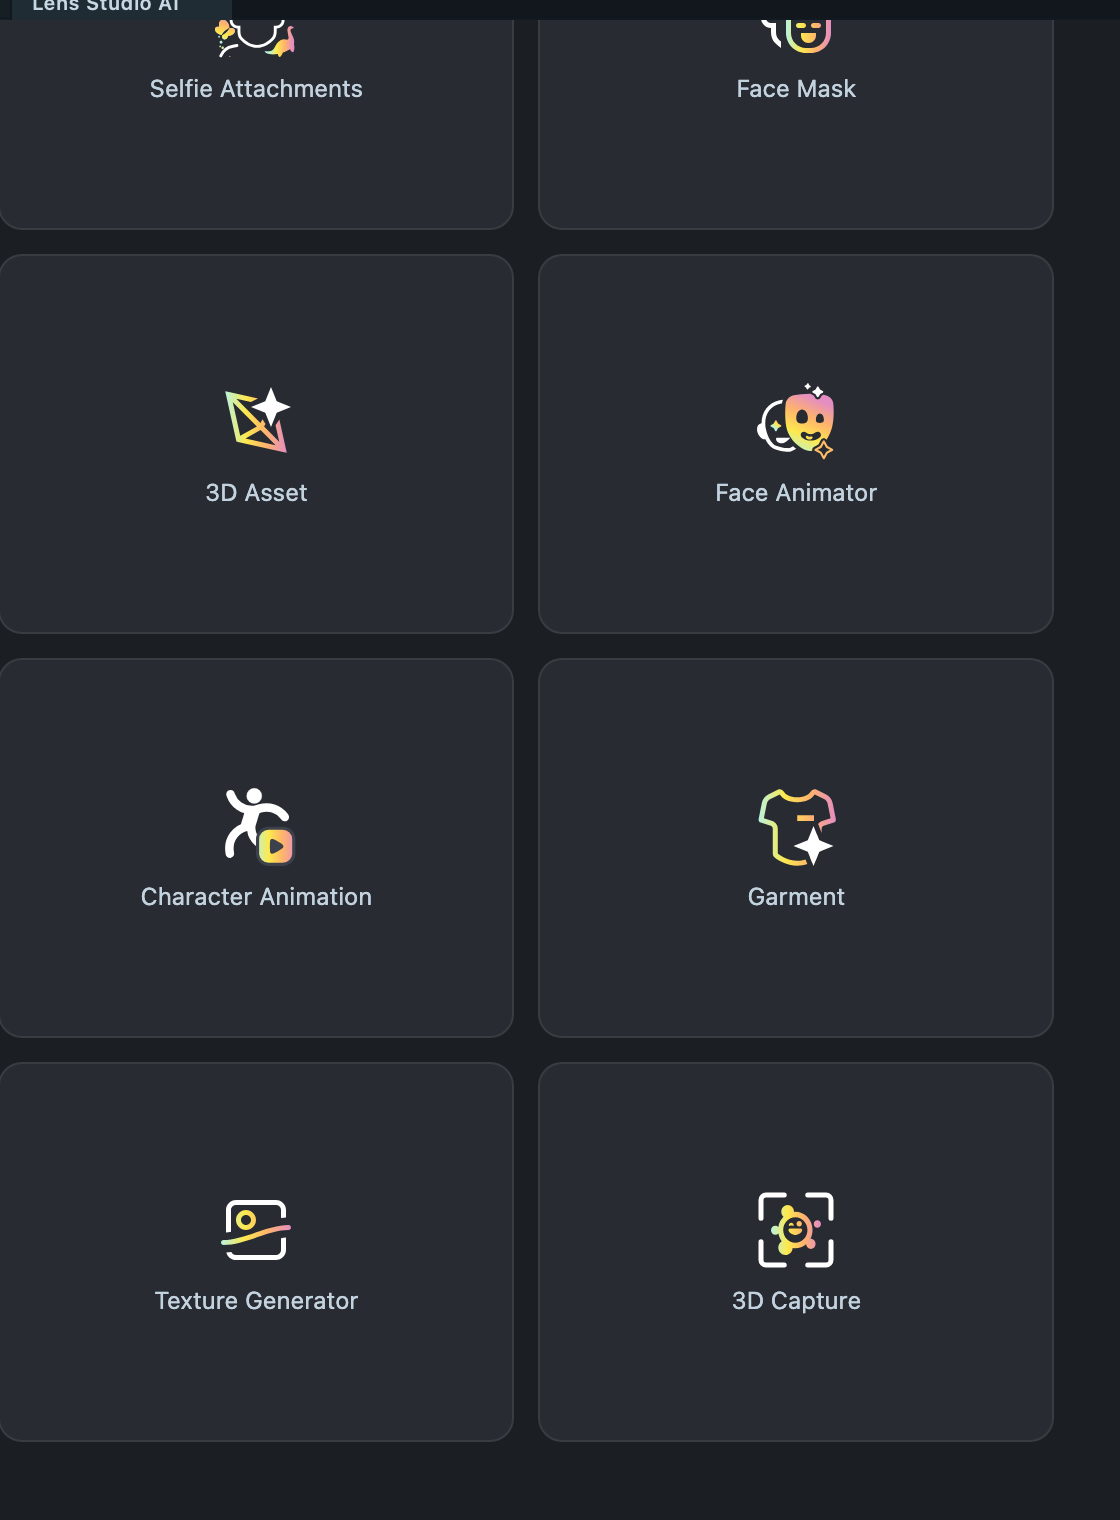
The Character Animation tool is an Asset Library plugin. If the Character Animation card is missing from the grid, install the Character Animation plugin from the Asset Library. Once installed, you can also open the Character Animation tool from the Asset Browser.
Choose how to create the animation
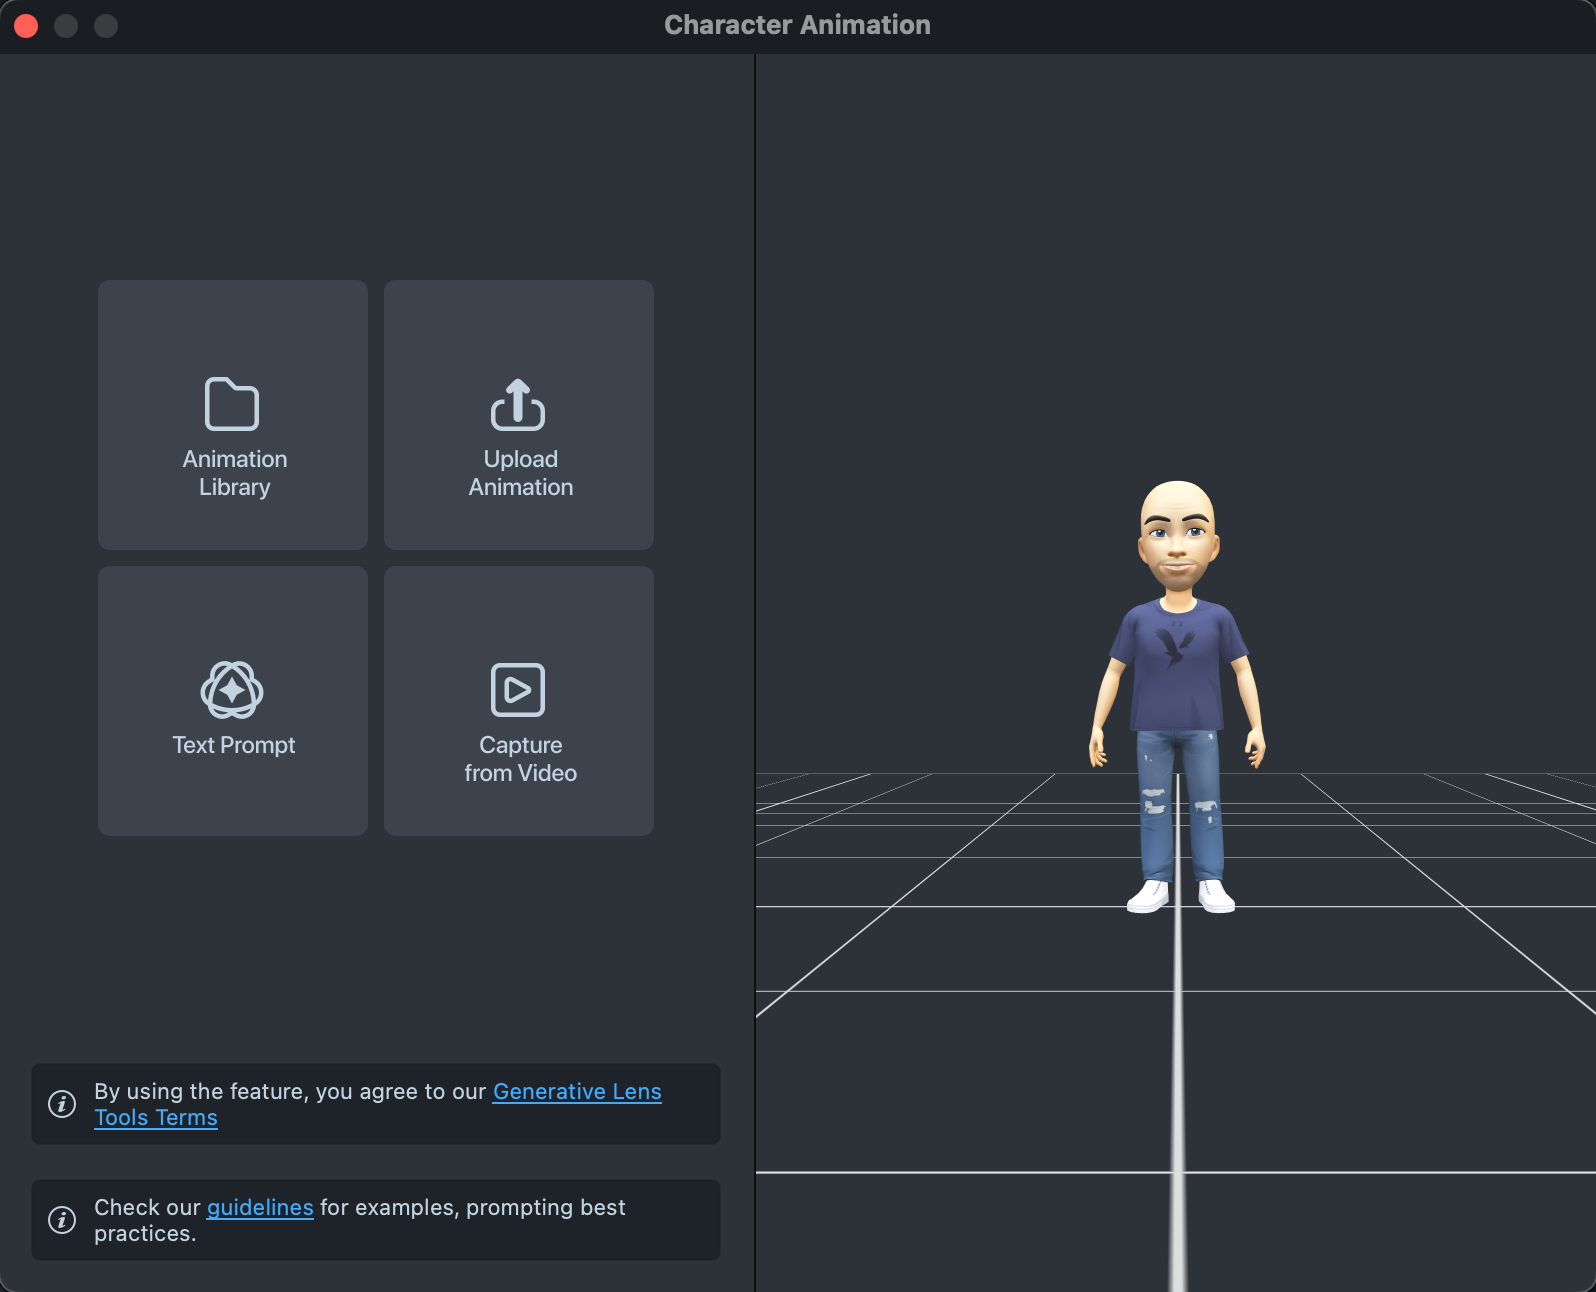
The Character Animation tool opens on a menu of four options:
- Animation Library: choose a pre-made animation from the library and apply it.
- File Upload: upload your own animation file.
- Text Prompt: generate a new animation from a text prompt.
- Video Source: upload a video and capture the animation from it.
Apply an animation from the Animation Library
Choose an animation in the Animation Library
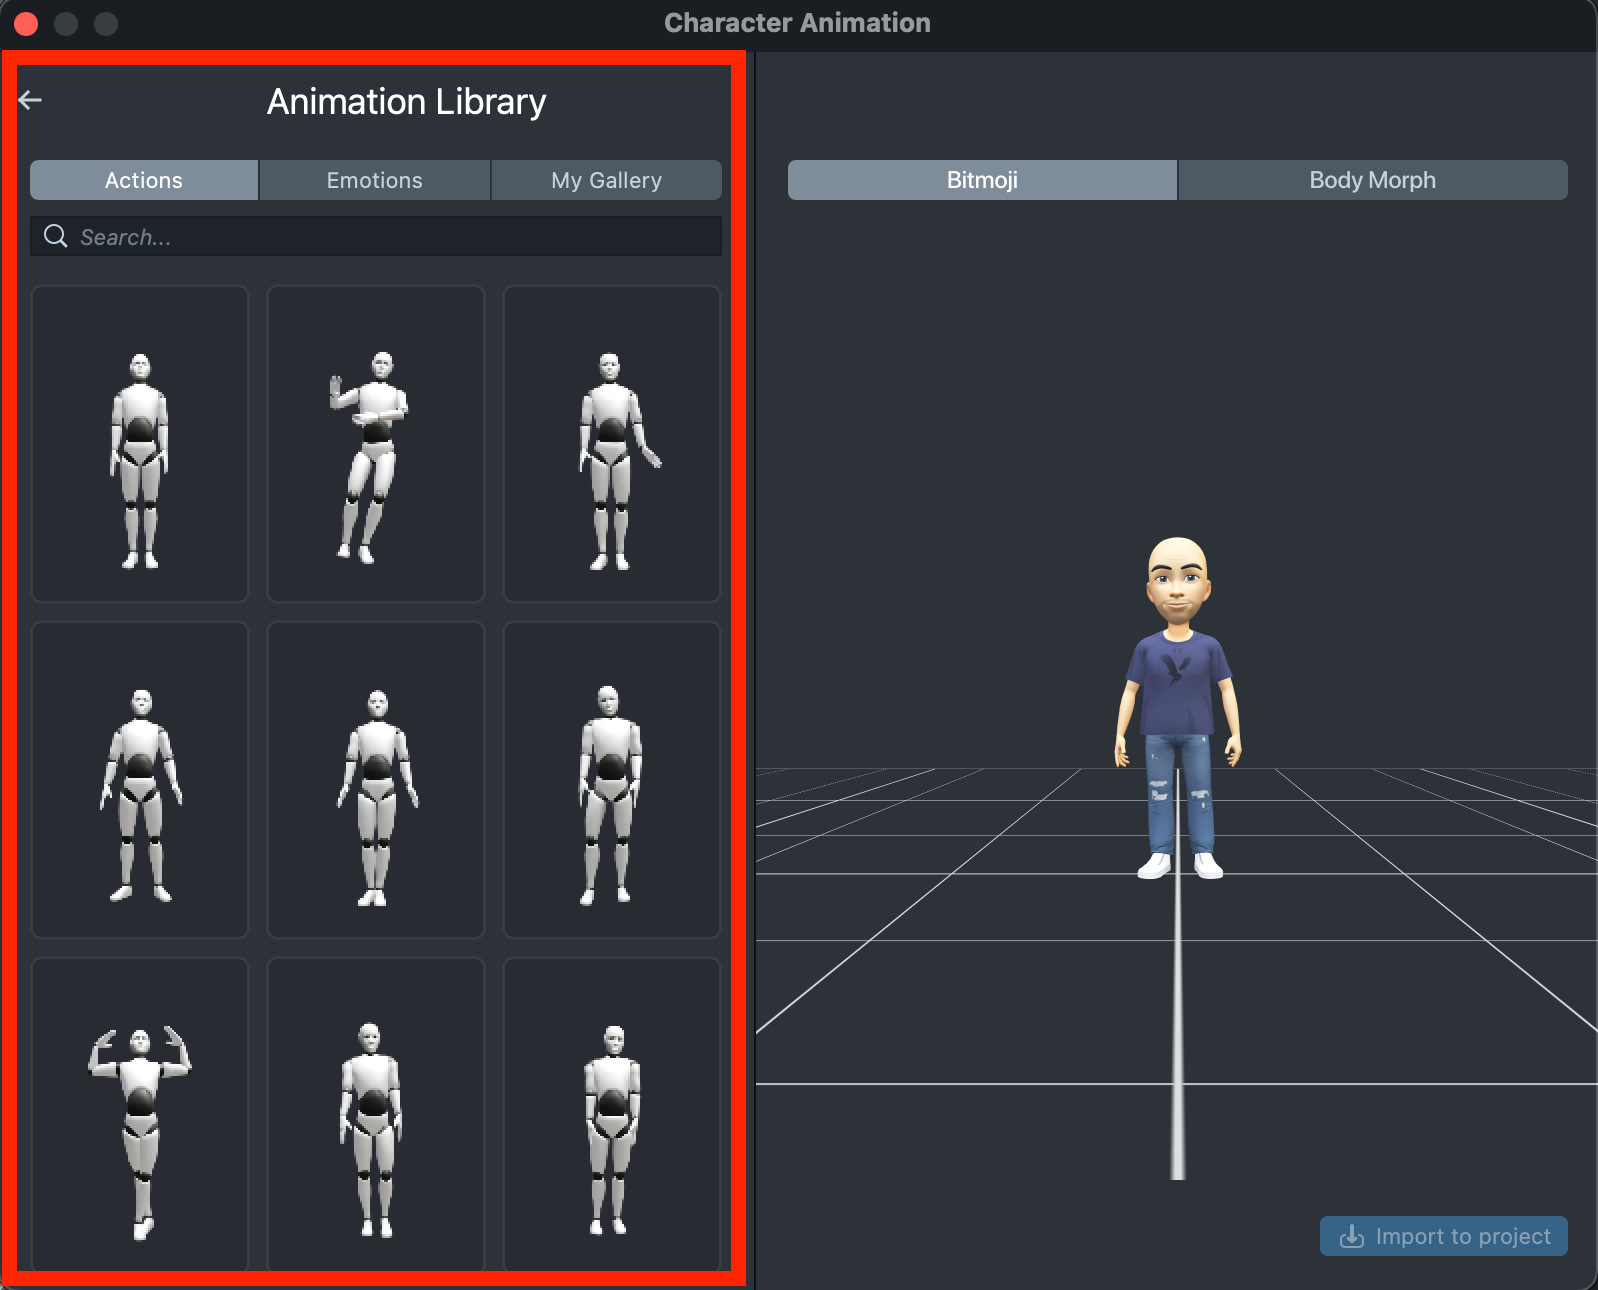
The left side of the Animation Library lists every available animation, in three tabs:
- Actions: full-body animations without facial expressions.
- Emotions: full-body animations with facial expressions.
- My Gallery: your custom animations, after you generate them from a text prompt or a video. My Gallery also shows the status of each animation that is still generating.
For a Bitmoji 3D character, you can add facial animations with Bitmoji Face Animator.
To find an animation quickly in the selected tab, type in the search bar.
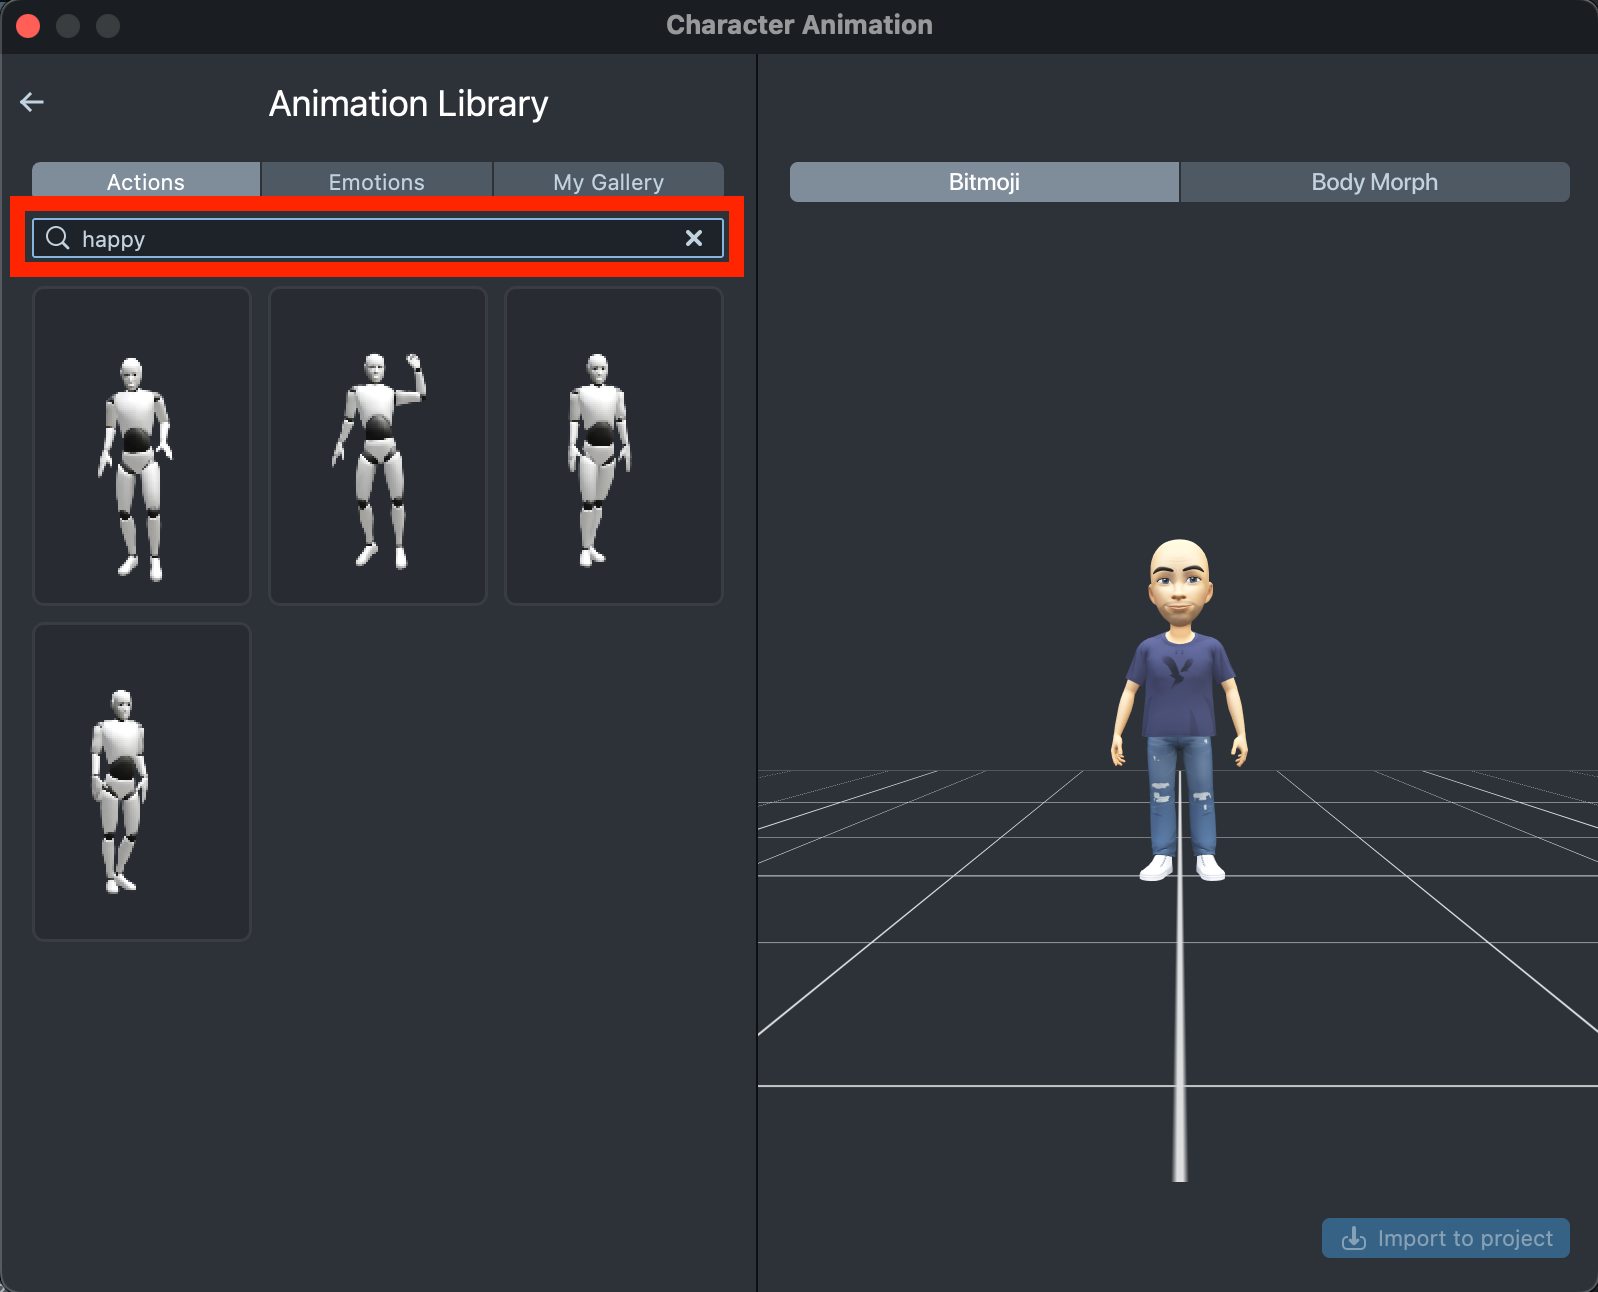
Choose a character for the animation
After you select an animation, choose the character to apply it to on the right side of the Animation Library. Switch between the Bitmoji 3D and Body Morph tabs at the top to apply the animation to a Bitmoji 3D character or a Body Morph character.
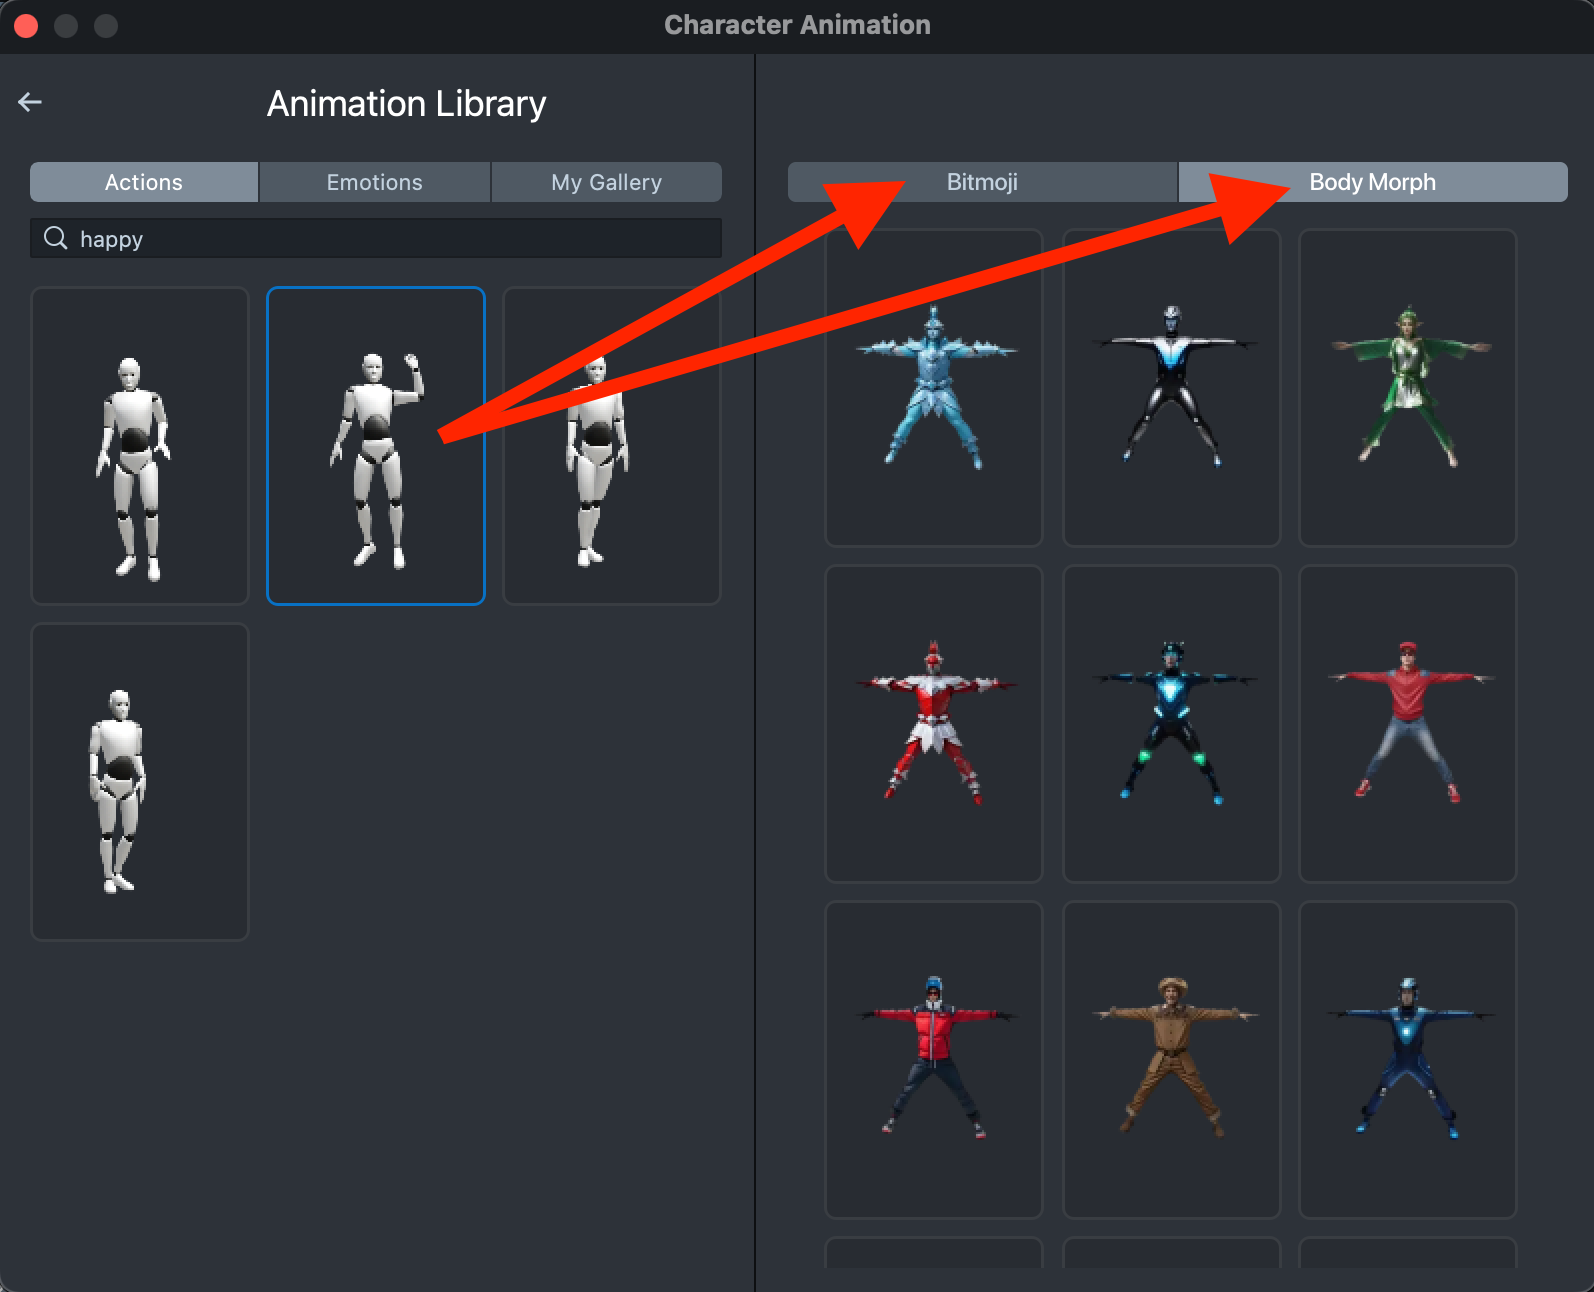
When building for Snapchat, an empty Body Morph tab means you haven't created a Body Morph character yet. Open the Body Generator, create a character with its tools, and the character appears in the Body Morph gallery, ready for animations.
Stitch several animations into one
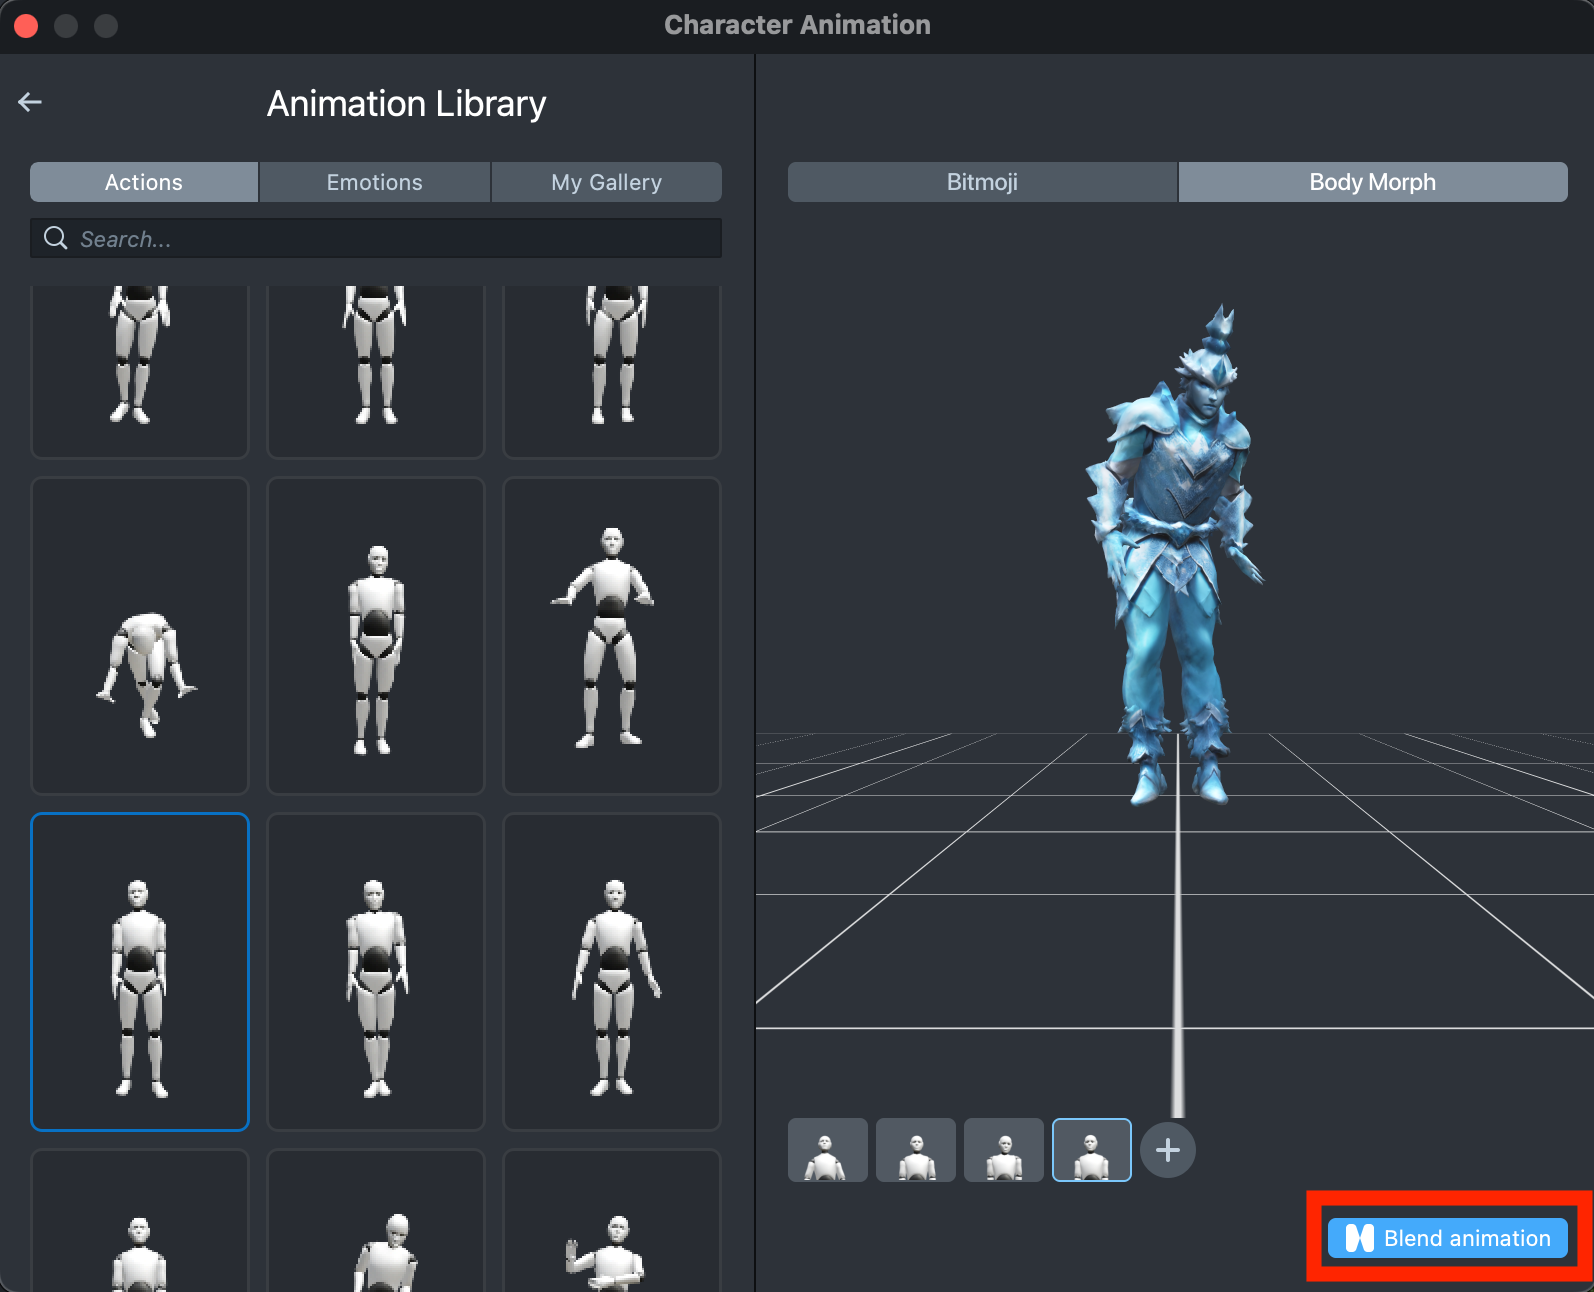
Stitching joins animations from the Animation Library into one animation, in the order you add them.
-
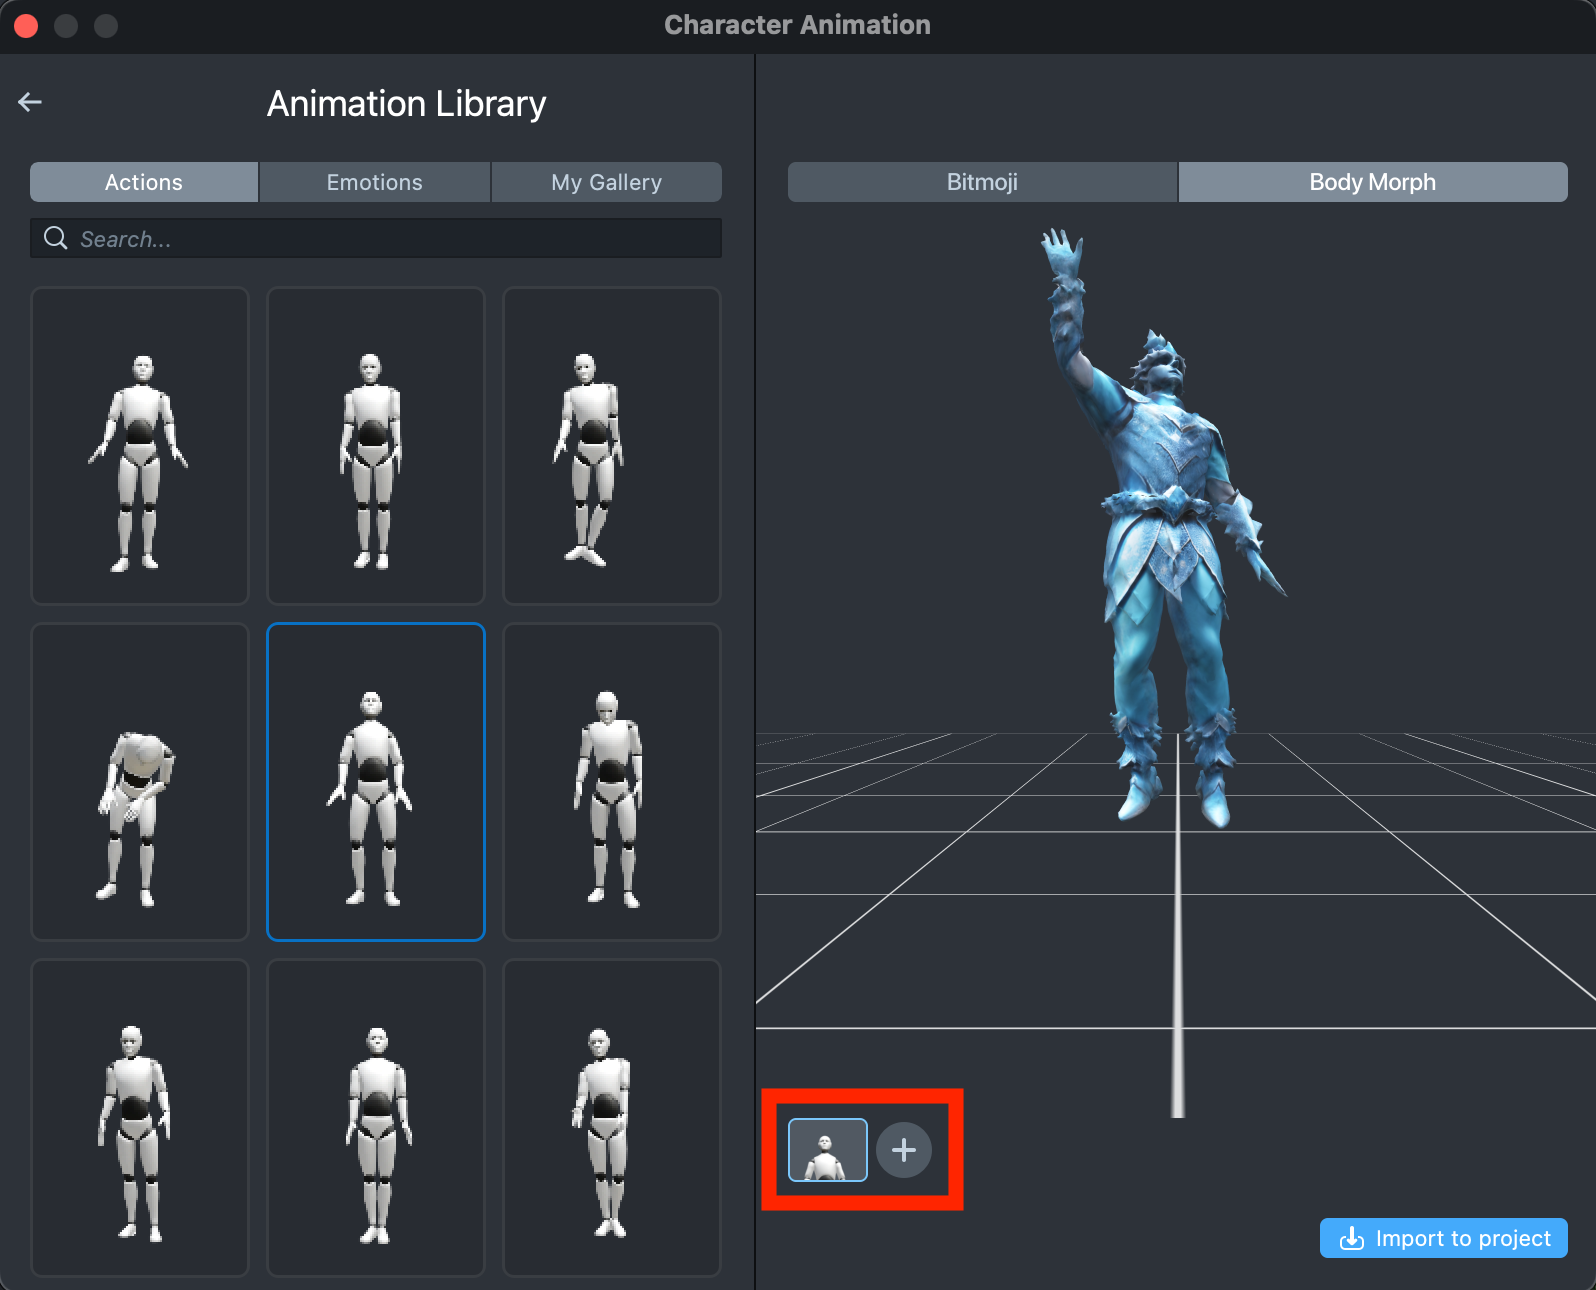
In the Animation Library, select the first animation to stitch. A small preview of the animation appears in the lower corner of the scene, with a + button.
-
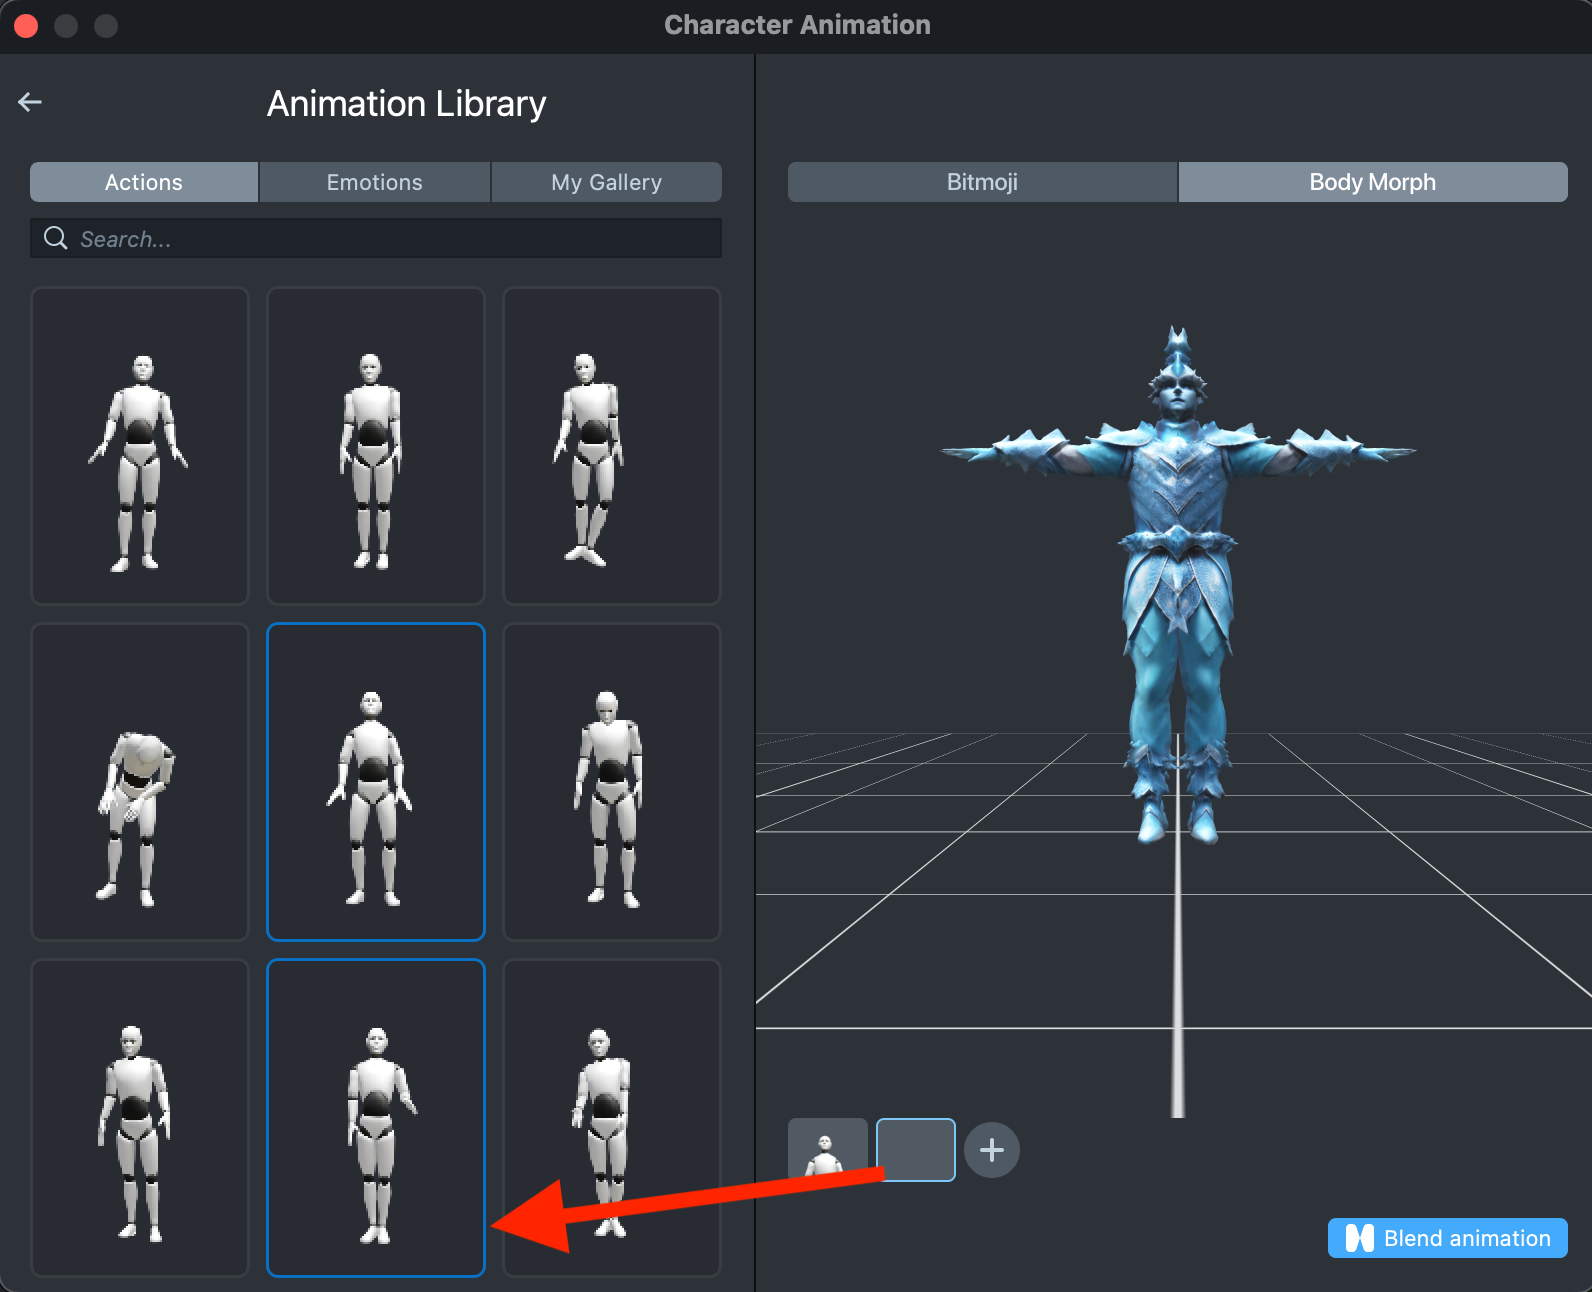
Select + and choose the next animation. You can add up to five animations in total.
-
When you've added all the animations you want, select Blend animation. A new tile appears in the library and shows the progress of the stitching.
Import the animated character to your project
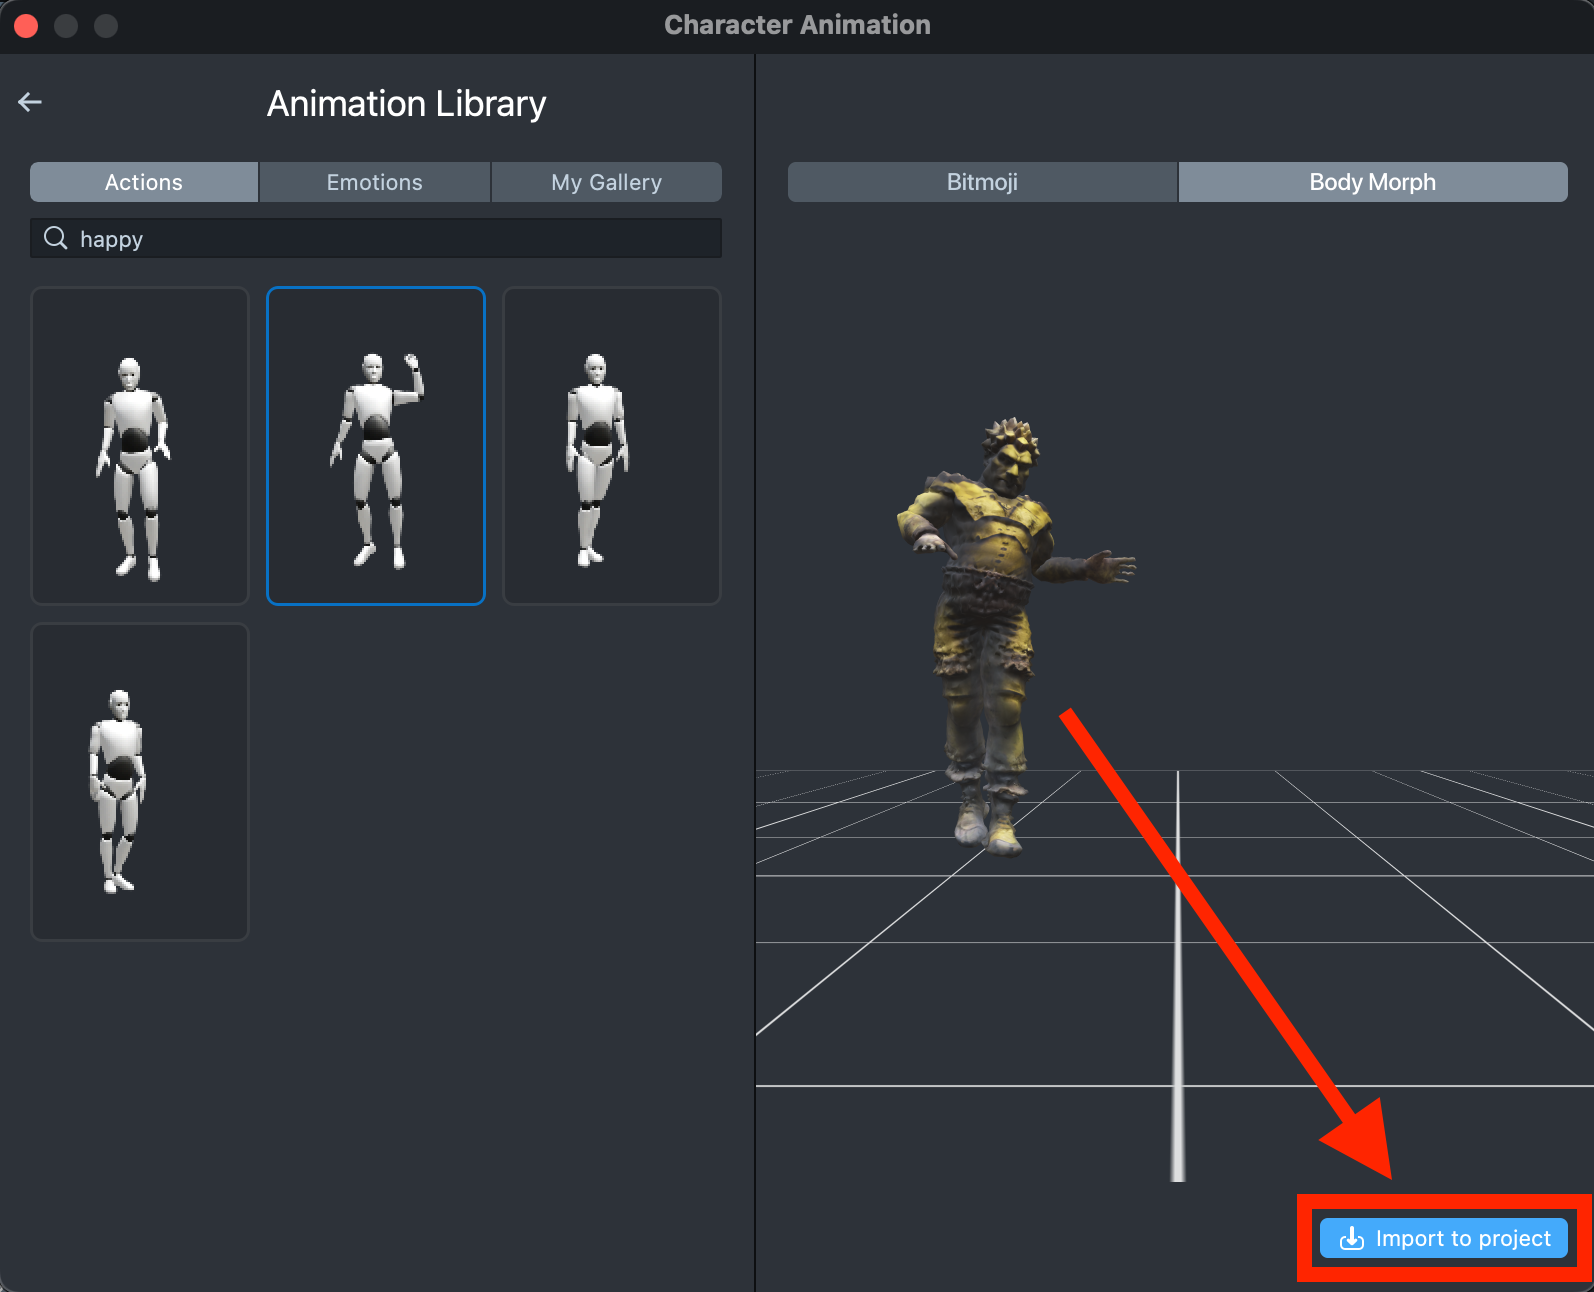
After you choose an animation and a character, select Import to project to bring them into your Lens Studio project.
Upload an .fbx animation file
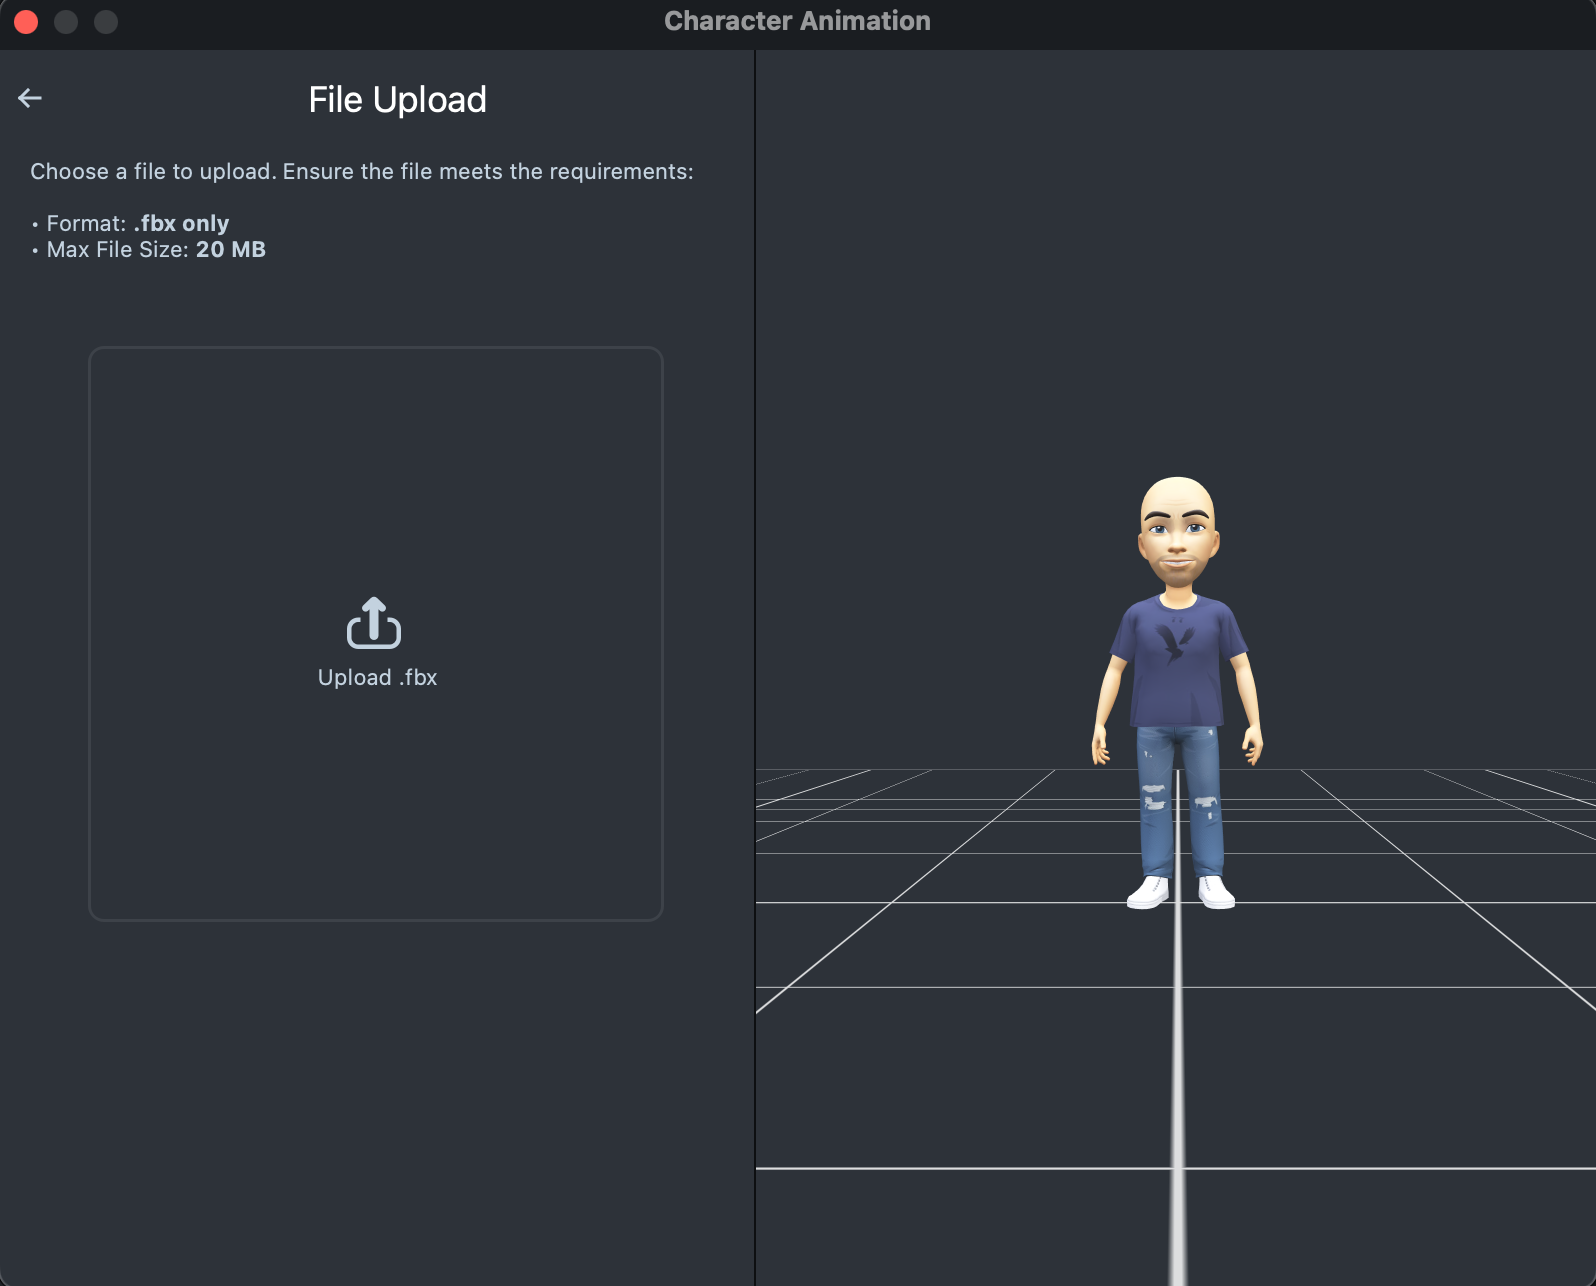
In the File Upload mode of the Character Animation tool, upload your own animation file.
-
Select the large Upload .fbx area and choose your animation file. The file must be an .fbx file of at most 20 MB.
-
The Character Animation tool opens the Animation Library, where you can follow the progress of the upload.
Generate an animation from a text prompt
In the Text Prompt mode of the Character Animation tool, generate an animation from a description.
-
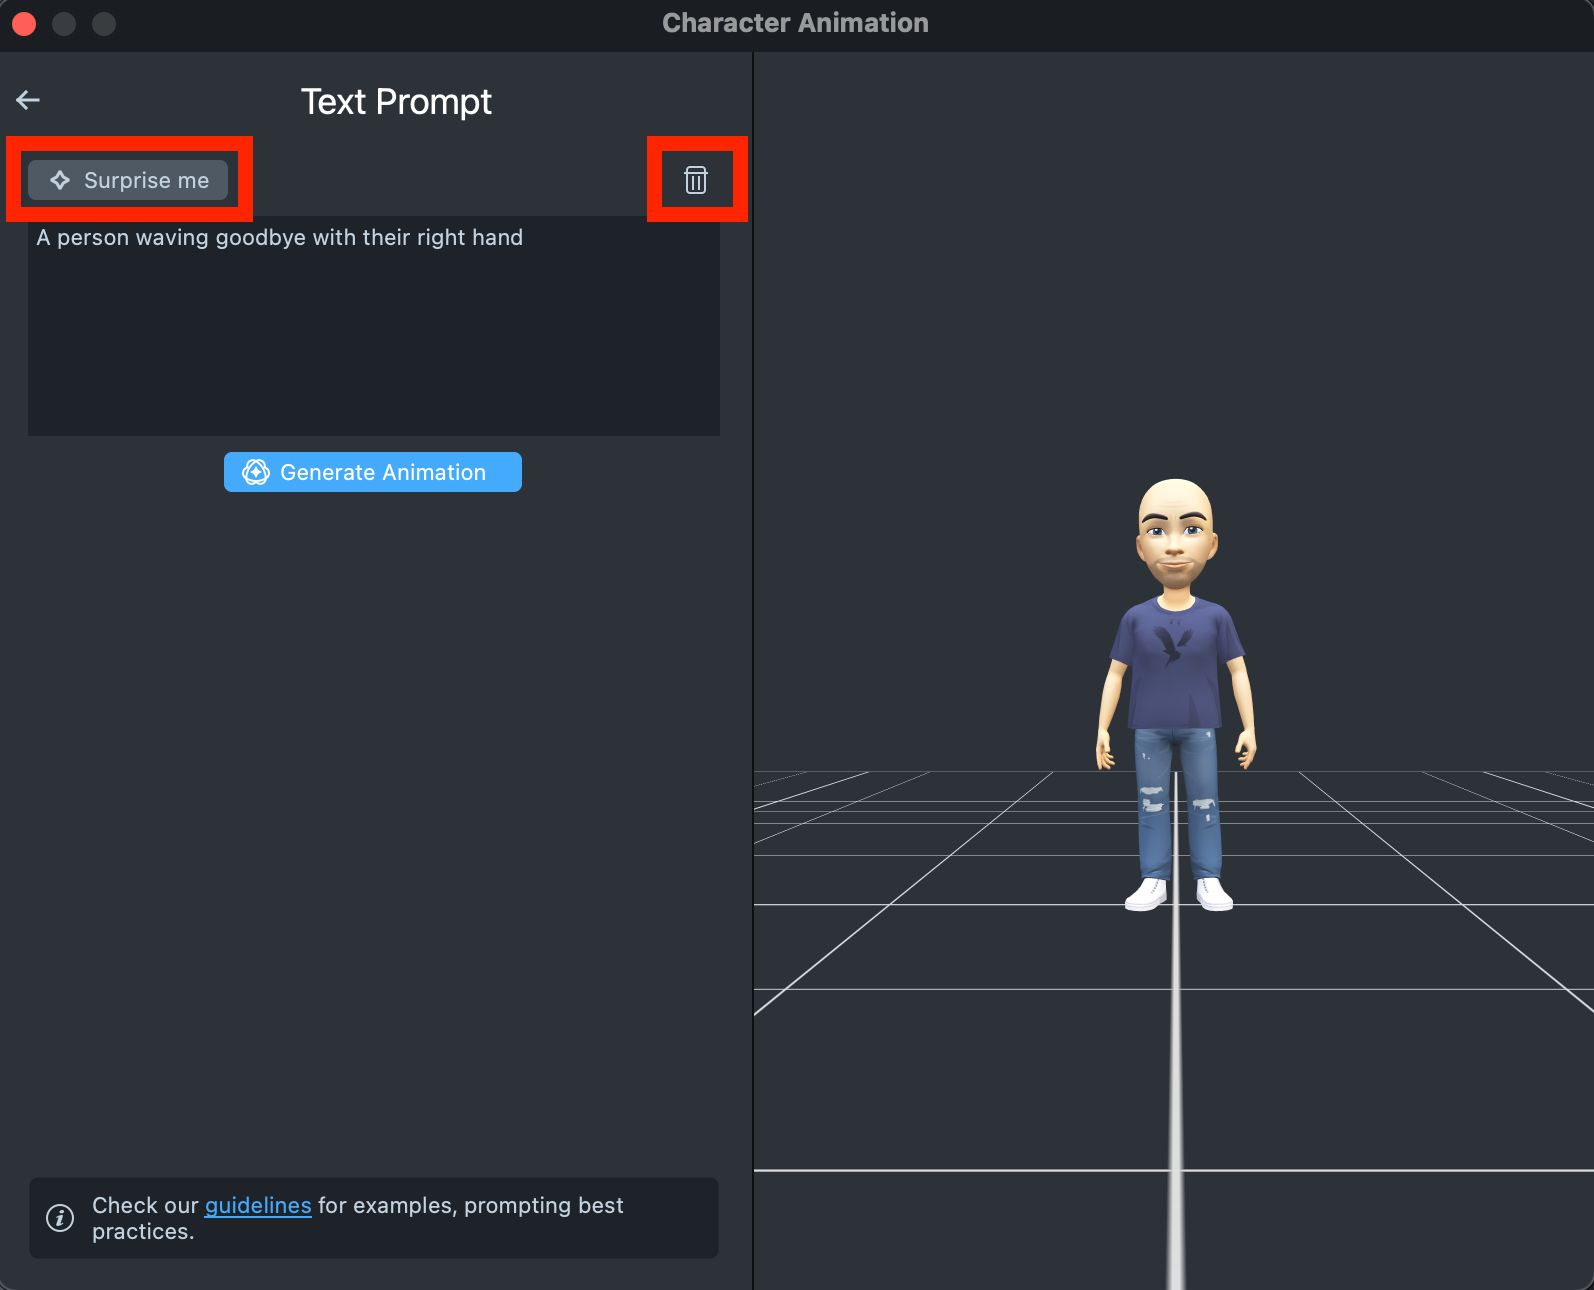
Type a description of the animation in the input field.
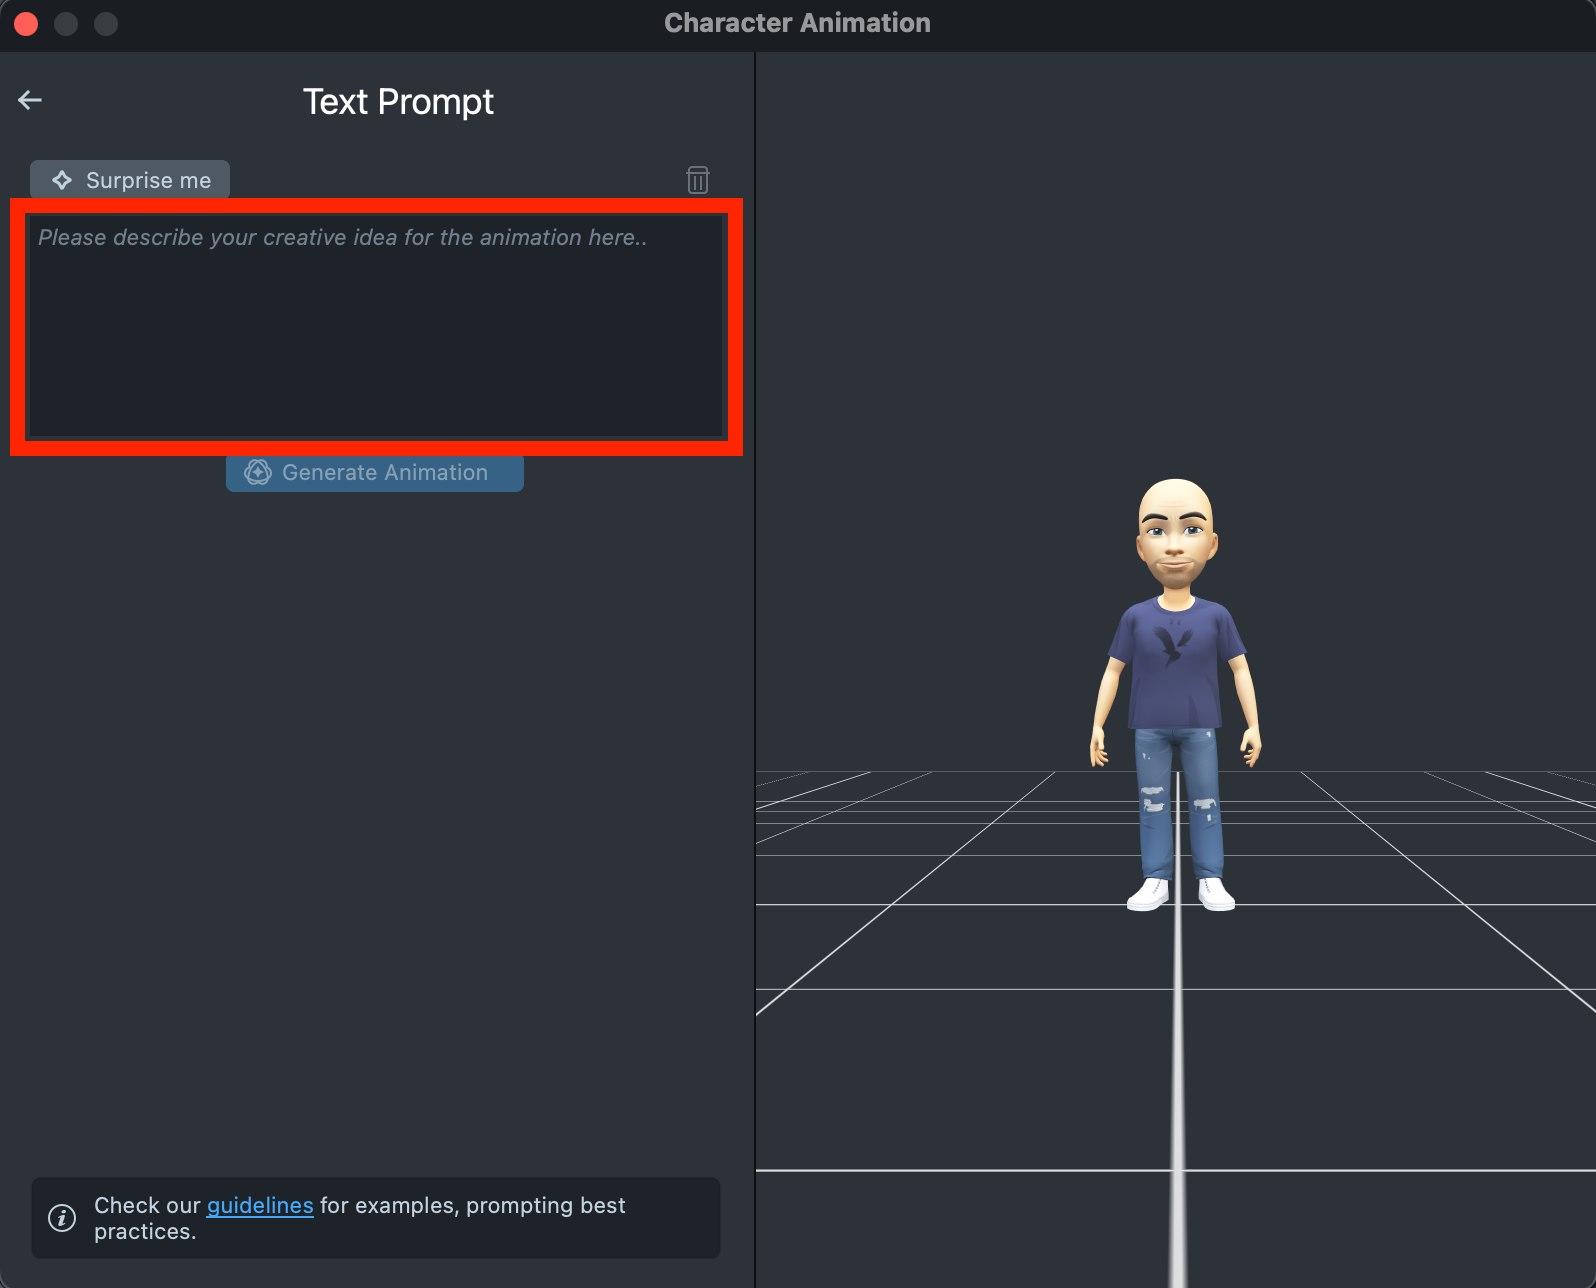
To see how prompts work, select Surprise me to fill in one of the default prompts. To clear the input field, select the trash icon in its top-right corner.
-
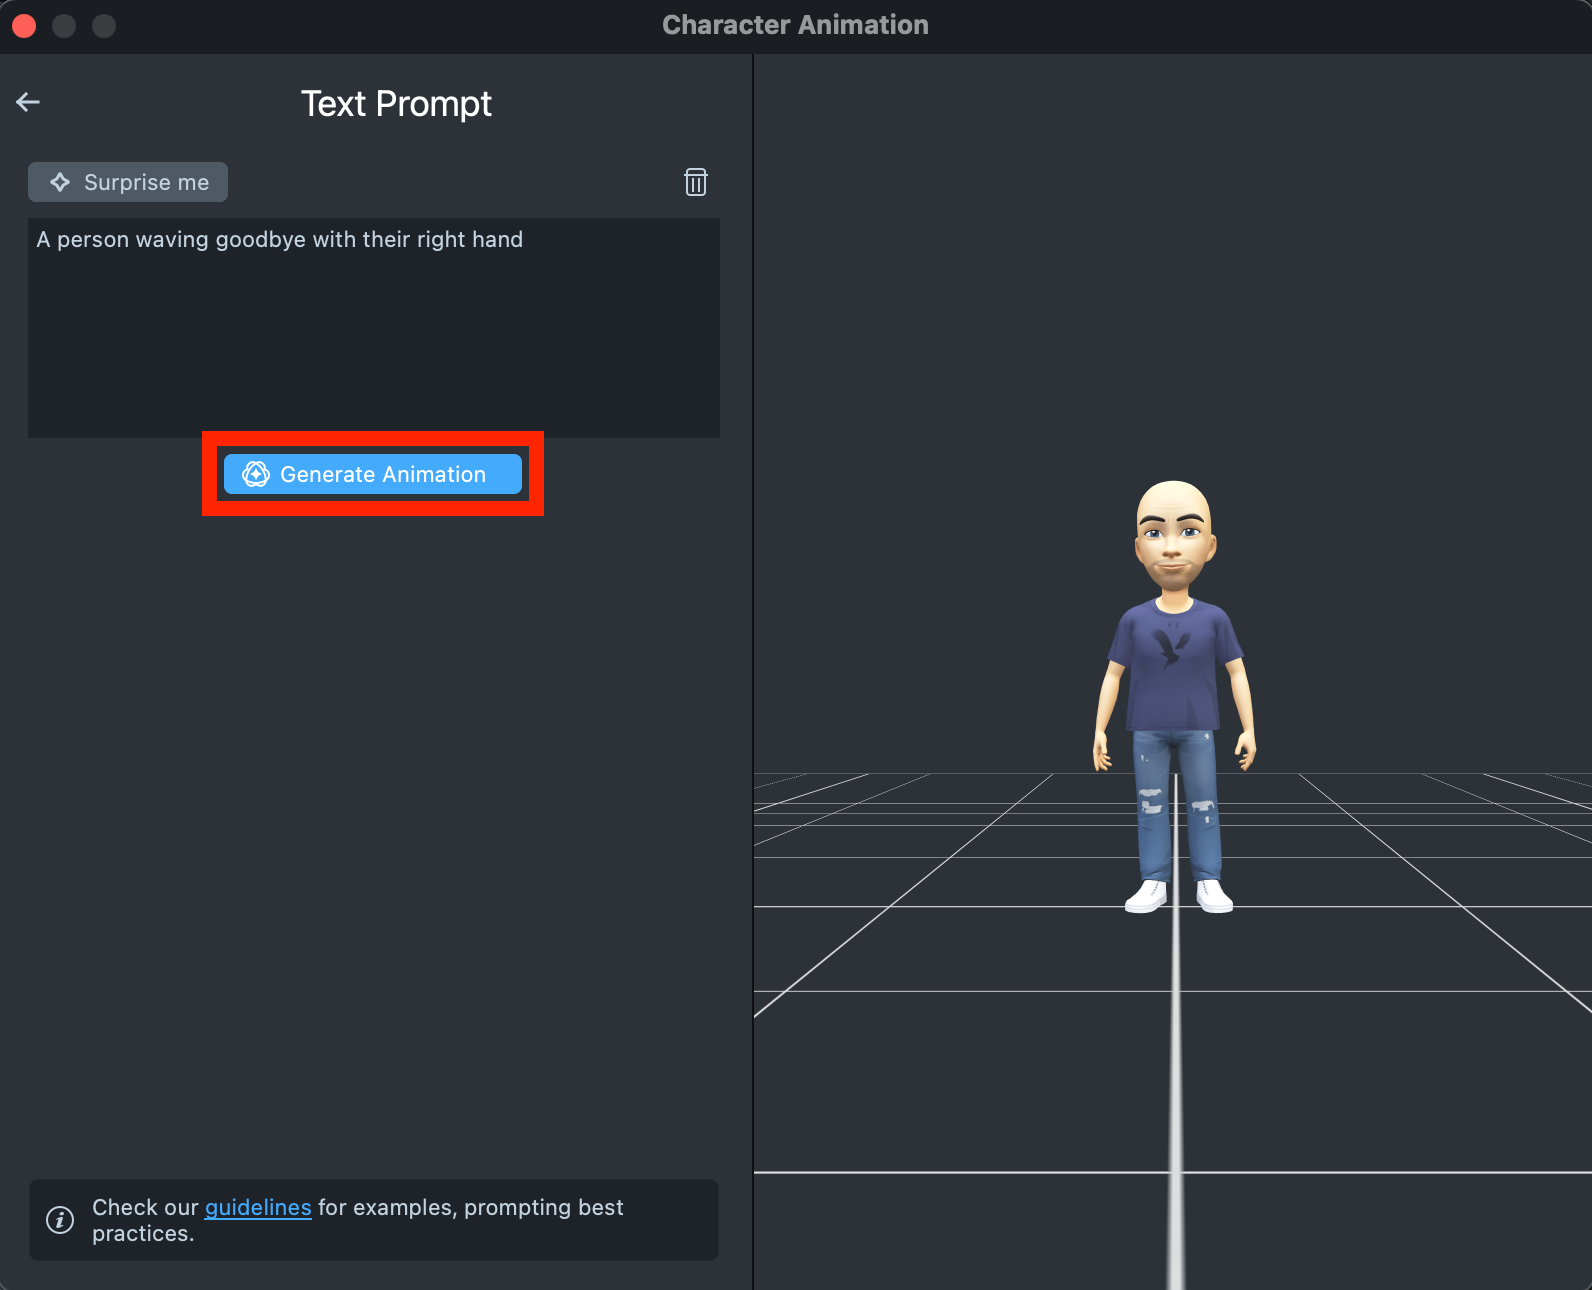
Select Generate Animation. The Character Animation tool opens the Animation Library, where you can follow the progress of the generation in My Gallery.
Capture an animation from a video
In the Video Source mode of the Character Animation tool, upload a video and capture the movement of a person in it.
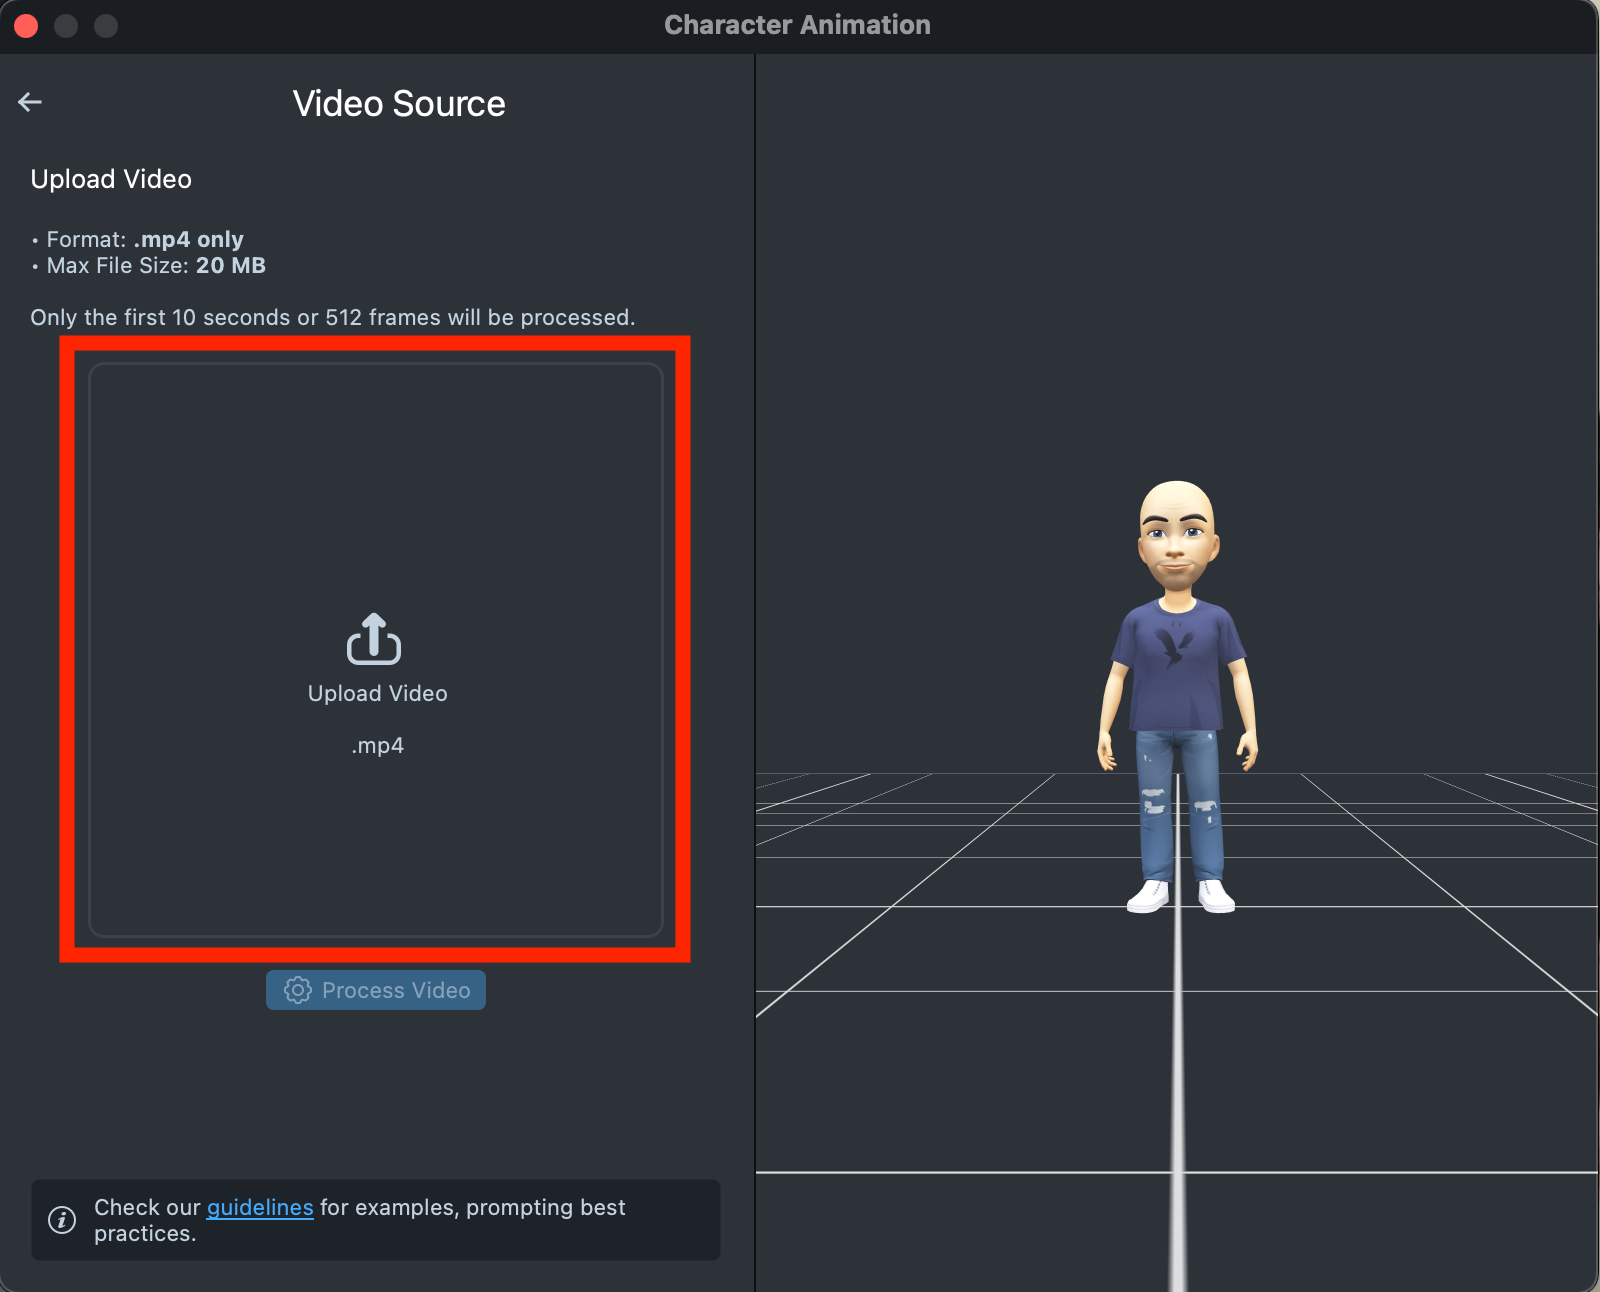
The Character Animation tool processes only the first 10 seconds or 512 frames of the video. Video requirements:
- Format: .mp4 only
- Max File Size: 20 MB
-
Select the Upload Video area and choose your video file.
-
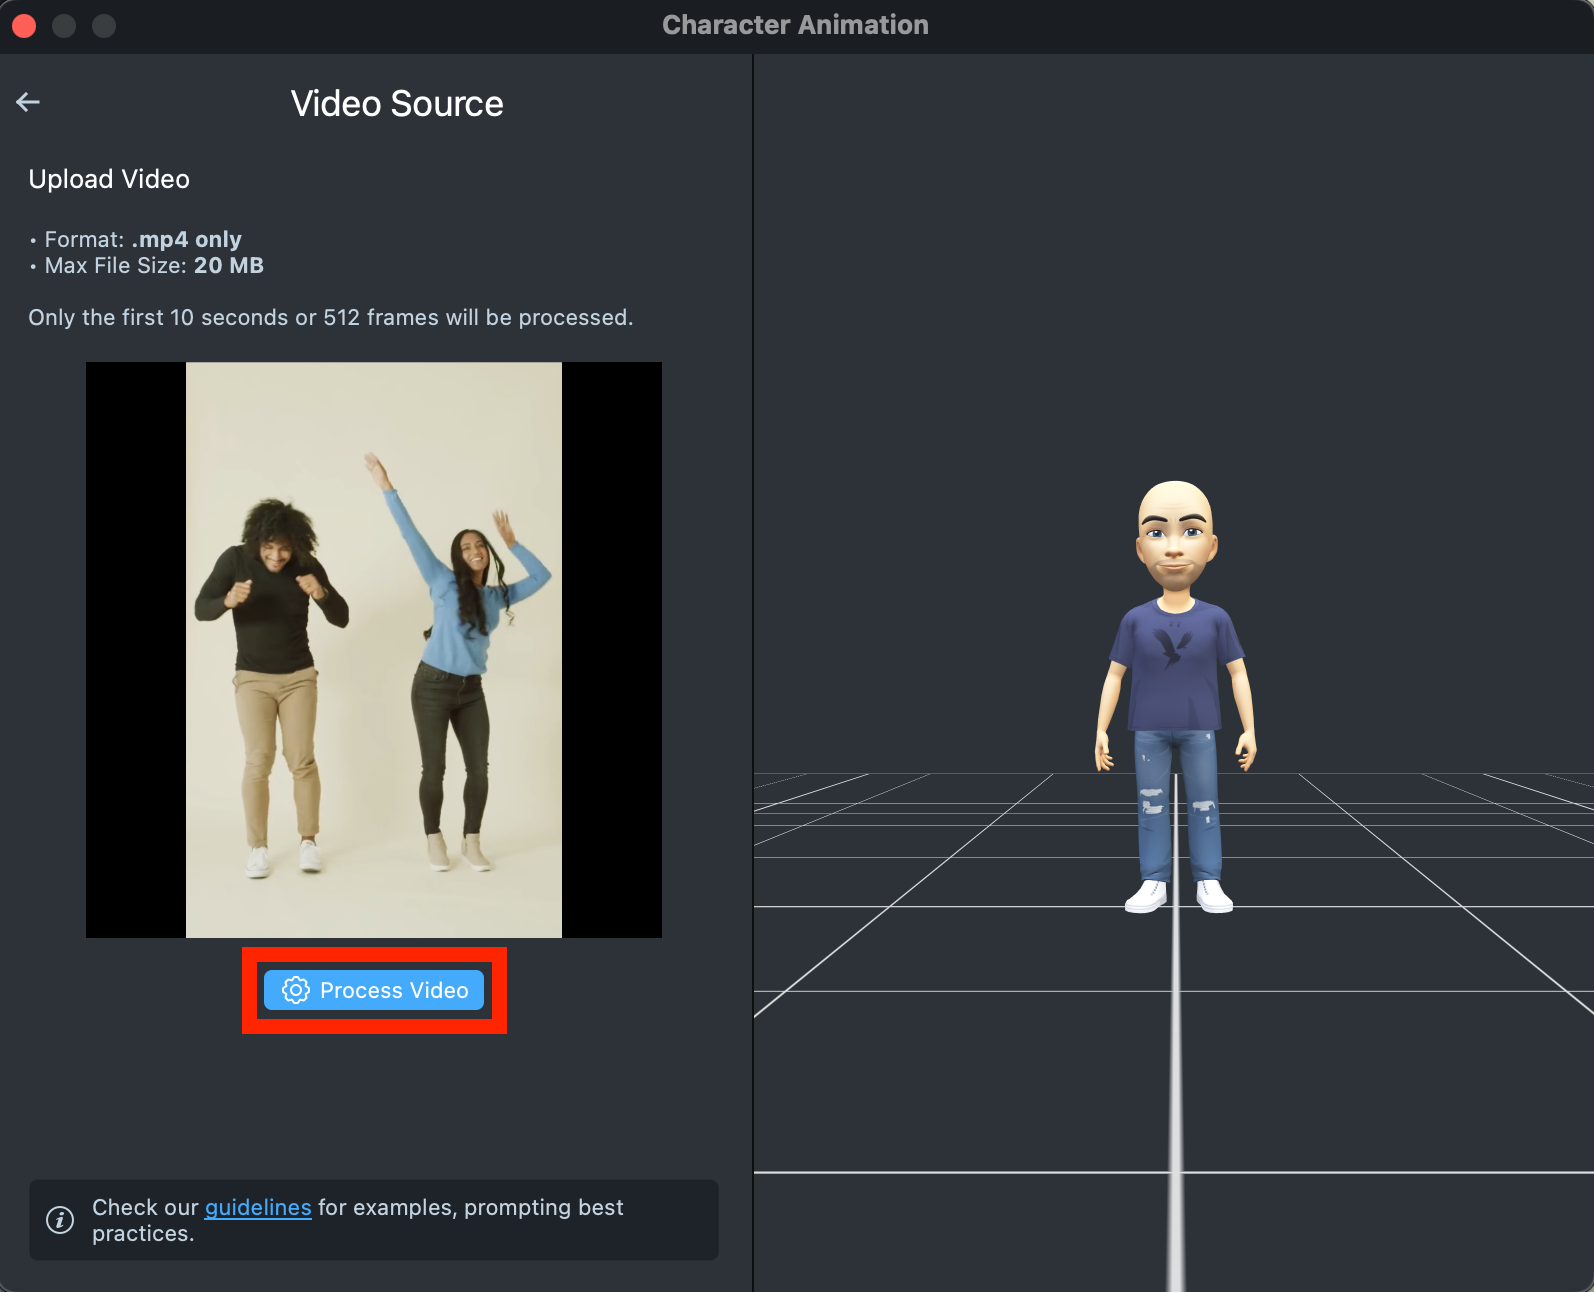
Select Process Video. The Character Animation tool analyzes the video and detects the people in it.
-
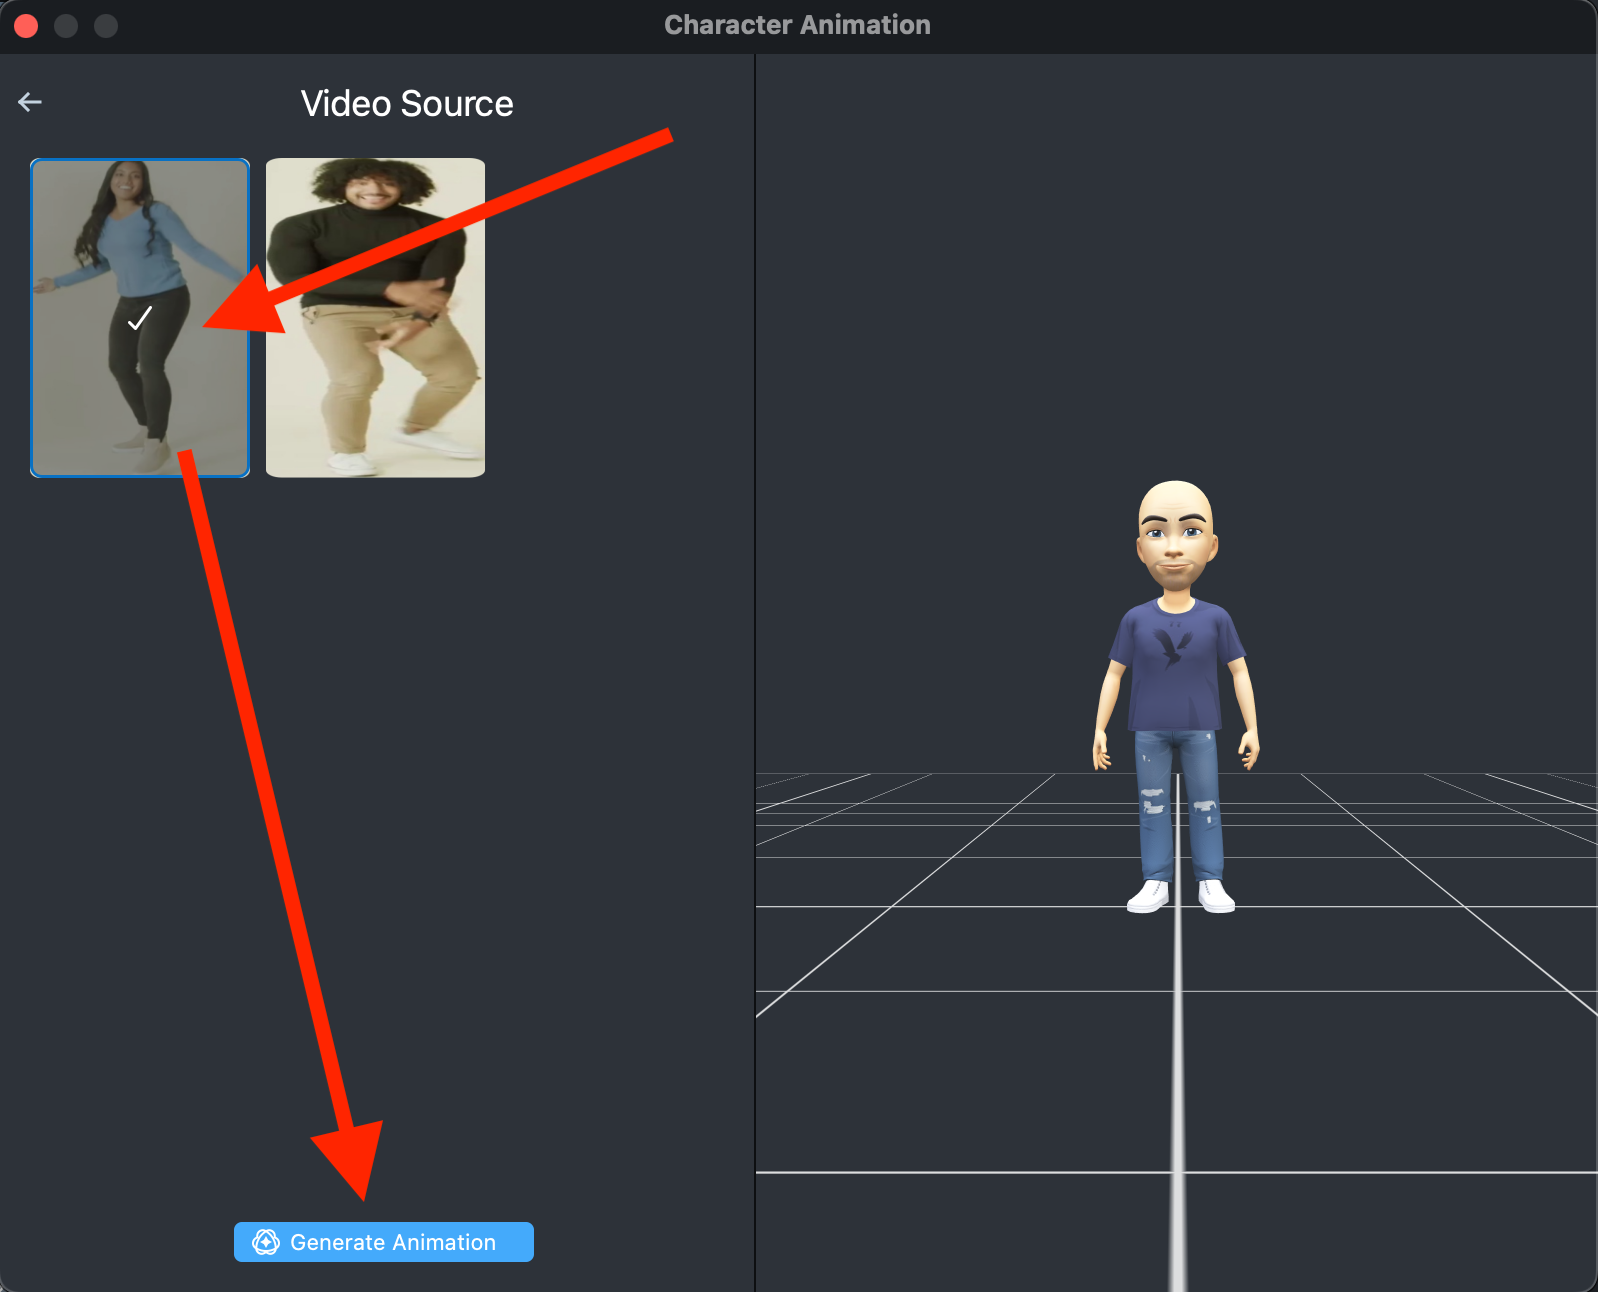
When the analysis succeeds, the Character Animation tool lists the detected people. Select the person whose movement you want to capture.
-
Select Generate Animation. The Character Animation tool opens the Animation Library, where you can follow the progress of the generation in My Gallery.
Videos that capture well and videos that fail
A video gives a good animation when:
- The video is shorter than 10 seconds.
- The video contains at least one person.
- Most of the selected person's full body is visible.
| Example 1 | Example 2 | Example 3 |
|---|---|---|
A video fails to give a good animation when:
- The video contains no person.
- The video is heavily blurred.
- The person in the video is too small.
- The person in the video is mostly occluded or out of the frame.
| Example 1 | Example 2 |
|---|---|
Animate Bitmoji 3D with other tools
To animate a Bitmoji 3D character with other tools and apply those animations, see Animating Bitmoji 3D.